UBC Legal has confirmed the privacy and information security requirements for Zoom in their recently completed Privacy Impact Assessment (PIA). In response to concerns, UBC and Zoom have made a number of updates to the default settings in Zoom in an effort to increase security and privacy for meetings and online classes. If you require the use of these functions, you may need to manually change the settings, and in some cases, the settings have been disabled to ensure your security and privacy, as well as the security and privacy of UBC’s information. A summary of the changes are provided below:
- Changes to Zoom Default Settings
- Changing sharing settings in the Zoom Web Portal
- Save Chat Manually
- Prevent Zoom Bombings
1. Changes to Zoom Default Settings:
- Screen Share – By default, only the Host can share content
- Chat Auto-Save – By default, chat auto save is now off
- Guest Identification – All guests will show in the participants list with an orange background behind their names
- Blur snapshot – By default, the iOS task switcher is blurred when shared
- Audio Notifications of Recorded Meeting – Participants connected to the computer audio or by telephone will hear a notification each time the recording is started, paused, resumed from being paused, or stopped
- Phone Number Masking – Phone numbers of users will be masked in the participant list, for example: 888****666
Screen Share
By default, only the Host can share content. The co-host feature allows you to share hosting content. The co-host feature allows you to share hosting privileges with another user and enables screen share. Follow the instructions below to enable this feature.
To enable the co-host feature
- Sign into the Zoom web portal and click My Meeting Settings (if you are an account administrator) or Meeting Settings (if you are an account member).
- Navigate to the Co-host option on the Meeting tab and verify that the setting is enabled.
- If the setting is disabled, click the Status toggle to enable it. If a verification dialog displays, choose Turn On to verify the change.

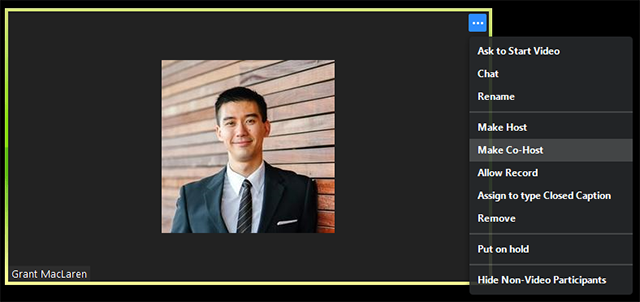
Using co-host in a meeting
There are two ways that you can make a user a co-host.
- In the meeting, the host hovers over the user's video, clicks on the three dots and chooses Make Co-Host.
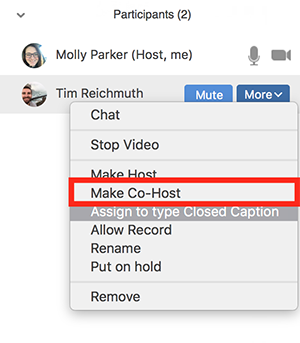
- Alternatively, the host can make another participant a co-host through the Participants window.
- Click on Manage Participants in the meeting controls at the bottom of the Zoom window.

- Hover over the name of the participant who is going to be a co-host, and choose More.
- Click Make Co-Host.
2. Changing sharing settings in the Zoom Web Portal
- Sign in to the Zoom web portal.
- In the navigation panel, click Settings.
- Under In Meeting (Advanced), click the option for All Participants.
Chat Auto-Save
By default, chat auto save is now off. To enable this setting:
3. Save Chat Manually
You can save your in-meeting chat manually during the meeting. This will save it locally to your computer.
- When in meeting, click on Chat.

- At the bottom of the chat window, click on Save Chat.
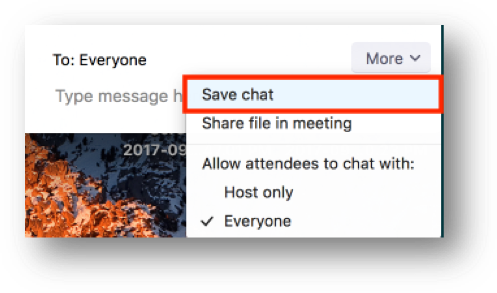
- This will save your chat to your local recording location. The default is your Documents folder > Zoom > Folder with meeting name, date and time.
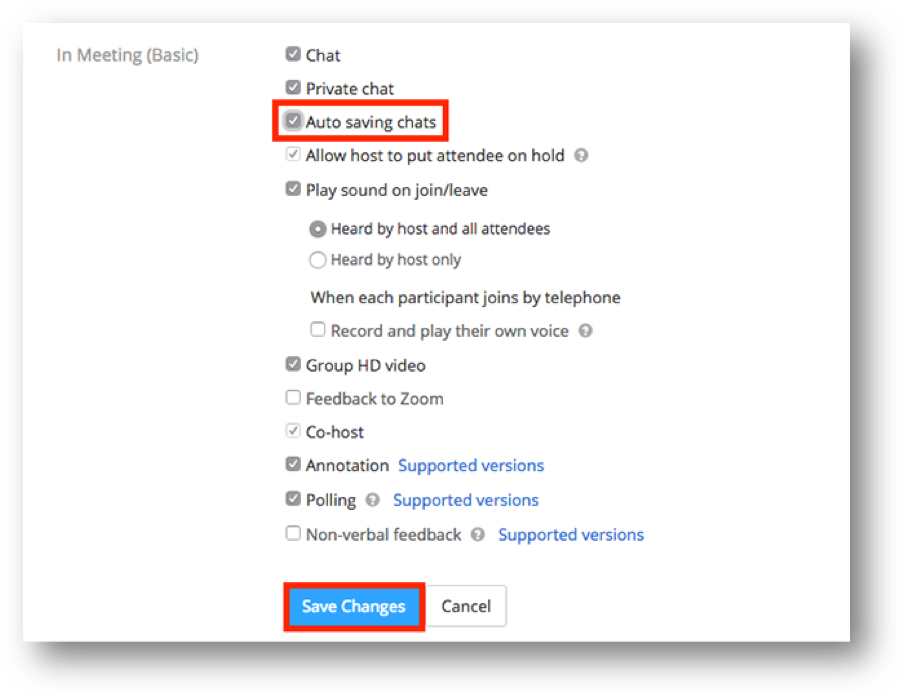
Auto-Save Chat
- Sign in to the Zoom web portal.
- Click Settings.
- Next to In Meeting(Basic), click Edit on the right side.
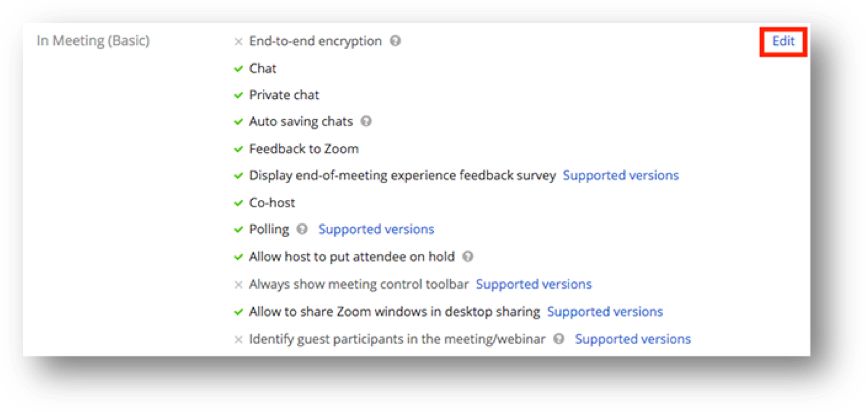
- Check the option for Auto saving chats.
- Click Save Changes.
Guest Identification
Any guest will show in the participants list with an orange background behind their names. A guest is anyone who is:
- Not signed in
- Signed in from an email address that is not in the same account as the host
- Signed in with a version of the Zoom client software older than the supported version
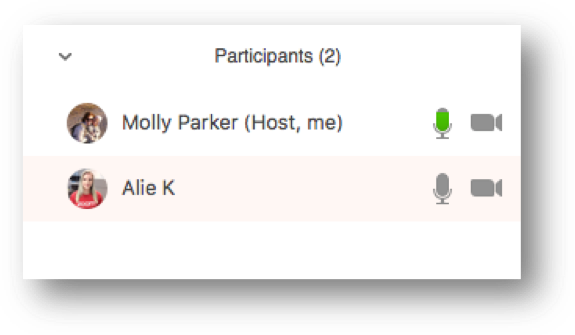
All guests will show in the participants list with an orange background behind their names
4. Prevent Zoom Bombings
You may have heard of a practice called Zoom bombing where during a Zoom session, intruders hijack the session by saying or showing inappropriate content. Zoom bombers who are successful in disrupting sessions can also post video footage of those incidents to video sharing platforms such as TikTok and YouTube. The compromised Zoom session can typically shut down by the host.
To prevent Zoom bombings, please keep the following things in mind when hosting public events:
- Avoid sharing meeting links on social media or public outlets
- When you share your meeting link on social media or other public forums, that makes your event extremely public. ANYONE with the link can join your meeting.
- Avoid using Personal Meetings ID (PMI) to host public events
- Your PMI is a persistent meeting room and people can pop in and out all the time. Learn about meeting IDs and how to generate a random meeting ID. Full video tutorial
- Manage Screen Sharing
- To prevent random people from taking over sharing, restrict sharing to the host. By default, this is enabled.
- You can check to see if this is enabled before or during the meeting. Click the arrow next to Share Screen > Advanced Sharing Options and ensure Host only is selected.
- To enable others to share screen, you can promote them to a co-host. Click on Manage Participants in the meeting controls at the bottom of the Zoom window. Hover over the name of the participant who is going to be a co-host, and choose More > Make Co-Host
- Manage Participants
- Lock the meeting
- By locking the meeting after the meeting has started, no new participants can join. In the meeting, click Participants at the bottom of your Zoom window. In the Participants pop-up, click the button that says Lock Meeting.
- Remove unwanted or disruptive participants
- From that Participants menu, you can mouse over a participant's name, and several options will appear, including Remove. Click that to kick someone out of the meeting.
- For public events, disable video
- Hosts can turn someone's video off. This will allow hosts to block unwanted, distracting, or inappropriate gestures on video or for that time your friend's inside pocket is the star of the show.
- Mute participants
- Hosts can mute/unmute individual participants or all of them at once. Hosts can block unwanted, distracting, or inappropriate noise from other participants. You can also enable Mute Upon Entry in your settings to keep the clamor at bay in large meetings.
- Introduce a Waiting Room
- One of the best ways to use Zoom for public events is to enable the Waiting Room feature. Just like it sounds, the Waiting Room is a virtual staging area that stops your guests from joining until youre ready for them.
- Meeting hosts can customize Waiting Room settings for additional control, and you can even personalize the message people see when they hit the Waiting Room so they know theyre in the right spot. This message is really a great spot to post any rules/guidelines for your event, like who it's intended for.
- The Waiting Room is really a great way to screen who's trying to enter your event and keep unwanted guests out.
- Participant registration
- Require participants to sign up for larger meetings and a short time before the meeting, send the password and link to all registrants.