This document assumes that you have an Internet connection already present. Please follow the instructions below to configure Ubuntu Linux to connect to UBC's myVPN service.
Note: UBC IT does not provide support for Linux setup/installation. This document is provided as general reference only and is not confirmed to be working on all Linux distributions.
This document is based on Ubuntu Linux 9.04 (Jaunty Jackalope) 32 bit. Other Linux distributions may require extra files, libraries or dependencies, or they may need different versions of those files, or the files may located in different locations in the file system than what is found on Ubuntu Linux 9.04. Please see the System Requirements section at the bottom for required packages.
Sun Java installation (optional)
It is highly recommended that you have Sun Java installed with the Mozilla FireFox plugin. You can verify if you have Sun Java installed by going to http://java.com in your FireFox web browser.
Here are 2 ways to install Sun Java in Ubuntu 9.04:
- Use the built-in Synaptic Package Manager located in System -> Administration -> Synaptic Package Manager and install sun-java6-jre and sun-java6-plugin
- Use Terminal and enter the commands: sudo apt-get install sun-java6-jre sun-java6-plugin
You will also need to remove any other web browser Java plugin packages (e.g. java-1_6_0-openjdk-plugin, icedtea6-plugin, etc).
It is also recommended to have GTK2 installed for the graphical icon to appear in the system tray.
Verify if you have Sun Java installed correctly by going to http://java.comin your FireFox web browser.
Web-based VPN Client Setup
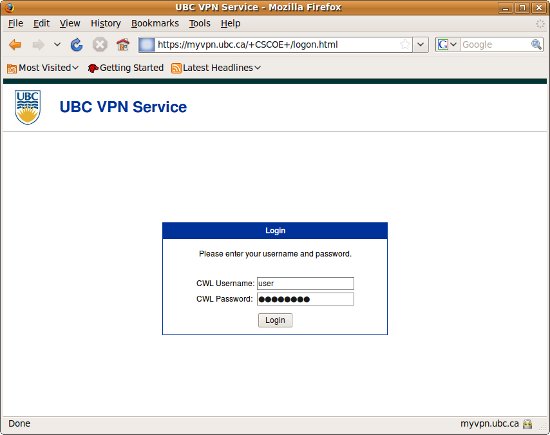
- Open your FireFox web browser and go to the website https://myvpn.ubc.ca
- Enter your CWL username and password and click Login .
Note : If you are a member of a specialized departmental group, you can append your group id after the CWL username (e.g. cwluser.department ). If you are not sure whether you need a departmental group, just enter your CWL username.
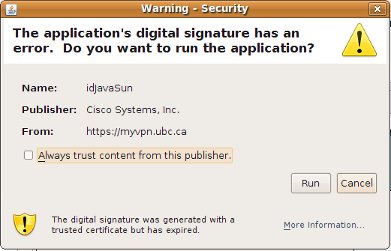
- The installation will begin and may take several minutes to complete. When
presented with a security certificate prompt, click Run to accept the
certificate.
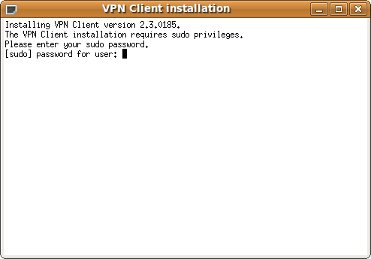
- If prompted to elevate permissions for installation, enter your computer account's
administration password .
- The installation will continue. If it fails, proceed to the Manual VPN
Client Installation section. Otherwise, the Cisco AnyConnect VPN Client window
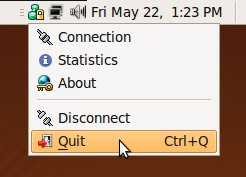
should read Connection Established and a new icon should appear in the top
panel of the desktop.

- You are now successfully connect to the UBC myVPN service. You can click on the
icon to Disconnect or Quit .
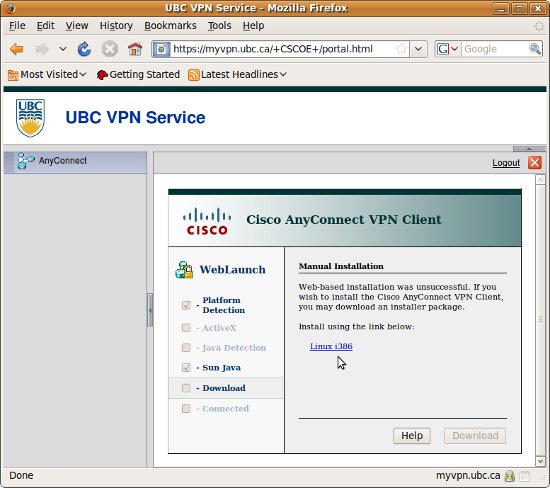
Manual VPN Client Installation
- If the automated installation fails, you will be presented with a screen similar to the
following. If this screen does not show up, disable the libnpjp2.so plugin in
Firefox under Tools -> Add-on -> Plugins.Click the link to save the
vpnsetup.sh file on your computer. It will usually be saved in the
/home/<user>/Desktop or /home/<user>/Downloads folder.
- Open Terminal , navigate to the where the vpnsetup.sh files
is located and enter:
sudo sh ./vpnsetup.sh -
When the installation is complete, you may close Terminal . Proceed to the next section, Reconnecting to myVPN .
Reconnecting to myVPN
You have 2 options in reconnecting to myVPN:
- Go to https://myvpn.ubc.ca and the Cisco AnyConnect VPN Client should automatically launch.
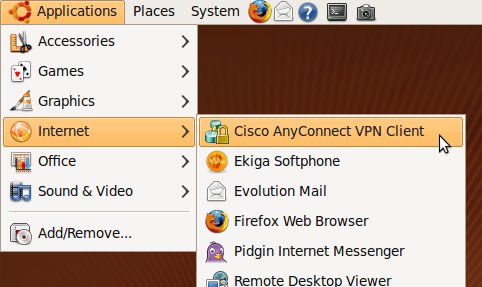
- If you would like connect without going to the website, use the installed client.
- Go to Applications -> Internet - > Cisco AnyConnect VPN
Client
- In the Connect To: field, enter myvpn.ubc.ca and click Select
- Enter your CWL username and password, and click Connect
Note : If you are a member of a specialized departmental group, you can append your group id after the CWL username (e.g. cwluser.departmentgroup ).
- Go to Applications -> Internet - > Cisco AnyConnect VPN
Client
System Requirements
This list of system requirements comes from the Release Notes for Cisco AnyConnect VPN Client. Again, UBC IT does not provide support for Linux setup/installation. This document is provided as general reference only and is not confirmed to be working on all Linux distributions.
Note that 64 bit Operating Systems might need 32 bit shared libraries for one or all of
these packages along with the ones listed down at the bottom:
libnspr4
libnss3
libsqlite3
lib32nss-mdns
ia32-libs
libxml2
libcurl3
and
linked or copied to /opt/cisco/vpn/lib or /usr/local/firefox or
/usr/lib32
e.g.:
# sudo mkdir /usr/local/firefox
# cd /usr/local/firefox
# sudo ln -s /usr/lib32/libnss3.so
# sudo ln -s /usr/lib32/libplc4.so
# sudo ln -s /usr/lib32/libnspr4.so
# sudo ln -s /usr/lib32/libsmime3.so
# sudo ln -s /usr/lib32/nss/libsoftokn3.so
# sudo ldconfig
Also, depending on your distribution, you may need to create a hidden personal Mozilla folder and empty settings file:
# mkdir -p ~/.mozilla/firefox/anything.default
The following sections show the Linux distributions and requirements from the official documentation:
Linux Distributions
AnyConnect supports Linux Kernel releases 2.4 and 2.6 on 32-bit architectures, and 64-bit architectures that support biarch (that is, that run 32-bit code).
The following Linux distributions follow the requirements and work with the AnyConnect Client:
- Ubuntu 7 and 8 (32-bit only).
- Red Hat Enterprise Linux 3 or 4. (As of publication, we have not tested AnyConnect with Red Hat Linux 5.
- Fedora Core 4 through 9. To use Fedora 9 with the AnyConnect client, you must first install Sun Microsystems JRE, preferably JRE 6, Update 5 or higher.
- Slackware 11 or 12.1.
- openSuSE 10 or SuSE 10.1.
Linux Requirements
- x86 instruction set.
- 32-bit or biarch 64-bit processor—standalone mode only; web-based install/connect is not supported.
- 32 MB RAM.
- 20 MB hard disk space.
- Superuser privileges.
- libstdc++ users must have libstdc++ version 3.3.2 (libstdc++.so.5) or higher, but below version 4.
- Firefox 2.0 or later with libnss3.so installed in /usr/local/lib, /usr/local/firefox/lib, or /usr/lib. Firefox must be installed in /usr/lib or /usr/local, or there must be a symbolic link in /usr/lib or /usr/local called firefox that points to the Firefox installation directory.
- libcurl 7.10 or later.
- openssl 0.9.7a or later.
- java 1.5 or later. The default Java package on Fedora is an open-source GNU version, called Iced Tea on Fedora 8. The only version that works for web installation is Sun Java. You must install Sun Java and configure your browser to use that instead of the default package.
- zlib or later.
- gtk 2.0.0,
gdk 2.0.0,
libpango 1.0. - iptables 1.2.7a or later.
- tun module supplied with kernel 2.4.21 or 2.6.