Microsoft Windows 7 / 8 / 10
To manually install the myVPN client on Microsoft Windows 7/8/10, please follow the instructions below.
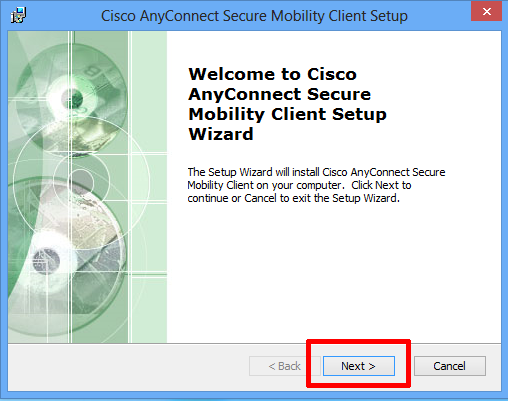
- Download and run the Windows installer file
- Click Next
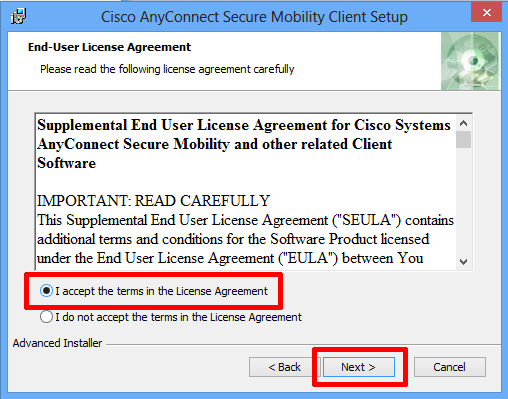
- Accept the license agreement and click next
- Click Install
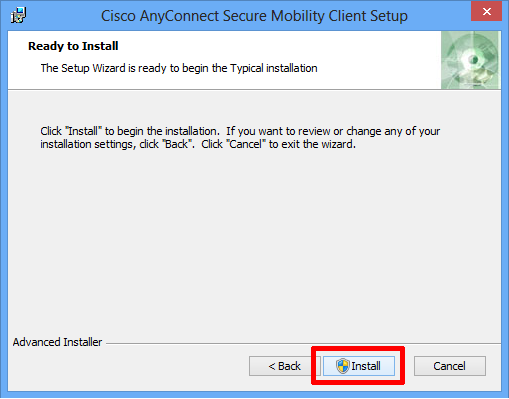
- You may be asked "Do you want to allow the following program to make changes to this computer?". If so, click Yes
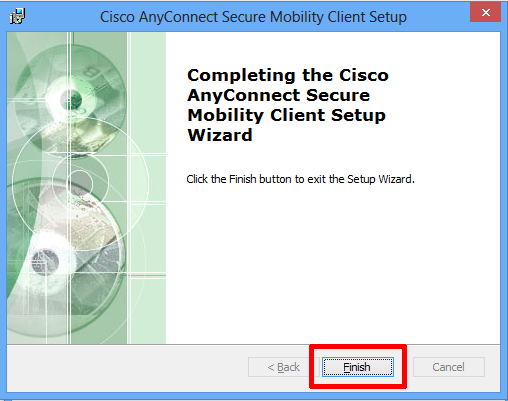
- Click Finish
To Connect to myVPN
You have 2 options in connecting to myVPN:
- Login to http://myvpn.ubc.ca
 and the Cisco AnyConnect Secure Mobility Client should automatically launch
 - If you would like to connect without going to the website, use the installed client:
- If you are using Microsoft Windows 7/8/10:
- Open the Start Menu, click on All Programs
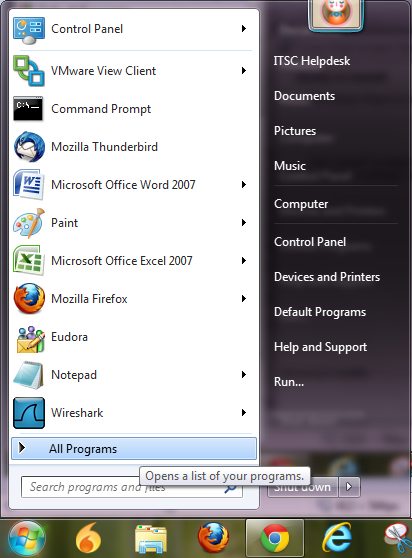
- Select Cisco AnyConnect Secure Mobility Client
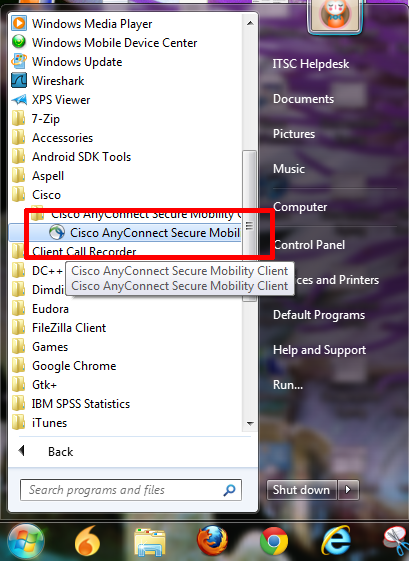
- Open the Start Menu, click on All Programs
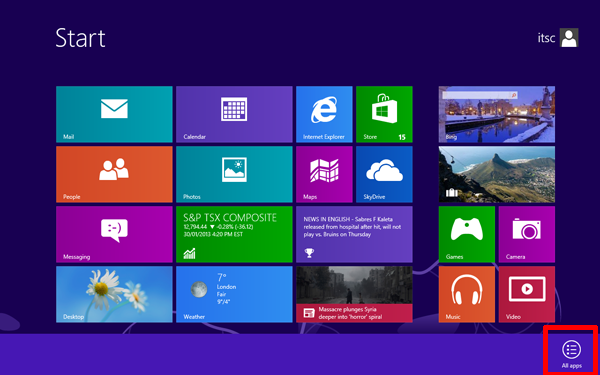
- If you are using Microsoft Windows 8:
- Open your Start screen, right click anywhere on the screen that is not an icon/app, and select All Apps
- Select Cisco AnyConnect Secure Mobility Client
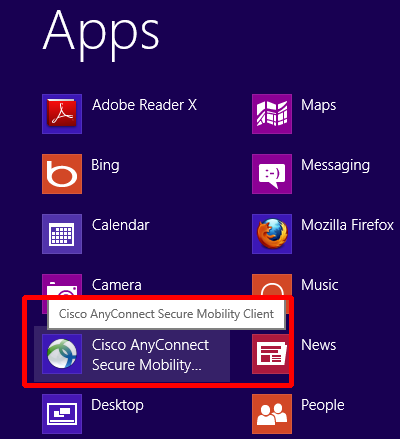
- Open your Start screen, right click anywhere on the screen that is not an icon/app, and select All Apps
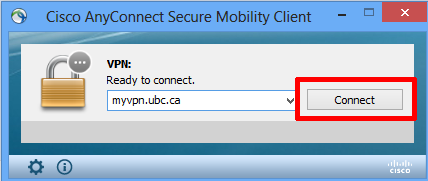
- In the box that appears at the bottom right corner of your screen, enter "myvpn.ubc.ca" in the text field and then click Connect
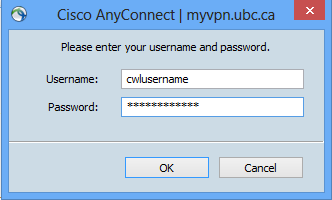
- Enter your CWL username and password in the box that pops up
- The Cisco AnyConnect VPN client has successfully connected when you see the popup message on your Desktop. You are now connected over VPN and can start working over the network as you normally would.

To Disconnect From myVPN
- Right-click on the Cisco AnyConnect VPN client icon in the Windows taskbar

- Select Quit
- If you are using Microsoft Windows 7/8/10: