General | Accessing MS Teams | How Tos | Privacy & Security | Integrations | Known Issues
General
Accessing MS Teams
How do I login to MS Teams via web/PC/Mac?
Please refer to the Service Requirements section to get access to MS Teams. Once you have access, follow steps below to login:
- Go to https://portal.office.com . (For Faculty and Staff using UBC owned devices may find MS Teams via Software Centre)
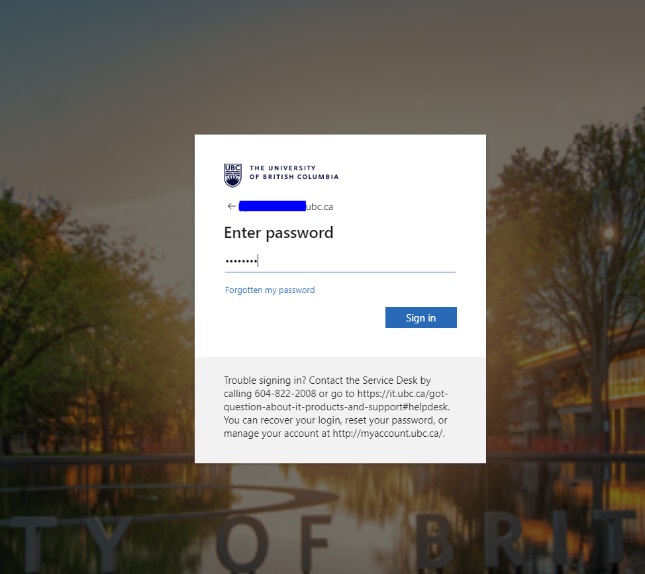
- For staff and faculty, login with your firstname.lastname@ubc.ca. For students, login with your cwl@student.ubc.ca.
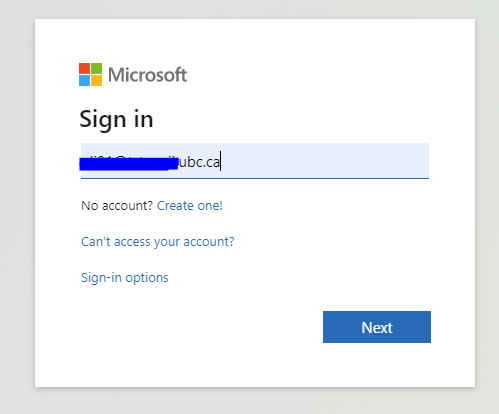
- Enter your CWL password.
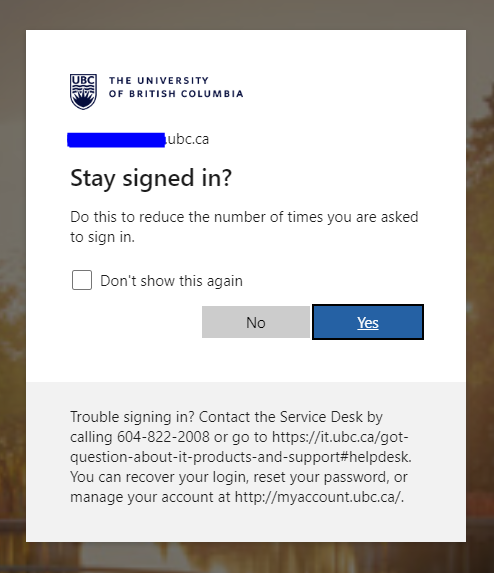
- Stay signed in? Click Yes, if you choose to stay signed in. This is recommended if you are on your work computer and you don't want to be asked to sign in every time. Otherwise, click No to receive the prompts for login credentials each time you access MS Teams. Faculty/Staff may be prompted for additional multi-factor authentication verification via Cisco DUO.
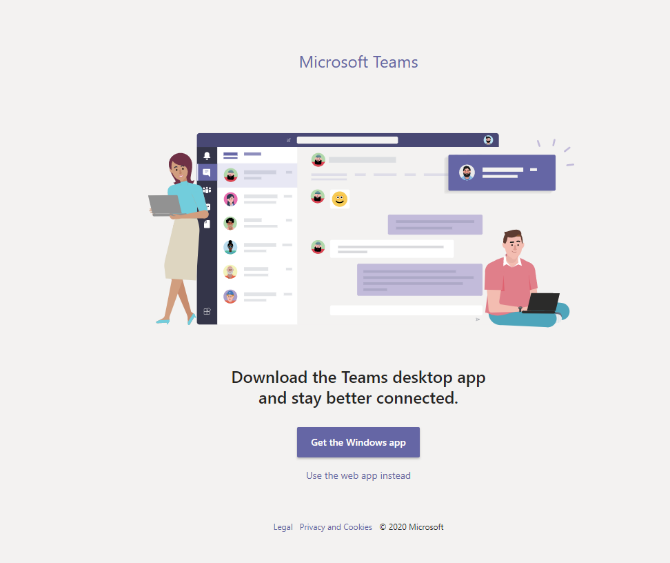
- Click the MS Teams icon. A window will pop-up for you to choose "Get the Windows app" or "Use the web app instead." If you choose to download MS Teams on your desktop, click Get the Window app and continue to Step 6. If you would like to use MS Teams on your internet browser, click Use the web app and continue to Step 10.
Get the Windows app on your Desktop/laptop?
- After you download the installation .exe file, click on the file to install MS Teams.
After you have installed MS Teams, the following window will pop-up. Click Continue.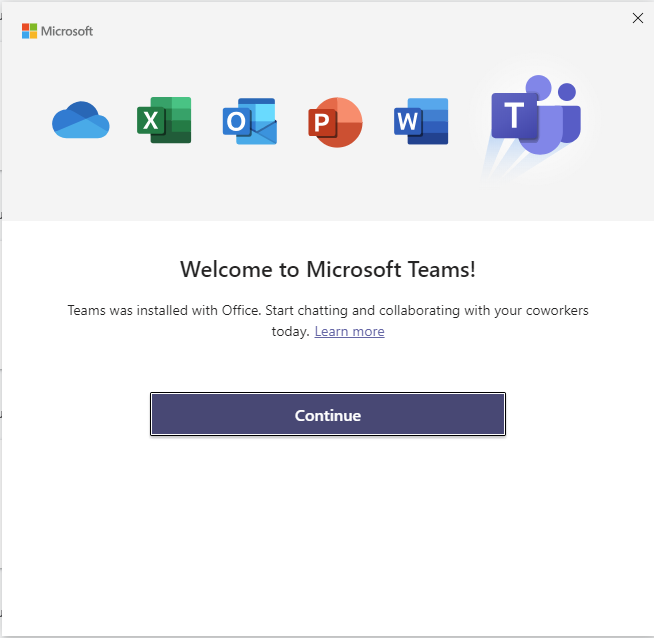
- For staff and faculty, enter in your firstname.lastname@ubc.ca and click Next.
For students, enter your cwl@student.ubc.ca address and click Next.
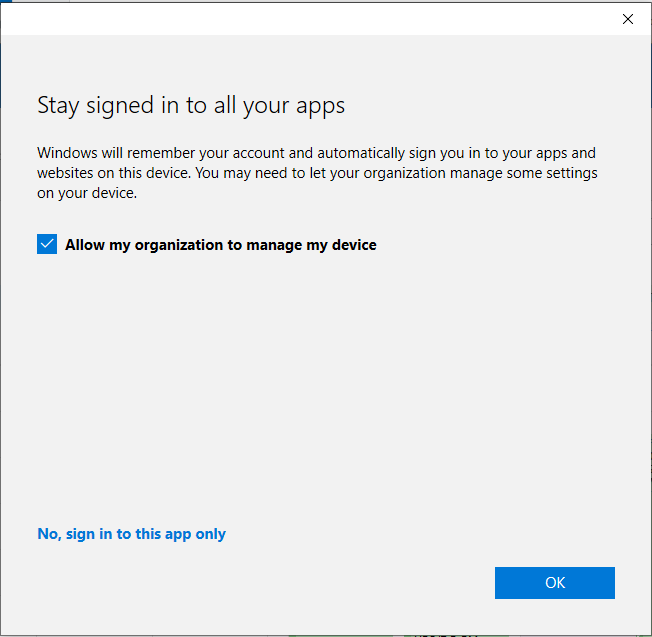
- You will be prompted to stay signed in to all your apps with your UBC account on your device. If you would like to, check Allow my organization to manage my device and click OK. This setting is to trust the device (laptop/mobile) registered in the server. If you log in from the same device in the future, it will not prompt you for your credentials.
- If you are using a temporary device, you may uncheck the option for allow my organization to manage my device. Click No, sign in to this app only at the bottom afterwards.
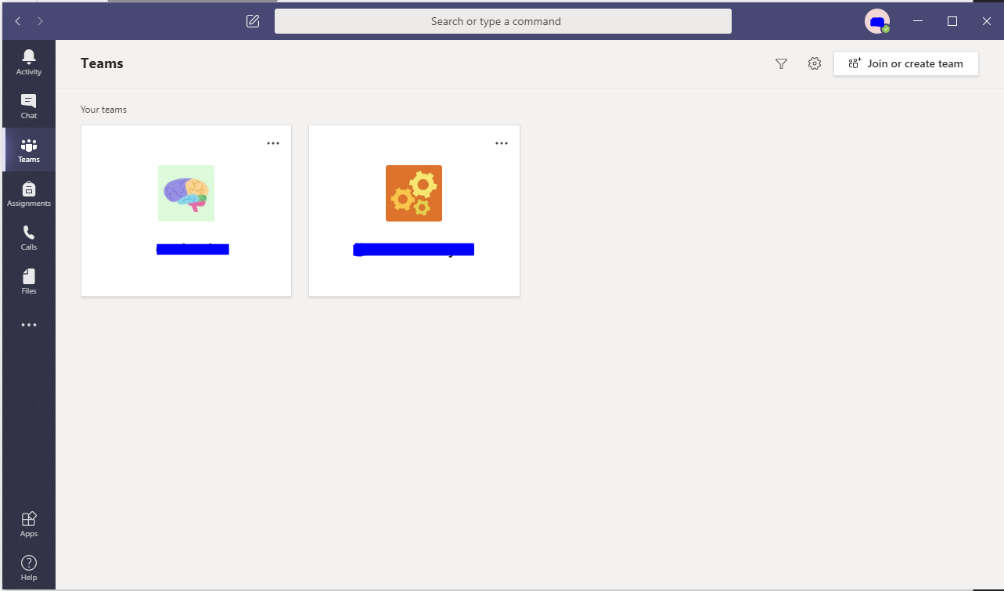
- You should have successfully installed MS Teams! You may not be able to see any MS Teams sites like in the picture below until you "Join or create team". The Team owner will provide you a code to join. Feel free to refer to the FAQs page on how to join a team and other how-to instructions.
Use the Web App Version instead
- Since you have previously already signed into the https://portal.office.com with your firstname.lastname@ubc.ca or cwl@student.ubc.ca account and CWL password, your browser should take you directly to your MS Teams web app version show below:

- If you changed your mind and would like to get the MS Teams desktop version instead, you may do so by clicking on the following icon on the bottom left corner of the web app version.
- Your browser should automatically download the installation .exe file:
Continue from Step 6 above for the rest of the instructions on Get the Windows app on your desktop.
How Tos
How do I start a chat in Teams?
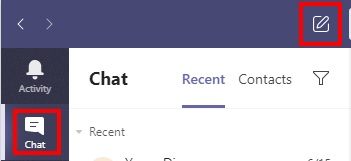
- Start a new chat by clicking on the Chats icon on the left panel.
- Then click on the New chat icon: at the top of the chat list.
- Enter the person's (you may add multiple people for a group conversation) name you want to chat with, compose your message in the box at the bottom of the chat. To open your formatting options, select Format beneath the box where you type your message.
- When you're ready, select Send
 . This starts the chat.
How do I create a new Team or join an existing team? And how to add members to the Team?
In order to start a Team at UBC you will need to submit a Team Request.
Click here for the Departmental Team Request Form for Staff and Faculty
You may also call 604.822.2008 IT Service Center for assistance to submit the request.
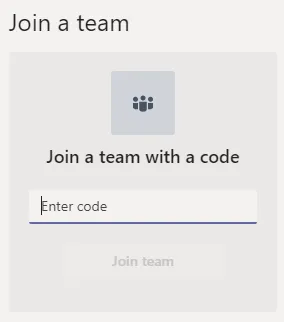
To join an existing Team, you should have received a code from the team owner:
- Click Teams on the left side of the app.

- Click on Join or create team on the top right.

- The window will populate asking you to enter the code you received from the group owner., enter it in the text box. Then you should have joined the team successfully.
How do I share a file in Teams?
Method 1: Attach it to a message
Sharing a file/document in a chat or your team/channel by clicking on the paperclip/attachment icon. Select the location of where the file/document you wish to share.
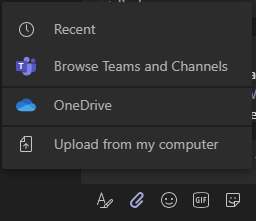
Method 2: Click on  tab, which is located at the top of every chat/channel
You will find all the files that has been shared in this location.
In a Chat, you can click on Files > Share and select the location of the file/document you wish to share.
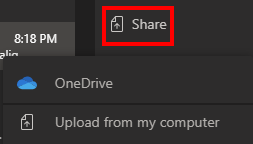
You may need to click on the refresh icon 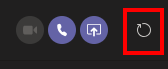 at the top right corner for the file to load up, after that you should see:

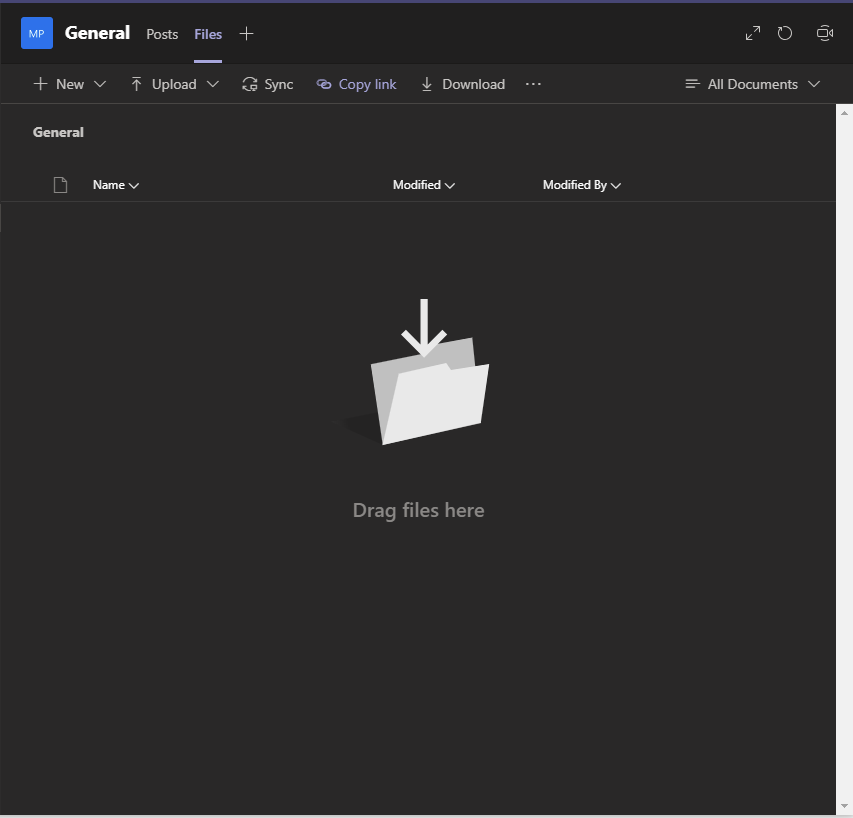
In a Team or Channel, you can click on Files > Upload and locate the file/document(s) you want to share. You may upload multiple at a time. Alternatively, you can just drag and drop the file/document.
For more information, follow these step-by-step instructions on the Microsoft Teams support page.
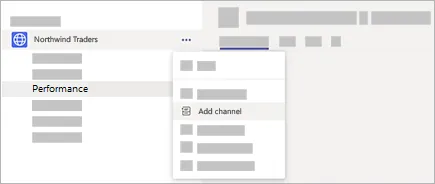
How do I create a new Channel in Teams? And how to add members to the channel?
You will need to be the team owner of your team to create a Standard Channel:
To create a standard channel (which are public to the whole team, refer to private channels below to have it strictly between the members added), locate the team list you want the channel to be under. Beside the team name, you will find More options > Add channel. You can also click Manage team, and add a channel in the Channels tab.
To add members to the standard channel:
- Go to the team you want to create the private channel for and choose More options > Add Member.
Creating a Private Channel:
- Go to the team you want to create the private channel for and choose More options > Add channel.
- Enter a name and description for your channel.
- Under Privacy, select the down arrow on the right, and then select Private – Accessible only to a specific group of people within the team.
Select Add. This adds a private channel to the team.
Image
To add members the private channel:
As a private channel owner, you can add or remove members, and edit private channel settings. Each person that you add must first be a member of the team.
To add members of your team to a private channel:
Next to the private channel name, select More options More options > Add members.
Image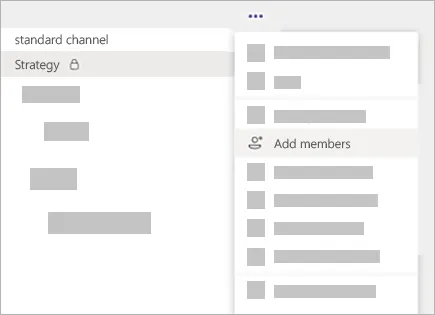
- Use the Members and Settings tabs to add or remove members and assign roles. Your private channel can have multiple owners and up to 250 members.
- When you're ready, select Done. Members can send messages in the private channel.
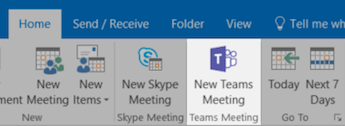
How do I schedule Teams meeting from Outlook? What about external users?
- To schedule a meeting from Outlook, you may switch to the calendar view. Click New Teams Meeting at the top.
- You should be able to see the invite link that populates to the meeting invite.
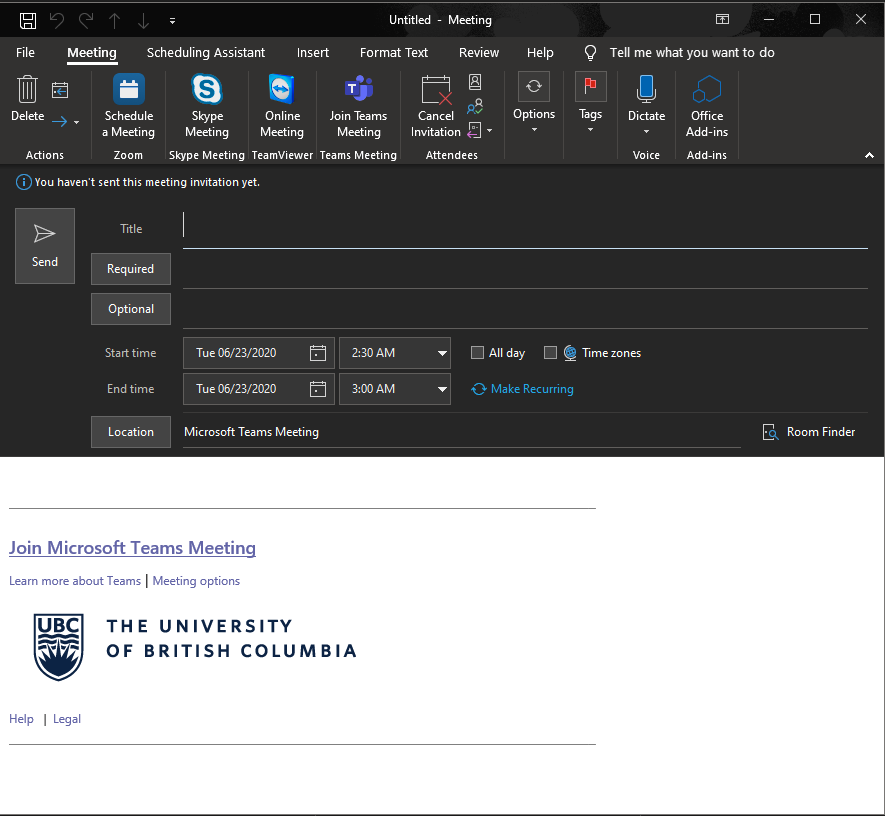
- Add your invitees in the To or Required field as if you are scheduling regular meetings.
- The invitees will receive this meeting invite and at the scheduled meeting time will be able to click on the Join Microsoft Teams Meeting link to enter the virtual meeting.
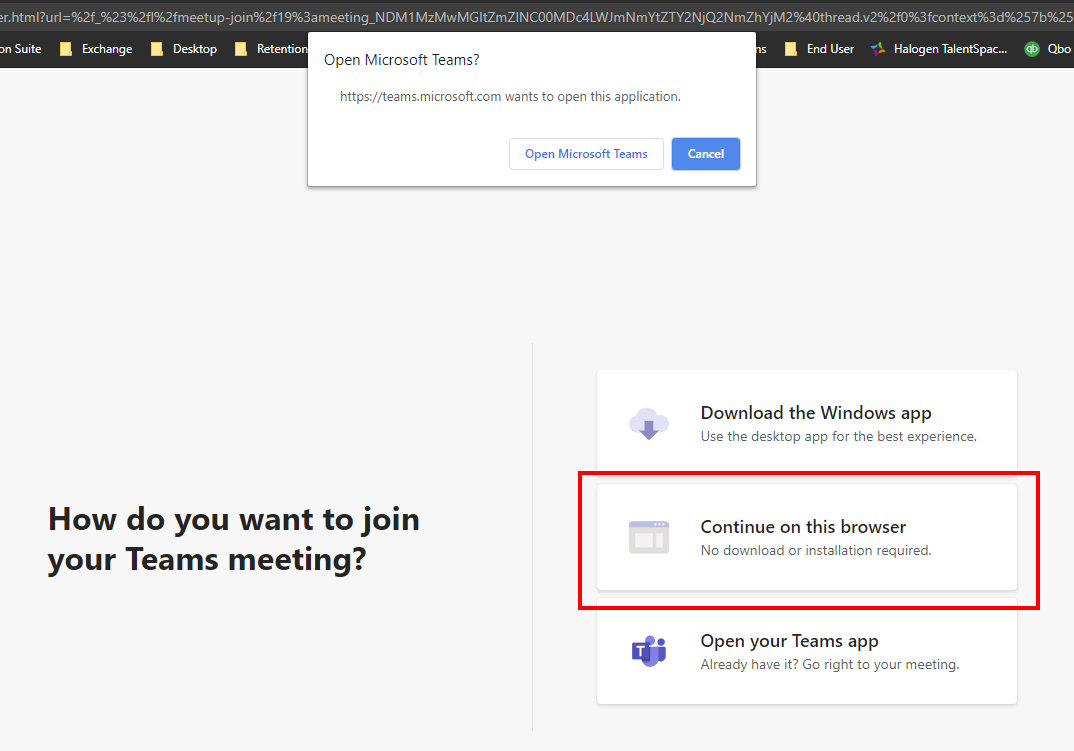
Window from your web browser will populate for you to select the following options:
As an active UBC staff/faculty/student with a registered Teams account click on Open Microsoft Teams to enter the online meeting.

Teams application will open, and you will be entered into the meeting.
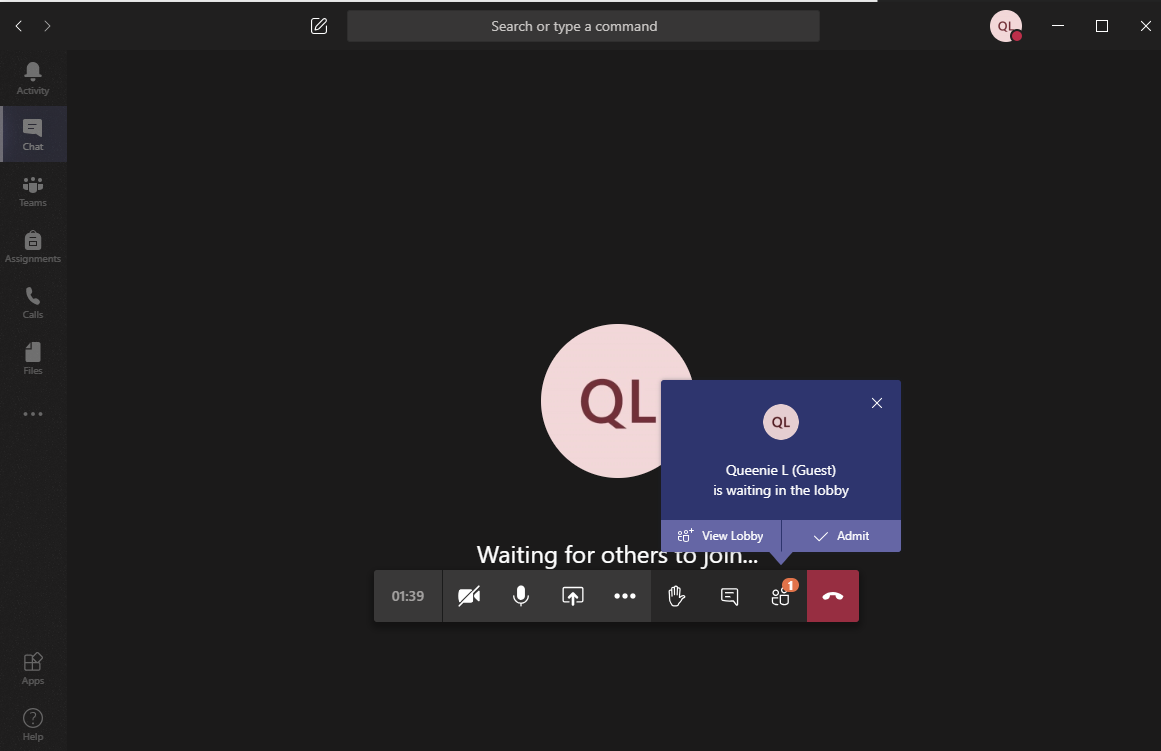
After you enter the meeting, you will need to Admit external users/guest users to join the meeting as they enter the meeting or when you are ready to greet them.
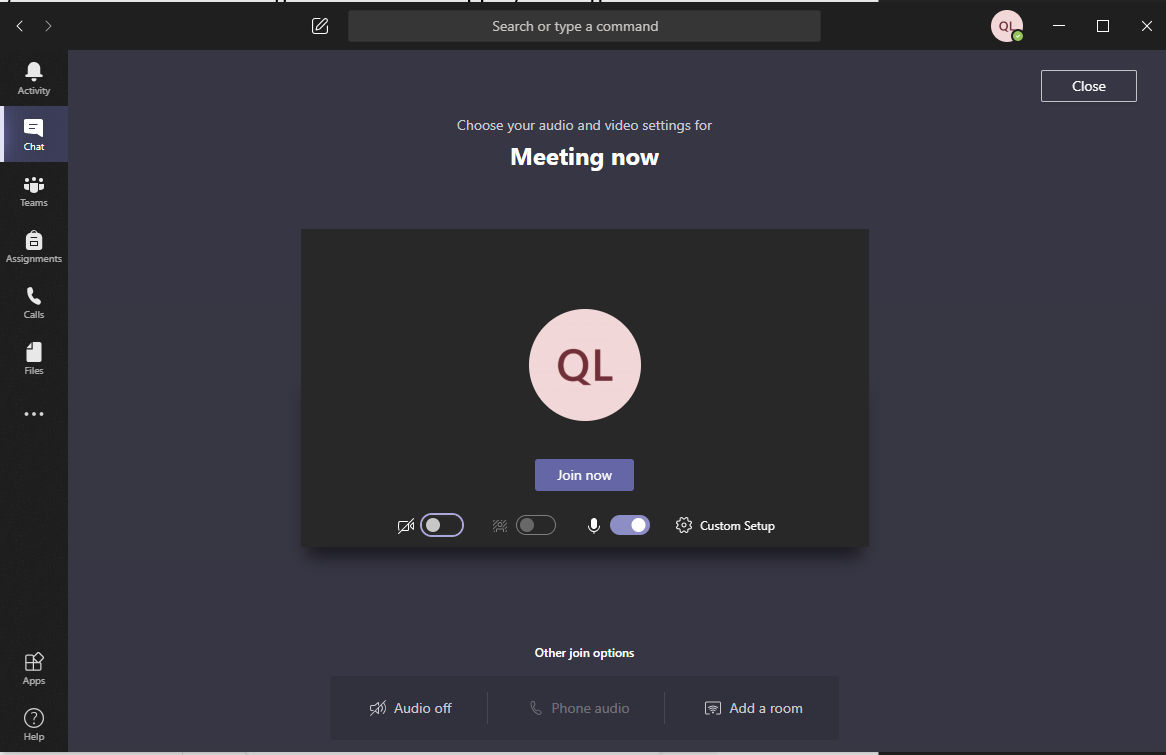
As a guest user (external users) and will enter the meeting via Teams Web App by clicking on Continue on this browser.
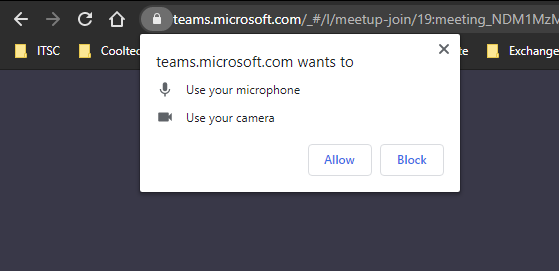
First time guest users will see the following window that will populate from your browser asking for permission to use your microphone and camera for audio and video conferencing purposes. Kindly click on "Allow" to proceed with the meeting.
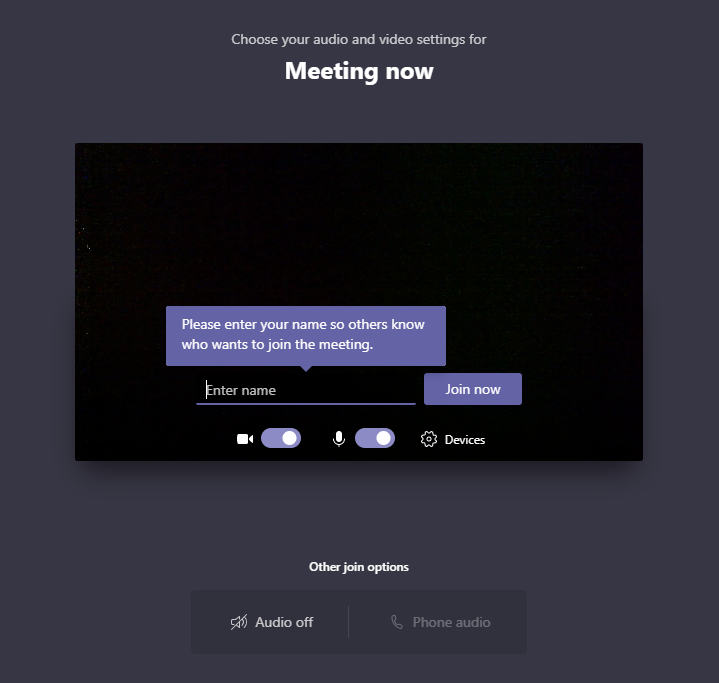
Then you should see the following window for you enter your name in the Enter name text box and click on Join now when you are ready to enter the virtual meeting.
When external users are joining the meeting a bit early or if the meeting hasn't started yet, they will be seeing the following window until an active UBC staff/faculty/student with a registered Teams account joins the meeting.
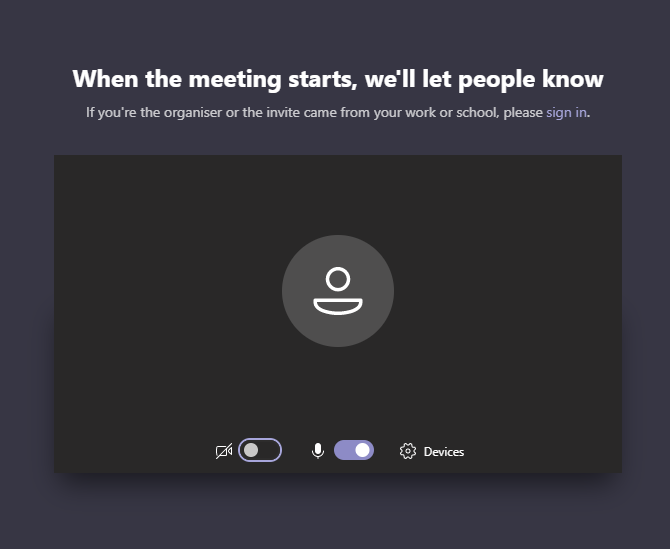
The meeting will automatically begin when the organizer or an active UBC user admits you into the meeting.
How do I schedule a meeting in Teams?
You must be on Teams only mode to be able to schedule a Teams meeting. To submit a request or find out what is Teams only mode, refer to https://forms.share.ubc.ca/request-teamsonlymode/SitePages/Home.aspx
- In Teams, you will see the calendar icon on the left panel of the client:
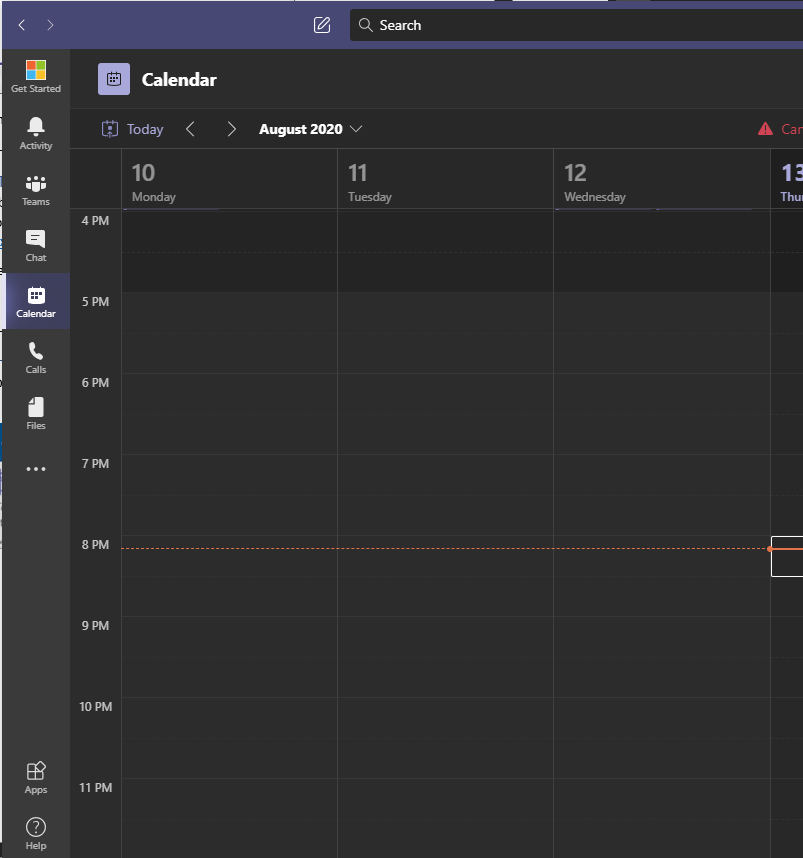
- After you click on calendar, the window will change to your calendar view which synchronizes with your Outlook calendar view. Your work week will appear for you to book meetings.
- To schedule a meeting, click on
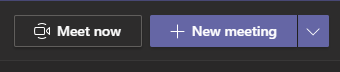 on the top right corner.
 - Enter in the time and date of your meeting and who you wish to invite. When you are finished with the meeting invite details, you may click Save.
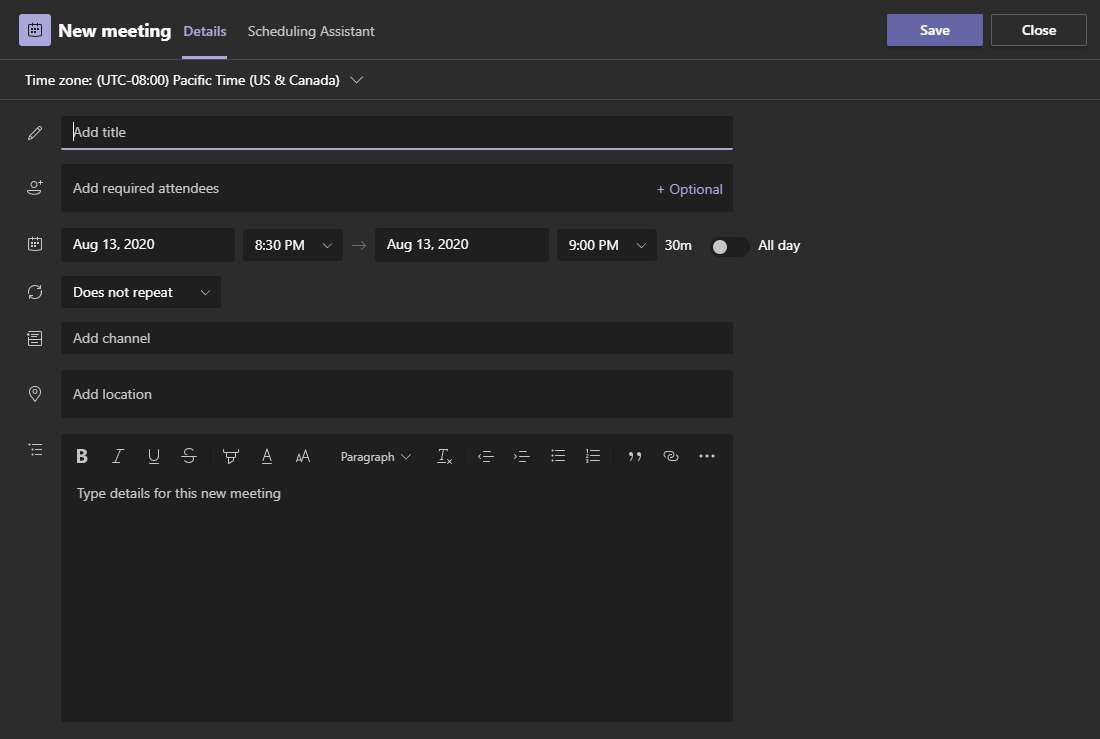
- The invite will then to be sent out to all the attendees as an email notification to accept or decline the meeting.
Can I invite external users/clients to join a Team?
Note: Only team owners of the team can invite guests to the team.
- Ensure the guest that you are inviting has provided you an external email address that is not an UBC email address.
- To add a guest to your team, go to the Teams application and click on the Team you wish to add the guest into.
- Click on the '…' icon beside the team name and click Add member:
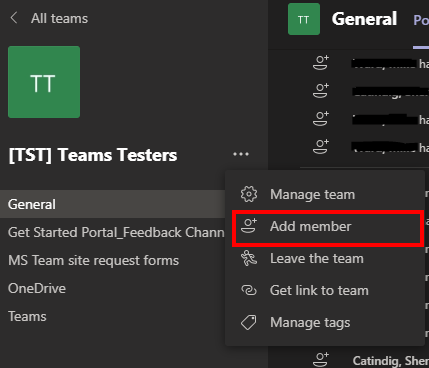
- The window will populate for you to enter the guest's email address, then click Add.
- The guest will then receive an email notification and allow them to join the team.
How do I start a group chat?
Start and name a group chat
Start one the same way you start a one-on-one chat: select New chat at the top of your chat list. Select the down arrow to the far right of the To field and type a name for the chat in the Group name field. Then, type the names of the people you'd like to add in the To field.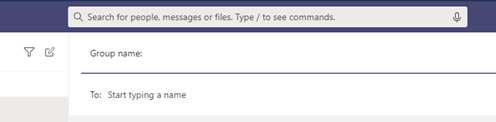
How do I access files that have been shared with me?
You can log into Teams and on the left navigation menu, click on Files. You should be able to locate all the files under Microsoft Teams that have been shared with you.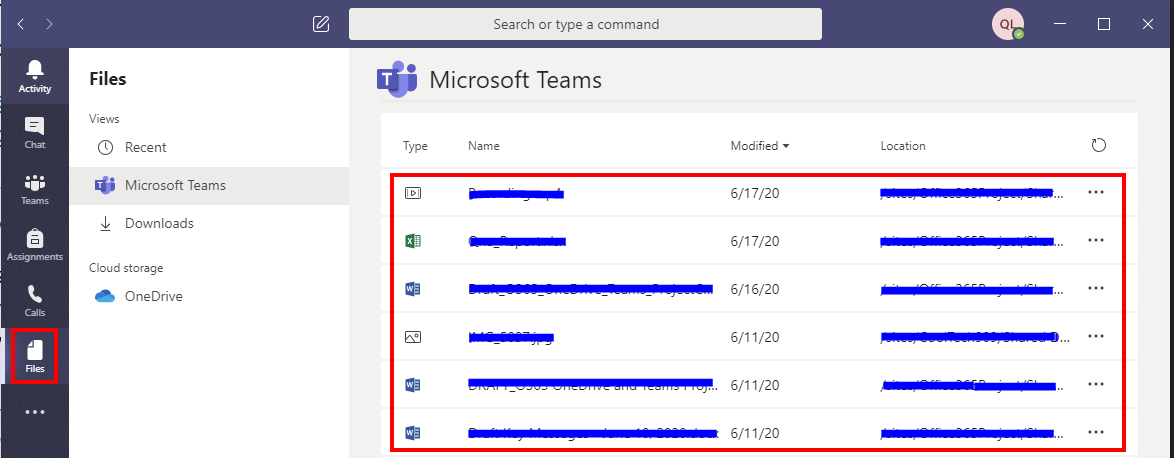
How do I share a file with someone outside of my team in Teams?
You may only be able to share a file within Teams with the members of your team.
Please note that sharing externally via link will not be available.
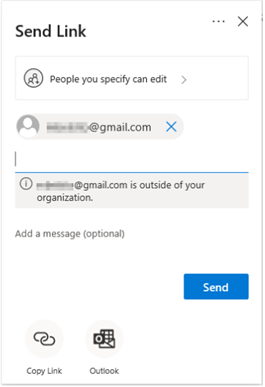
You can share externally as a file or folder with an identifiable email address of the guest user by following the steps below:
- Open the Word, Excel or PowerPoint file you wish to share externally if you haven't already have it opened.
- When you are ready to share the document, click on
 located at the top right corner.
 - The following window will populate for you to enter the guest's email address:
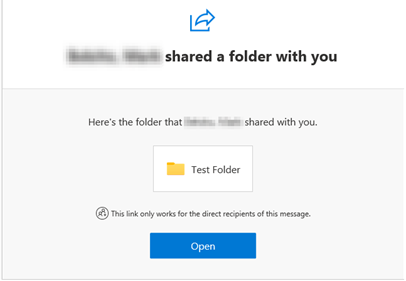
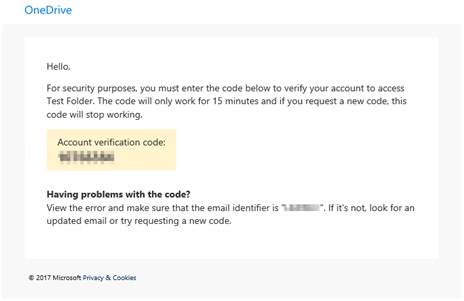
- The recipient receives the following email:
- When they visit the link, they will need to click the Send Code button.
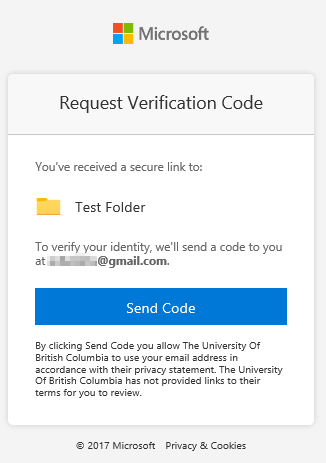
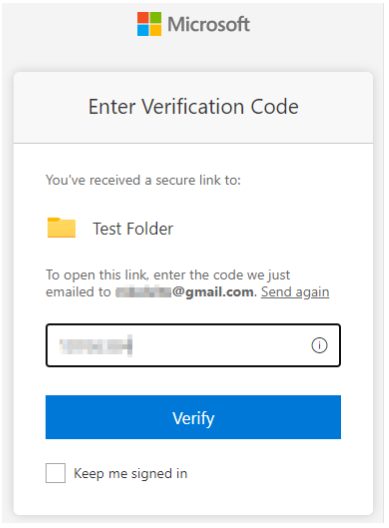
- This will send a code to them to authenticate:
- The user will then enter the code and clicking Verify.
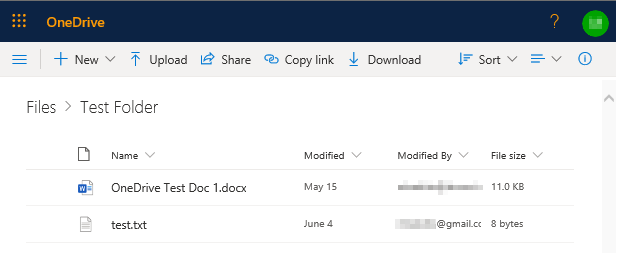
- If successful, they will get access to the shared OneDrive folder:
Who can host live events?
Live Events can be hosted by Faculty or Staff that is on Teams only mode.
In Teams, you will see the calendar icon on the left panel of the client:
Image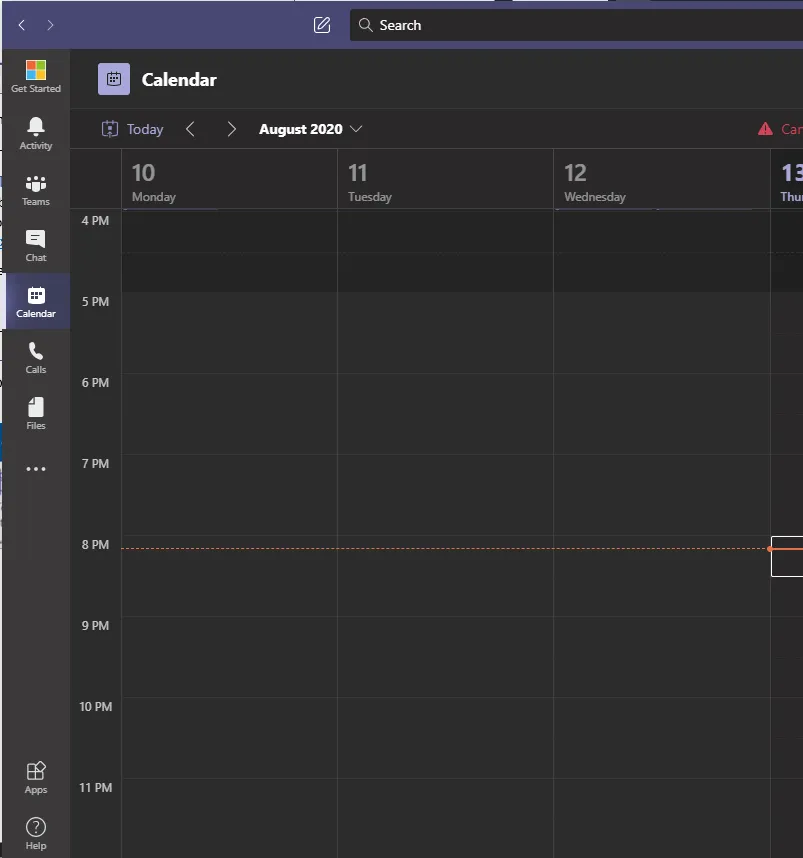
On the top right corner, you will see
Image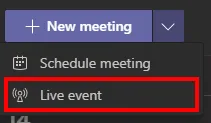
click on the arrow icon for the dropdown menu to see Live event.
A window will populate for you to enter in the live event details you wish to schedule:
Image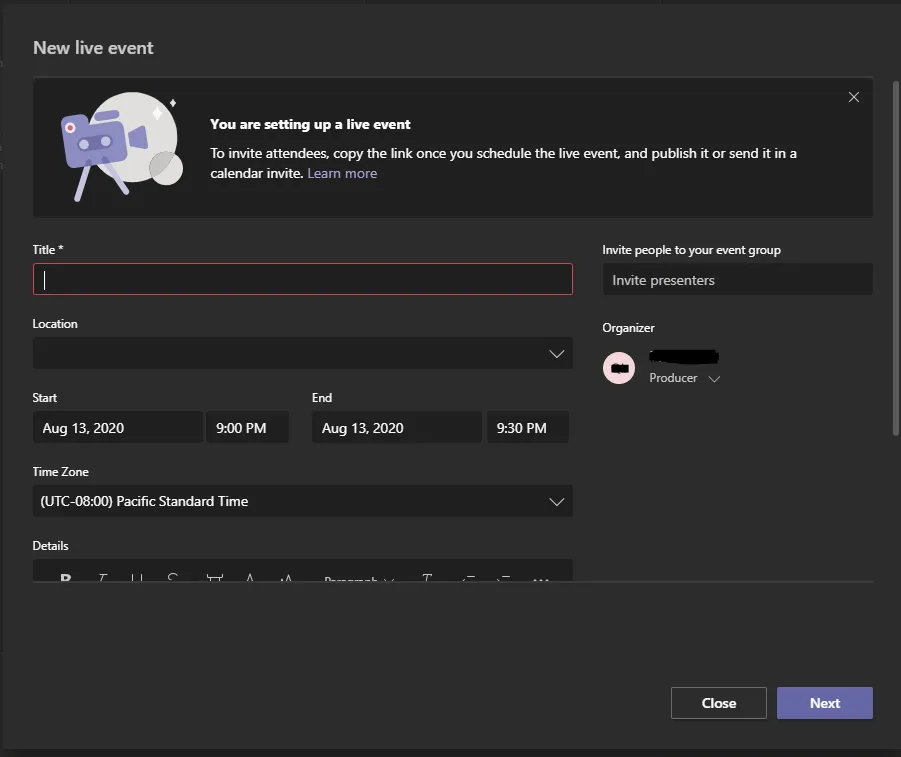
Where do I find more training documents or support on Teams?
For access inquiries, please contact the IT Service Centre.
Visit the Microsoft Teams help & learning page for additional support. Microsoft training videos on Teams are also available.
If you already have MS Teams installed, you may also visit the Get Started portal located at the top left corner of the Teams client for more guidance on how to utilize Teams: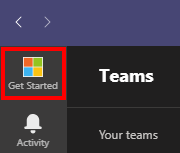
Privacy and Security
Integrations
Known Issues
Windows Firewall Warning when initiating a call on the Microsoft Teams client for the first time.
Users impacted: All Windows PC Teams users Estimated resolution timeline: No ETA More information can be found here. Workaround: Click Cancel to ignore the message. The call will work after the warning is dismissed. Additional information can be found here.
