Junk Mail (SPAM) is an ongoing issue that has no perfect solution. In our efforts to curb SPAM, we have added SPAM identification features to our FASmail email service.
- An incoming mail message's originating IP address is checked in a database to see if it matches any known spam hosts or relays. If there is a match, then the message will be immediately rejected.
You can set up most Email applications to look for this header and automatically move tagged messages to a Junk Mail folder. Documentation for configuring the mail clients that can detect this tag are provided below.
Important: The instructions below explain how to move email that is tagged as SPAM to a 'Junk E-Mail' folder. You will still have to go through your 'Junk E-Mail' folder to evaluate whether any messages were identified incorrectly. Although the system in general is extremely accurate, false positive (and false negative) identifications do occasionally occur. Once you have checked to make sure that only junk is in the Junk E-Mail folder, you can delete the messages. It is advised that you do not automatically delete messages in case there are legitimate messages that get incorrectly tagged as spam. Please note that messages in the Junk Mail folder will automatically be deleted after 90 days as per UBC Records Management Schedule IM4500.
- Log into your the FASmail webmail (OWA) client at www.mail.ubc.ca
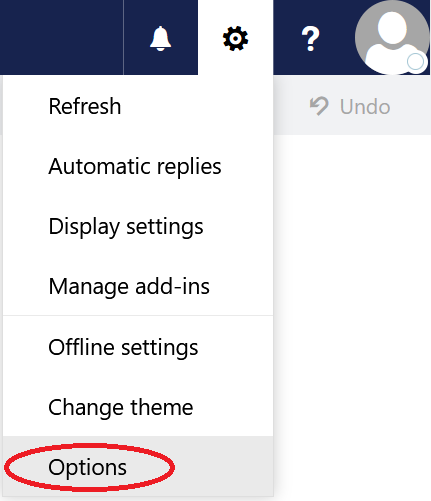
- Click on the cog in the upper right corner of the window and select "Options" from the drop-down menu.
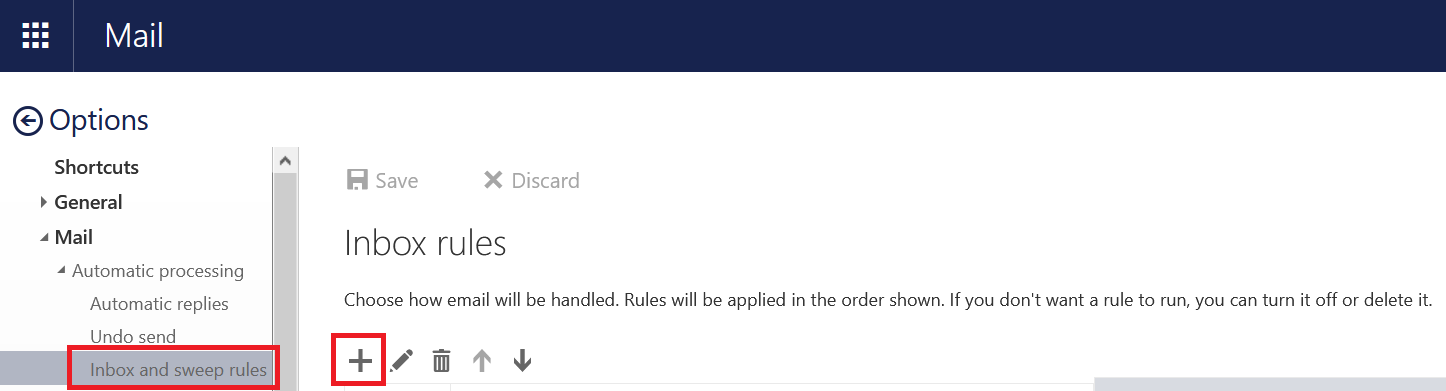
- On the "Options" screen, select "Inbox and sweep rules", then click the "+" symbol to add a new inbox rule.
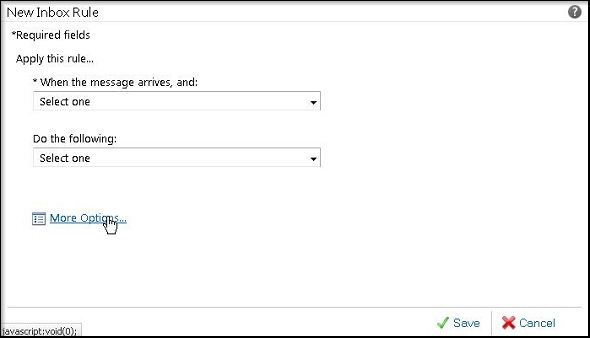
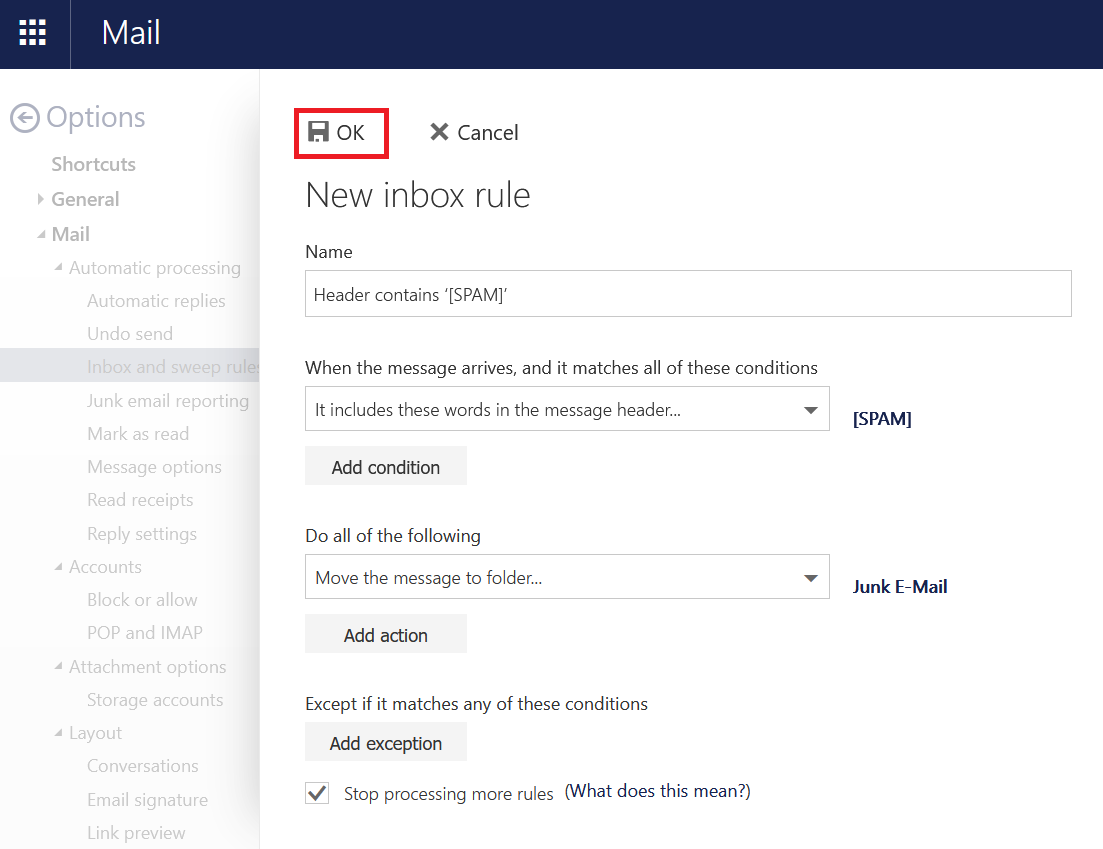
- A pop-up window will appear called "New inbox rule".
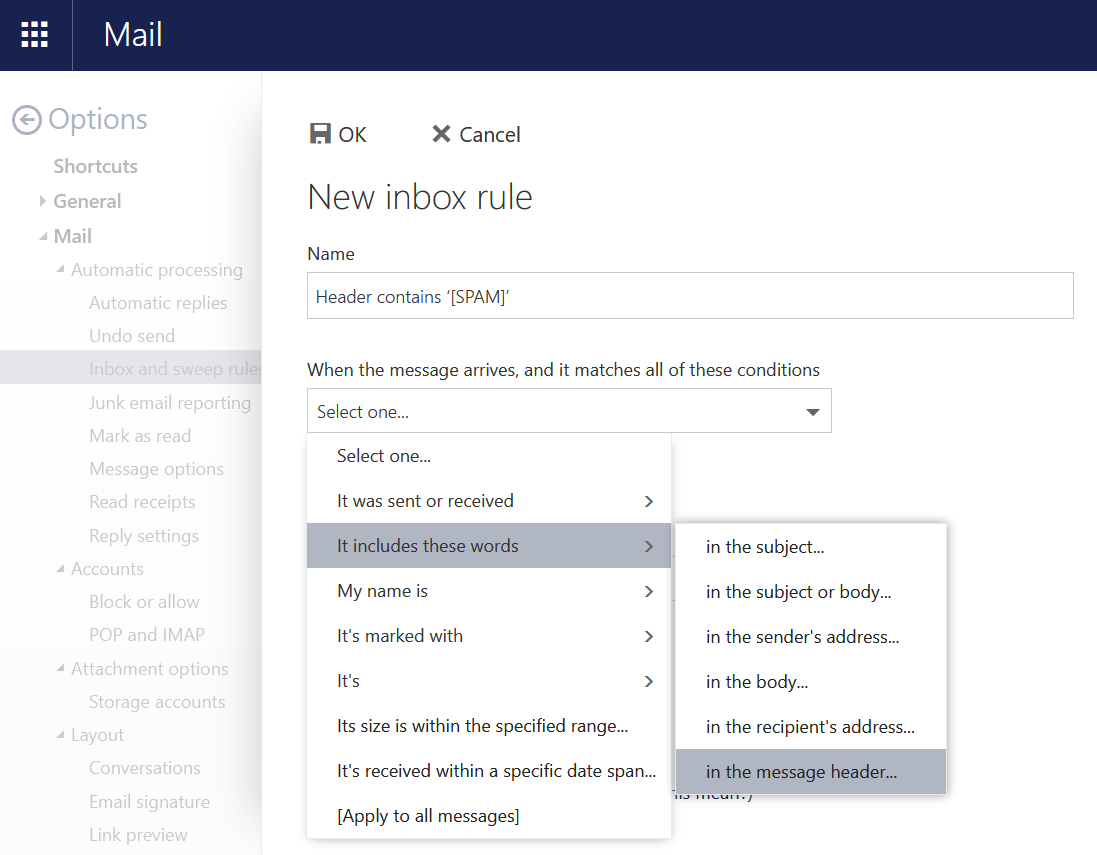
- Create a name for the rule (it can be useful to create a very specific name for the email rule as below, e.g. Header contains '[SPAM]')
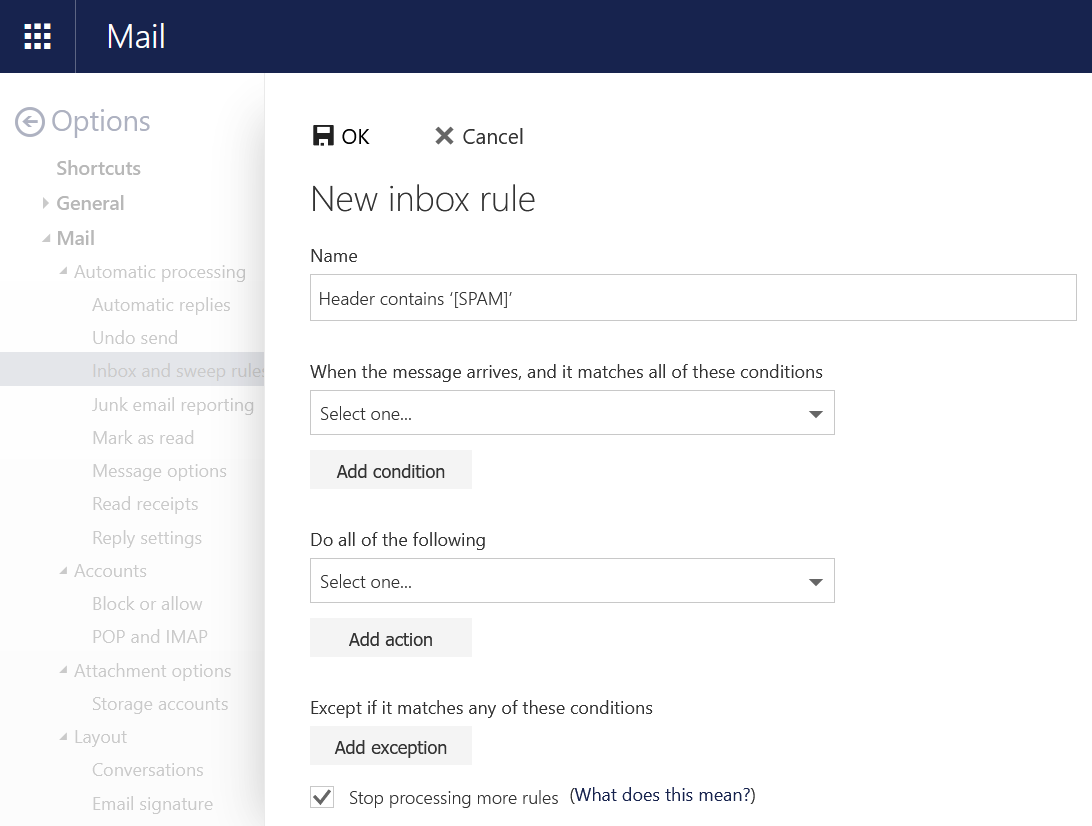
- Under where it says "When the message arrives, and it matches all of these conditions", select "It includes these words" and then "In the message header…"
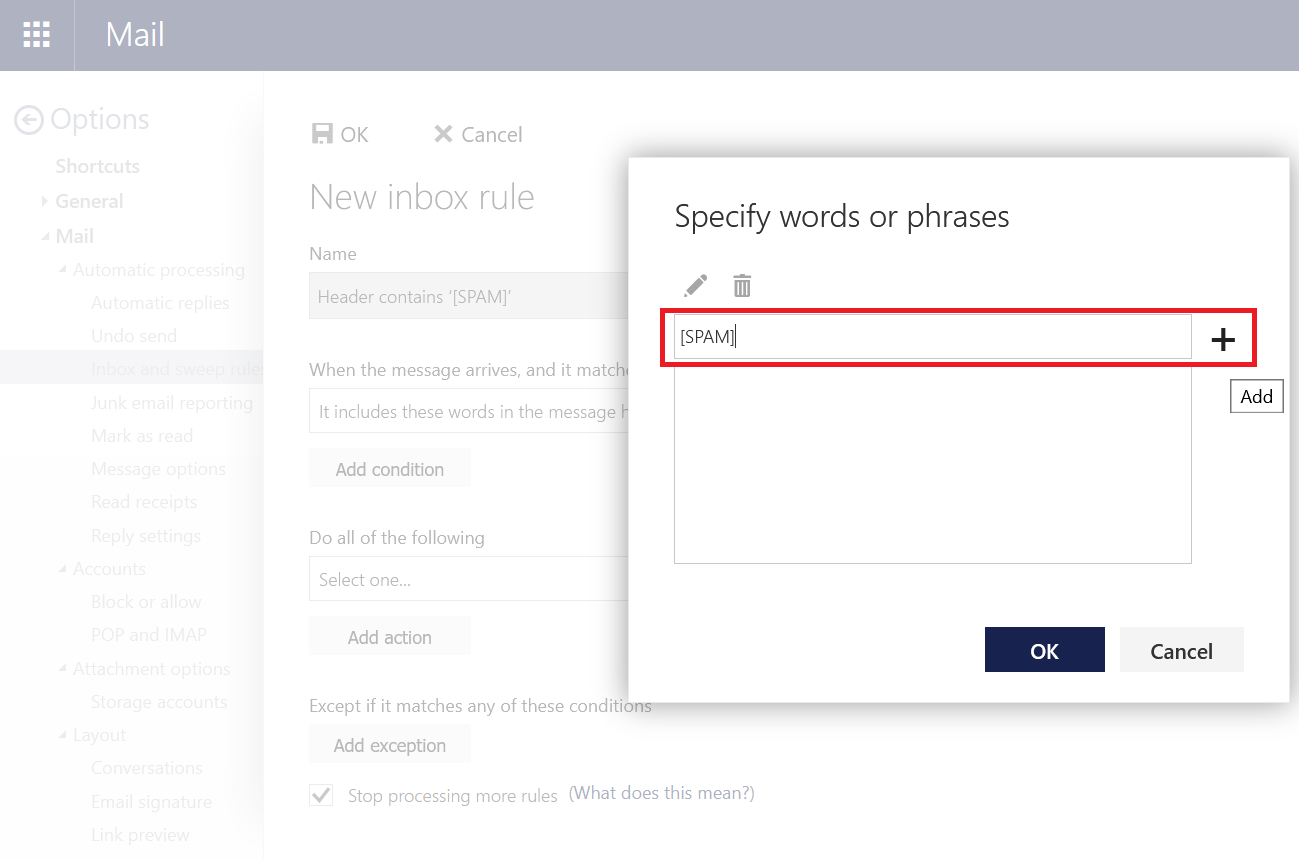
In the text field under "Specify Words or Phrases", type in: [SPAM]
- Note: Be sure to include the square brackets.
- Click the plus symbol to the right of the text field to add the text to the Search list.
- Click "OK" to return to the previous screen.
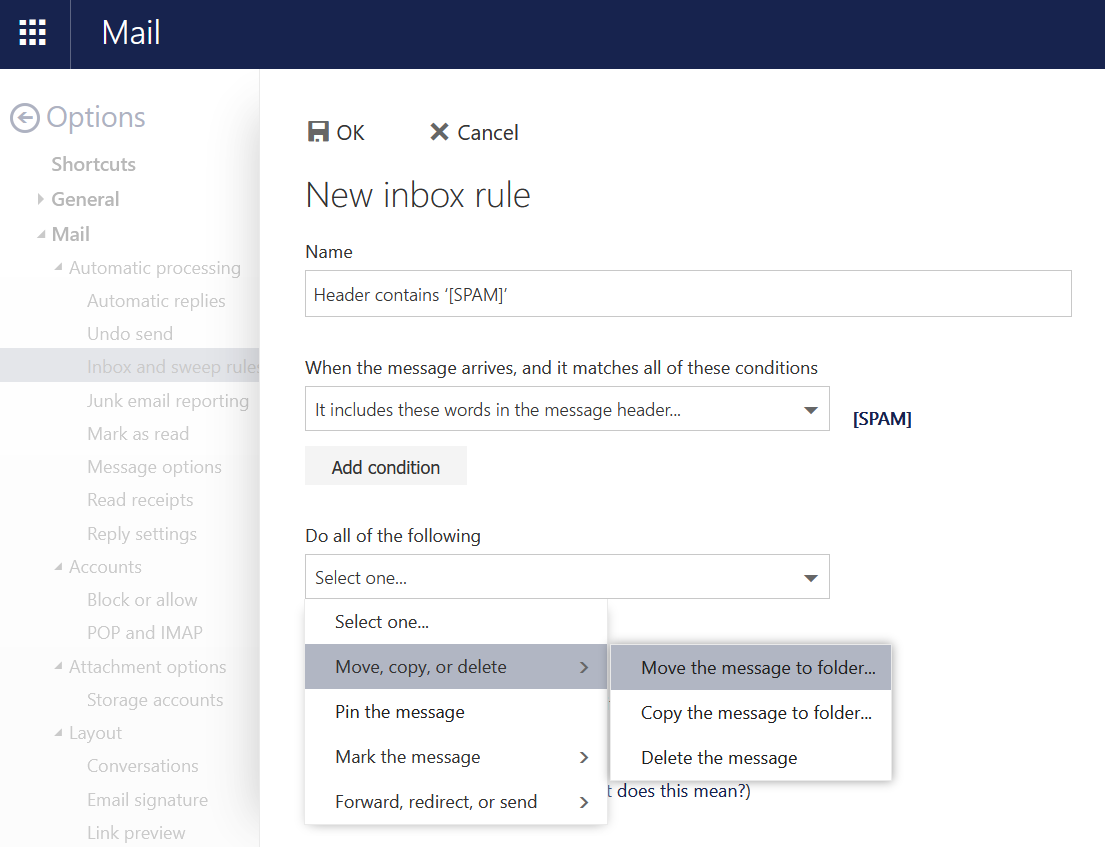
- Under where it says "Do all of the following:", select "Move, copy, or delete" and then "Move the message to folder..."
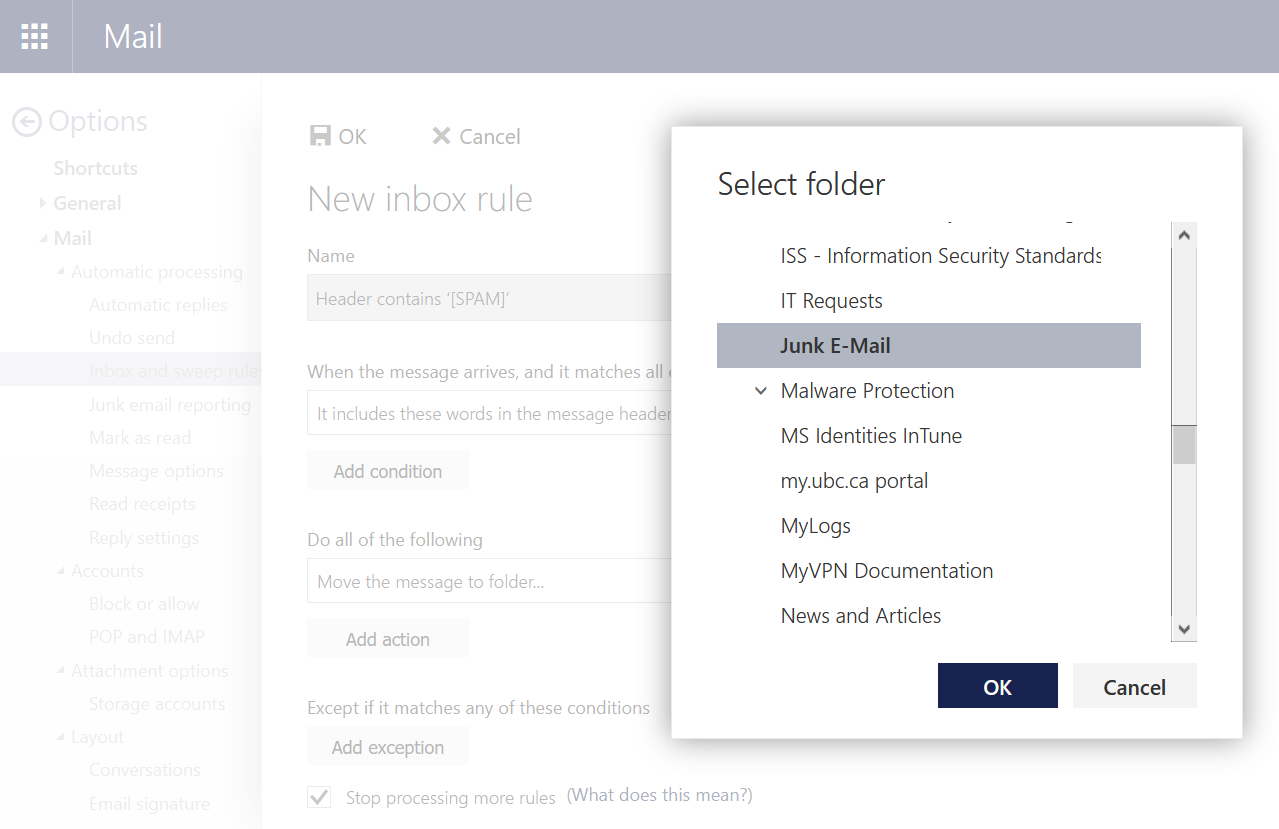
- Select "Junk E-Mail" and press "OK".
- Click "OK". You must click "OK" to save and implement the new rule.
- You may receive a warning after clicking the "Save" button. This warning is only relevant if you had previously set up any rules in Outlook that you have turned off. If you click "Yes" to the warning message, it will remove any disabled Outlook rules that you had previously set up. Since they are turned off, there is no real impact to you other than you may have a recreate that rule if you need it again in the future.
You must click "OK" to complete the setup of this spam filtering rule.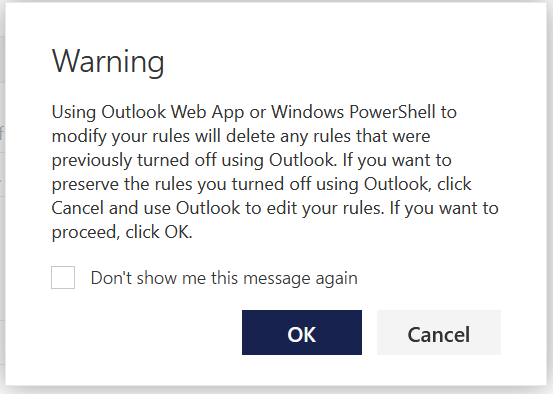
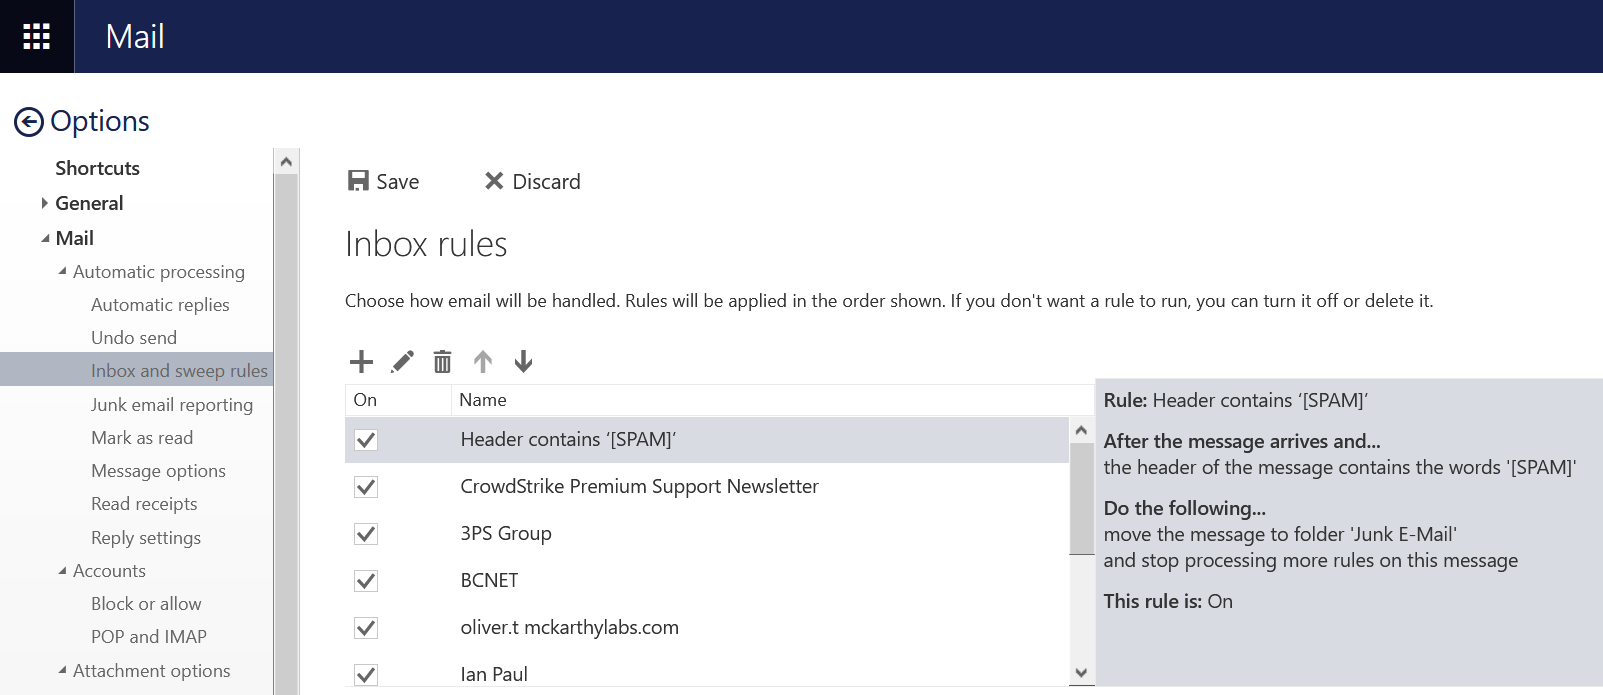
- Ensure that the rule that you created is at the top of the list. You should see the rule that you just created in the Inbox Rules list. If you have more than one rule in the Inbox Rules list, highlight the rule that you just created and click the up arrow to move it to the top of the list.
- Click the "Mail" link at the upper left side of the window to return to your INBOX.
- You have now set up a server-side rule to move suspected junk mail messages into your "Junk E-Mail" folder. Please regularly check this folder to ensure that there are no false positives that appear in it. Please note that this will not filter out all spam but it should reduce the amount that you receive in your INBOX.