General | Accessing MS OneDrive | Using MS OneDrive | Privacy and Security | Integrations | Known Issues
General
Accessing MS OneDrive
How do I login to MS OneDrive?
Please refer to the "Sign Up Requirements" section to get access to OneDrive. Once you have access, follow steps below to login:
- Go to https://portal.office.com . For Faculty and Staff using UBC owned devices, you might already have the application installed on your computer via the backend. If not, you can find it in the Software Centre on your desktop. Please access the login the application via the desktop client.
- For staff and faculty, login with your firstname.lastname@ubc.ca. For students, login with your cwl@student.ubc.ca.
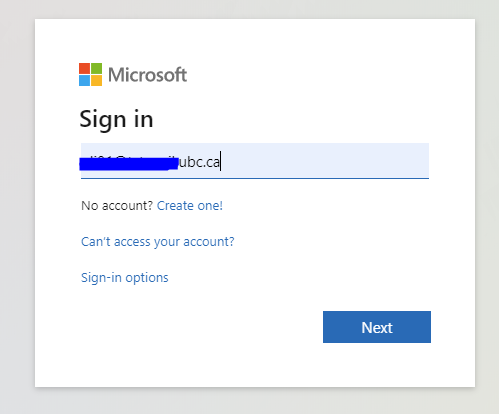
- Enter your CWL password.
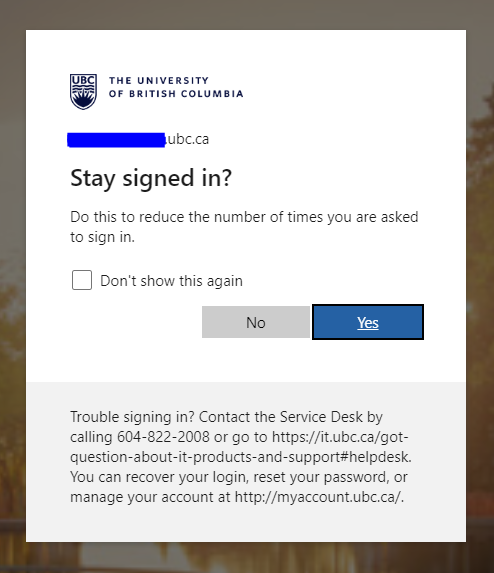
- Stay signed in? Click Yes, if you choose to stay signed in. This is recommended if you are on your work computer and you don't want to be asked to sign in every time. Otherwise, click No to receive the prompts for login credentials each time you access OneDrive. Faculty/Staff may be prompted for additional multi-factor authentication verification via Cisco DUO
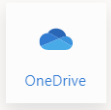
- Click the OneDrive icon.
- Your browser will then show all your OneDrive files, files that has been shared with you, or files that you have shared to others. You will also be able to view all the files that have been shared within your team sites.

How do I get MS OneDrive app on my desktop/laptop?
Install the Windows version of the MS OneDrive sync client from here. For Faculty and Staff using UBC owned devices, you might already have the application installed on your computer via the backend. If not, you can find it in the Software Centre on your desktop. Once you have launched the application
- Start OneDrive Setup. Please select one of the two methods below to continue your setup.
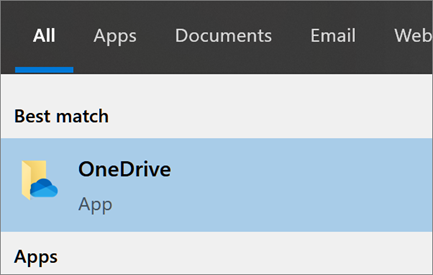
- Select the Start button. Search for OneDrive. Once the application name shows up, click on it to open the application.
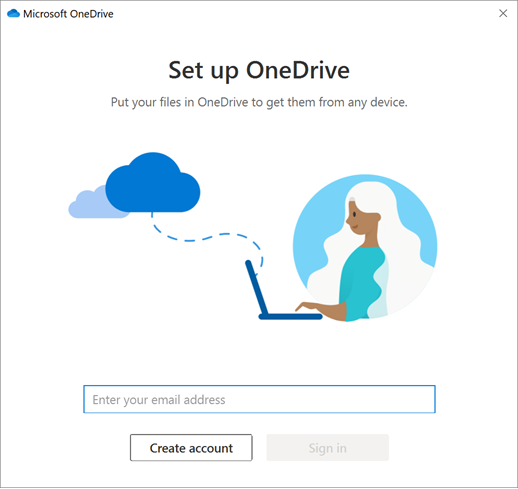
- When OneDrive setup starts, enter your firstname.lastname@ubc.ca then click Sign in to set up your account.
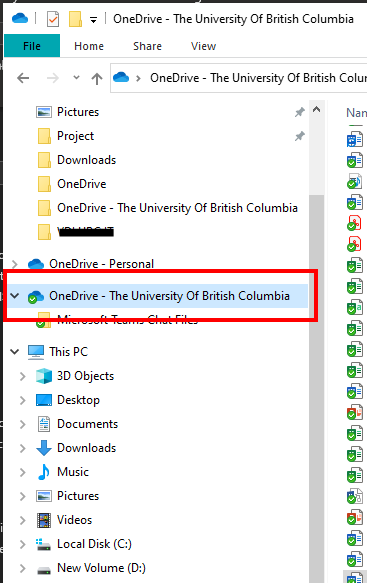
- As soon as your OneDrive has been set up, you are able to open Windows Explorer from your computer and you should see your UBC OneDrive account as a folder access:
- You may then drag and drop any files into the "OneDrive – The University of British Columbia folder" as you wish. You may also set this up on multiple devices.
I have a UBC IT Desktop managed PC. Why am I having issues synchronizing it with my MS OneDrive client?
To synchronize, you will first need to log onto UBC Virtual Private Network.
- Check to see if you have the MS OneDrive Cloud icon in your system tray shown below. If you see it, click on it and follow the steps to set up your account. If you do not see it, please follow the next step.
- Open Command Prompt on your PC
- Type in gpupdate /force and click Enter
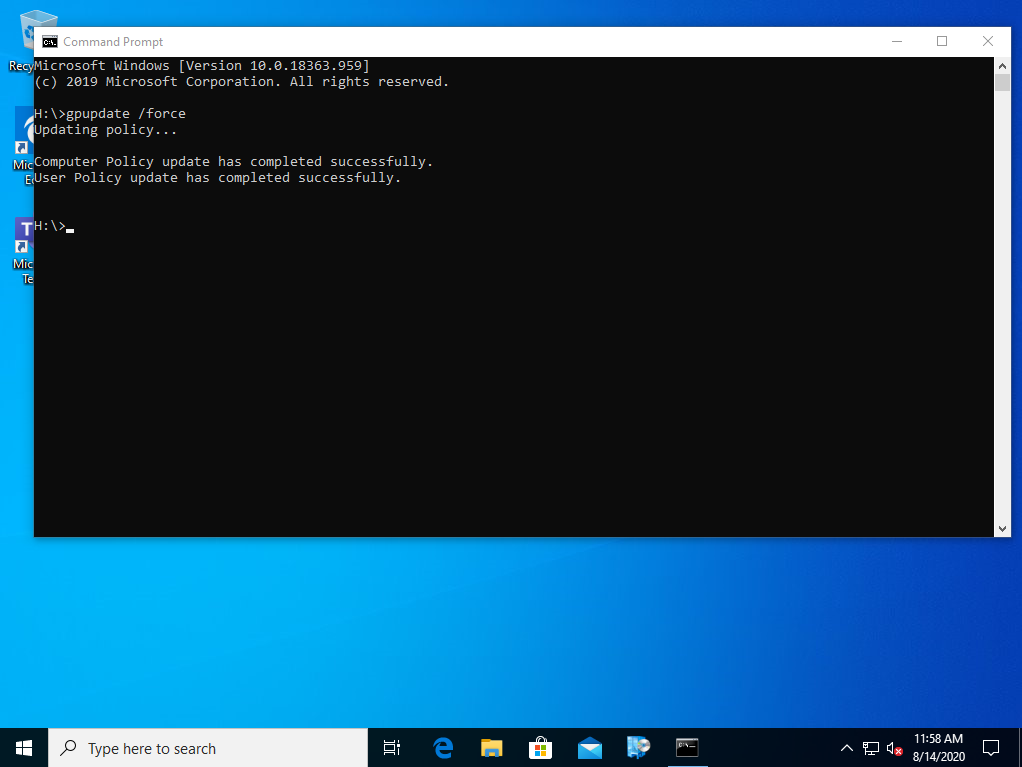
- This will enable the OneDrive app on your PC.
- Reboot and log into the app.
Using MS OneDrive
What if I already have a personal account signed into OneDrive?
Note: If your device is a UBC managed device, you don't have the ability to add a personal OneDrive folder.
If you already have a personal account signed into OneDrive on your non-UBC managed device, you do not need to sign out of your personal account. You can use OneDrive settings to add your UBC OneDrive to your computer.
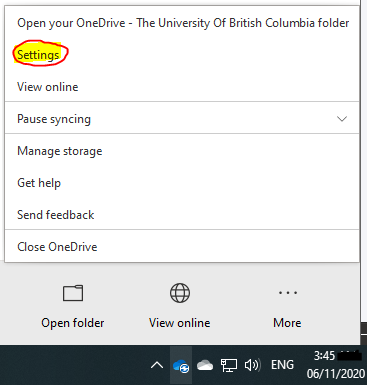
- In the taskbar navigation area, right click the OneDrive cloud icon and click on Settings.

- In Settings, select Account tab, and then click Add an account.

- When OneDrive Setup starts, enter your firstname.lastname@ubc.ca email address and then select Sign In to set up your account with your CWL password.

- After the setup, you will see both your OneDrive – Personal folder and OneDrive – The University of British Columbia folder both synced to your computer.
For additional details and video instructions, visit the Microsoft OneDrive Support page.
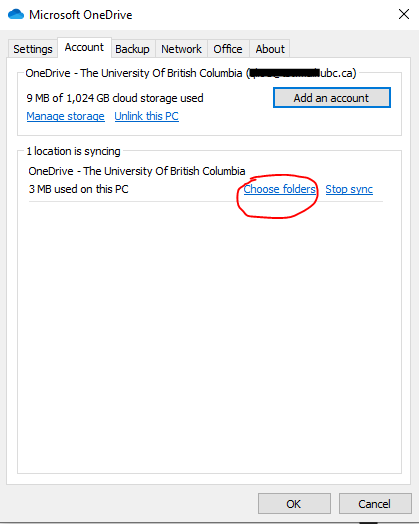
How to select which MS OneDrive folders to your Windows Computer?
If you don't want to synchronize all your folders in MS OneDrive to your computer, you can specify which folders you would like to synchronize.
- Open the Sync your OneDrive files to this PC dialog box using one of these methods:
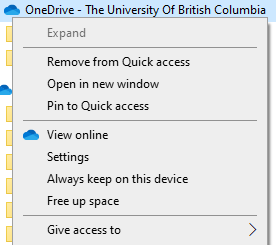
- In File Explorer, right-click a folder in OneDrive, and select Settings then click on Choose folders.
- OR
- Right-click theblue OneDrive – The University British Columbia icon in the notification area on your taskbar, select Settings, select the Account tab, and select Choose folders.

- In File Explorer, right-click a folder in OneDrive, and select Settings then click on Choose folders.
- In the Sync your OneDrive files to this PC dialog box, uncheck any folders you don't want to synchronize to your computer and select OK.
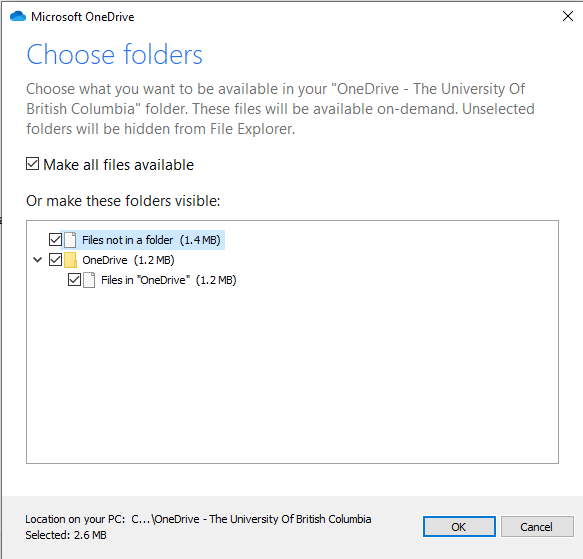
Note:
- If you uncheck a folder you are syncing to your computer, the folder will be removed from your computer. The folder and its contents will still be available online.
- The sync settings you choose are unique to each computer unless you're syncing everything everywhere.
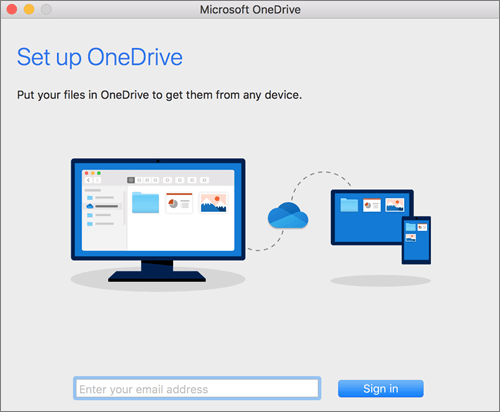
How to synchronize MS OneDrive to your Mac computer?
Download OneDrive for Mac client here.
Start OneDrive Setup. Follow the instructions listed in one of
Method 1: If you have no accounts signed into OneDrive
- Launch a spotlight search and search for OneDrive, select ENTER to launch application.
- Enter your firstname.lastname@ubc.ca email address and select Sign in to set up your account.
Method 2: If you already have a personal account signed into OneDrive
- Add your UBC OneDrive account in OneDrive Preferences.
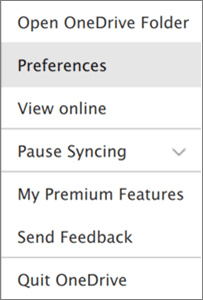
- Click on OneDrive cloud icon from your top Menu bar, click the three dots to open the menu, and select Preferences.
- Click the Account tab and in the new Add Account group, select Add a Business Account to start OneDrive Setup.
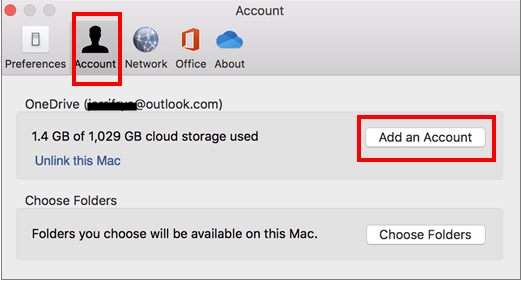
- Enter your firstname.lastname@ubc.ca and click Sign in.
Refer to Microsoft link for more details: https://support.office.com/en-us/article/sync-files-with-onedrive-on-mac-os-x-d11b9f29-00bb-4172-be39-997da46f913f
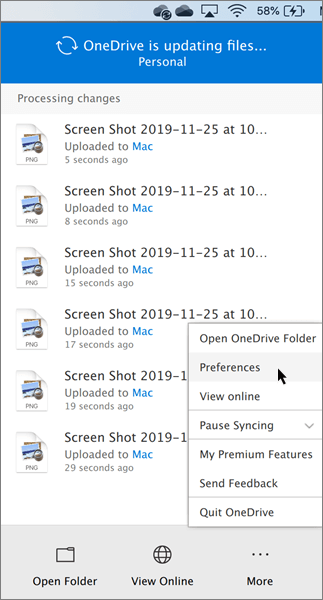
How to select MS OneDrive folders to sync on your Mac computer?
If you don't want to synchronize all of your folders in OneDrive to your computer, you can specify which folders you'd like to sync.
- Click the cloud icon from your desktop toolbar to reveal the OneDrive dropdown menu.

- Select More > Preferences.
- Select the Account tab and select Choose folders.
- In theSync files from your OneDrivedialog box, uncheck any folders you don't want to sync to your computer and select OK
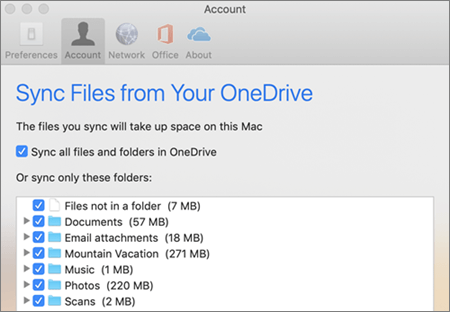
- Click OK to save your changes.
Note:
- If you uncheck a folder you are syncing to your computer, the folder will be removed from your computer. The folder and its contents will still be available online.
- The sync settings you choose are unique to each computer unless you're syncing everything everywhere.
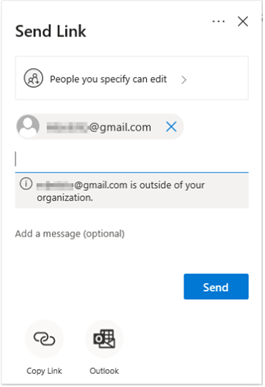
Who can I share files/documents with? And how?
You may share files/documents with UBC internal staff and external users. If you use the option to share with specific people, it will ask you for an email address.
External UBC Users (Non-UBC Email Addresses)
If it is an external address (non-UBC email address), an email will be sent to the external user containing a link to the files/documents.
Once the user clicks on the link, it will take them to the MS OneDrive site. They will be prompted to validate with a code that was provided in their email. Once they enter this code, they can access the shared file. The user will not need the suite of Office 365 applications or a guest account.
Here are the functionalities that external UBC users have with MS OneDrive.
- Access the shared file with their personal OneDrive account as well.
- Accept sharing invitations using the same account that the invitations were sent to.
- The recipient receives the following email:
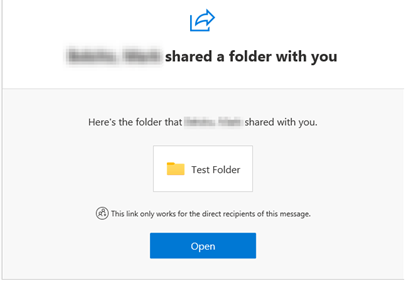
- When they visit the link, they will need to click the Send Code button.
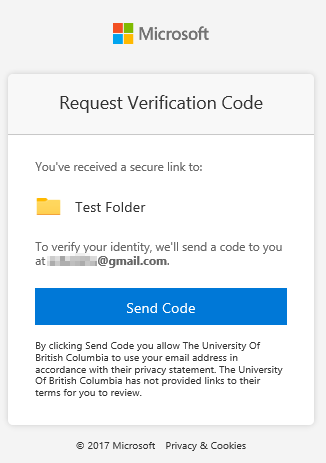
- This will send a code to them to authenticate:
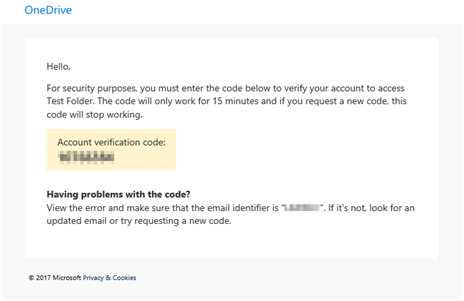
- The user will then enter the code and clicking Verify.

- If successful, they will get access to the shared OneDrive folder:

How do I share files and stop sharing files when I am the file owner?
Follow these step-by-step instructions on the Microsoft OneDrive support page.
How do I retrieve a deleted document?
- Go to the MS OneDrive website: https://onedrive.live.com/
- Sign in with your firstname.lastname@ubc.ca email address and CWL password.
- In the navigation pane, select Recycle Bin.

- Select the files/folders you wish to restore by pointing to each item and click the circle check box that appears, then click Restore.
For more details and video instructions, visit the Microsoft OneDrive Support page on how to restore and delete files/folders.
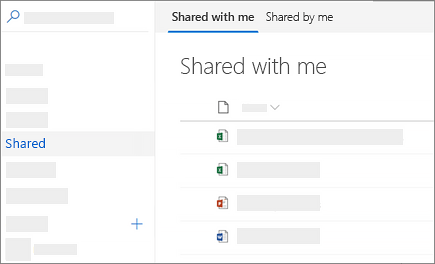
How do I access files that have been shared with me?
When a file is shared to you, you should have received an email invitation which contains a link to access the shared file. If you do not receive a link, you can log into OneDrive and on the left navigation menu, click on Shared with me. You should be able to locate all the files that have been shared with you.
For additional instructions, please visit the Microsoft OneDrive support page on this topic.