Microsoft Planner FAQs

General | Accessing MS Planner | Using MS Planner | Privacy & Security |


General

Microsoft (MS) Planner is a task management tool for groups to collaboratively plan, assign, and track tasks. Planner is offered by Microsoft as part of their M365 suite. MS Planner enables users to efficiently manage deliverables using lists, Kanban style boards, and charts directly through MS Teams.

Accessing MS Planner

MS Planner is available for all active Students, Faculty, and Staff.

Students:

Active UBC student who meet the criteria below are eligible for the full functionalities of MS Planner:

  • An active Enterprise Active Directory (.stu) account
  • An active UBC Student Email mailbox with a cwl@student.ubc.ca email address

To request a Student Email mailbox and access to MS Planner, sign up using CWL MyAccount page. Please keep in mind that it may take up to 48 hours for you to gain full access.

Note:

If you wish to anonymize your CWL account, you may do so by selecting the "Rename CWL" on the CWL MyAccount page once a year. By accepting the Terms of Service, you affirm consent to use your CWL name to create your UBC Student Email mailbox. If you would like to rename your CWL more than once a year, please contact the UBC IT Service Centre.

Faculty/Staff:

Active UBC faculty or staff who meet all the criteria below can gain full functionalities of MS Planner:

  • An active Enterprise Active Directory (EAD) account
  • An active Faculty and Staff (FASmail) mailbox
  • A firstname.lastname@ubc.ca email alias that is associated with your FASmail mailbox

Note:

The firstname.lastname@ubc.ca email alias does not have to be set as your primary email address.

The service will automatically be provisioned for you once you have met all the above criteria. It may take up to 48 hours to synchronize your account information before it can be used to access MS Planner.

If you have a FASmail account, but do not have a firstname.lastname@ubc.ca email alias, please contact your department directory admin.

If you do not have FASmail account, please contact your local IT Helpdesk or UBC IT Service Centre.

Teaching Assistants and Research Assistants:

Teaching Assistants and Research Assistants with active UBC employee statuses are eligible to utilize MS Planner if they meet the above-mentioned list of criteria for active Students, Faculty, and Staff.

Guests:

Guests can collaborate through MS Teams. However, they do not have full M365 access through UBC's M365 tenant. For more information, see Microsoft's guest access in Planner guide.

Yes, Planner can be accessed on both Android and iOS devices via the downloadable Planner app. Please review Information Security Standard U7: Securing Computing and Mobile Storage Devices/Media to learn about the requirements that must be complied with when storing content on your mobile devices.

Please refer to the "Who can use MS Planner" section to verify your eligibility and follow any prerequisite steps. Once you have access, follow steps below to login via MS Teams:

  1. Sign into MS Teams and download the desktop/client version
  2. Follow the instructions under "How do I login to MS Teams via web/PC/Mac?" on the MS Teams FAQ page.
  3. Open MS Team and check to see if you have the "Tasks by Planner and To Do" tab


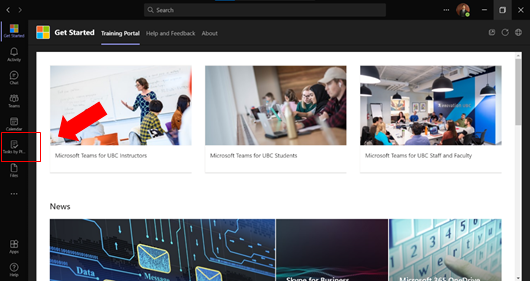
  4. If you already have the tab, skip to step 5. If not, click on the ellipses on the left toolbar.


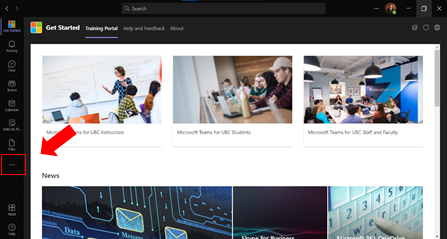
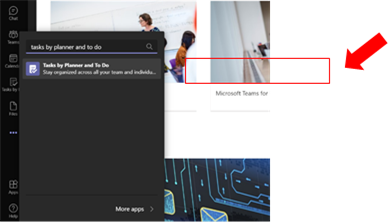
  5. Search for "Tasks by Planner and To Do." Click on it when it appears. This will give you access to the Planner tab.
    Graphical user interface, application

  6. Next, to add a Planner tab to a team channel, click into the channel and select the + (add a tab) button at the top of the page.
    Graphical user interface, text, application

  7. Search for "Tasks by Planner and To Do," and click on it when it appears.


Yes, in order for Planner to appear, you may have to log out of MS Teams and then log back in.

No, there is no client version of MS Planner that can be downloaded onto your desktop. Planner can only be accessed via the desktop/laptop client version of MS Teams.

The MS Planner mobile app will have regular updates will be provided by Microsoft. The schedule of updates will be determined by Microsoft according to their roadmap.

Using MS Planner

Using Planner within Teams improves user experience and engagement with your colleagues. For a quick introduction to using Planner in Microsoft Teams, follow this guide.

A plan within Planner simply refers to the overall project, deliverable, or goal that each of your tasks belongs to. You must create a plan to begin managing tasks with Planner.

If you already have a Teams site, you will need to determine if you are okay if all members of that team have access to the Planner plan. If you would prefer to have an isolated Planner plan with its own membership then you will need to create a new Teams site for this purpose. You can request a new Teams site in the “Get Started” portal (top left icon) of the Teams app.

Note: Membership of the plan is tied to the Teams site. If you remove users in Planner, it will also affect their Teams site membership. We recommend that you use Planner within Teams to maintain team membership.

The membership between MS Planner and Teams is shared. The members of a Teams site will be the same members within Planner. If you choose to use Planner outside of Teams, ensure you avoid removing members as it will affect the associated Teams site membership.

Managing tasks in Planner consist of many actions, such as adding tasks to a plan, assigning tasks and due dates, commenting on tasks, adding attachments to a task, and etc.

For a quick introduction on how to manage tasks in Planner, read Microsoft's guide on how to manage tasks in Planner.

Yes, you can add files to a task so that all relevant team members can access them. To do so, follow these instructions on how to attach files, photos, or links to a task.

Every plan has an associated dashboard that visualizes your progress to-date. To access that dashboard, simply open Planner, click on a plan, and choose the "Charts" tab at the top of the window.

For more information on how to make the most of your dashboards, read this article from Microsoft.

You must be an owner or given access to add the Planner tab within a Teams site.

For more information on how to use MS Planner, please visit the Microsoft Planner website or watch these Microsoft Planner training videos.

Privacy & Security

A Privacy Impact Assessment (PIA) for MS Planner has been approved by UBC Safety & Risk Services. Please refer to this link for more information on Privacy Impact Assessment (PIA). All data created and uploaded to MS Planner via Teams will be stored in your MS Teams site. MS Teams is stored securely and hosted in Canada.

For best practices and to add an additional level of security, you should also never include personal information in task titles or details. For more information, please read the M365 Terms of Service.

Note: UBC students who sign up for a UBC Student Email mailbox will have their CWL ID and email address (cwl@student.ubc.ca) stored outside of Canada and shared with other users that are on the UBC M365 tenant. Only the account information is stored outside of Canada. Mailbox contents are hosted in Canada. You are required to opt-in and consent to the Terms of Service using the CWL MyAccount page.