Install a CLI client | Install a GUI client
Install a CLI client in GNU/Linux that will connect to UBC’s MYVPN service
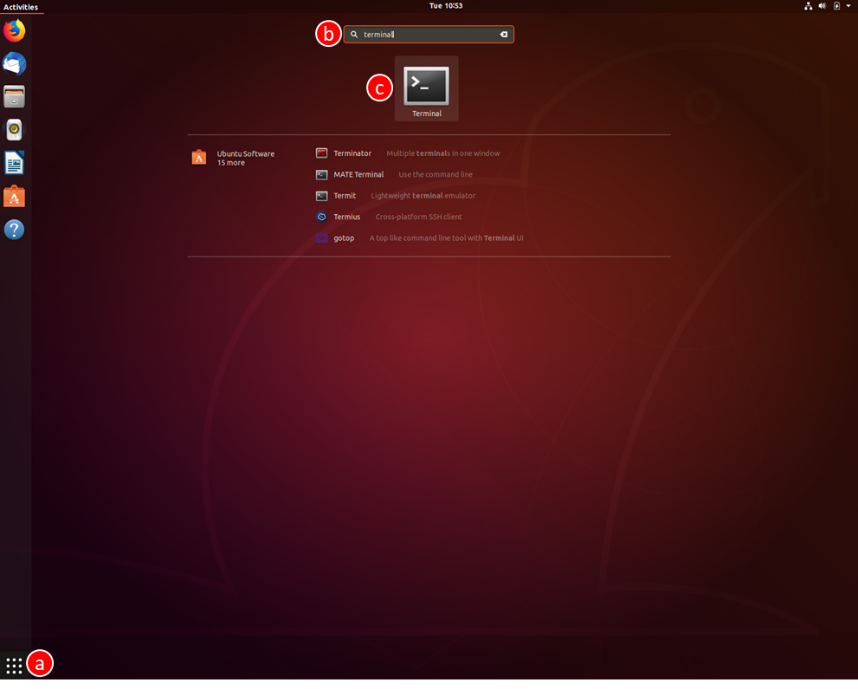
- Navigate to the Terminal
- Click on Show Applications in the bottom left hand corner
- Type Terminal in the search bar
- Click on the Terminal application

- Install the OpenConnect VPN client using your distributions package manager
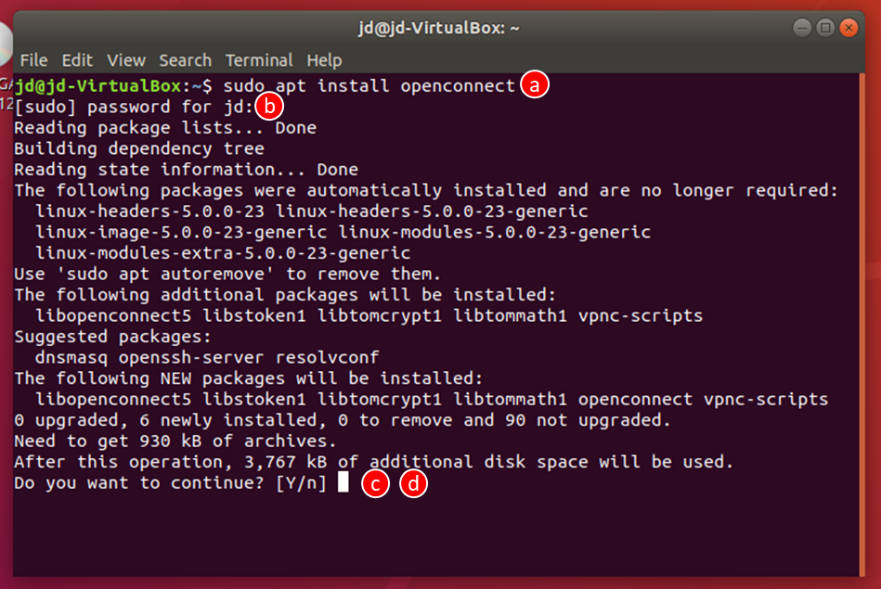
- In the Terminal window:
- For Debian/Ubuntu, type: sudo apt install openconnect
- For Redhat CENTOS Fedora, type: sudo yum install openconnect
- Enter your password (if required) and press enter
- Type y and press enter to accept changes
- The OpenConnect application will install
- In the Terminal window:
- Connect to myVPN using the OpenConnect VPN client
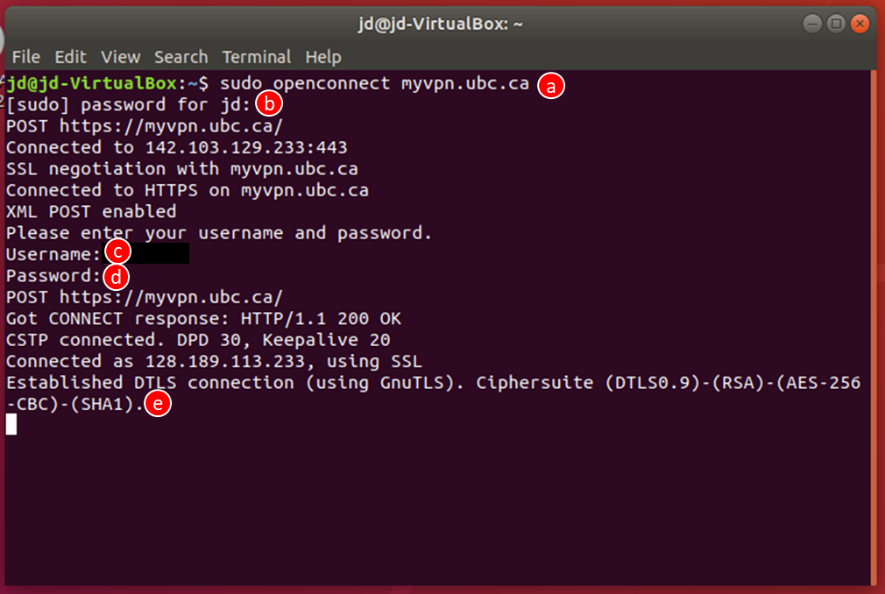
- In the Terminal window, type: sudo openconnect myvpn.ubc.ca
- If required, enter your password and press enter
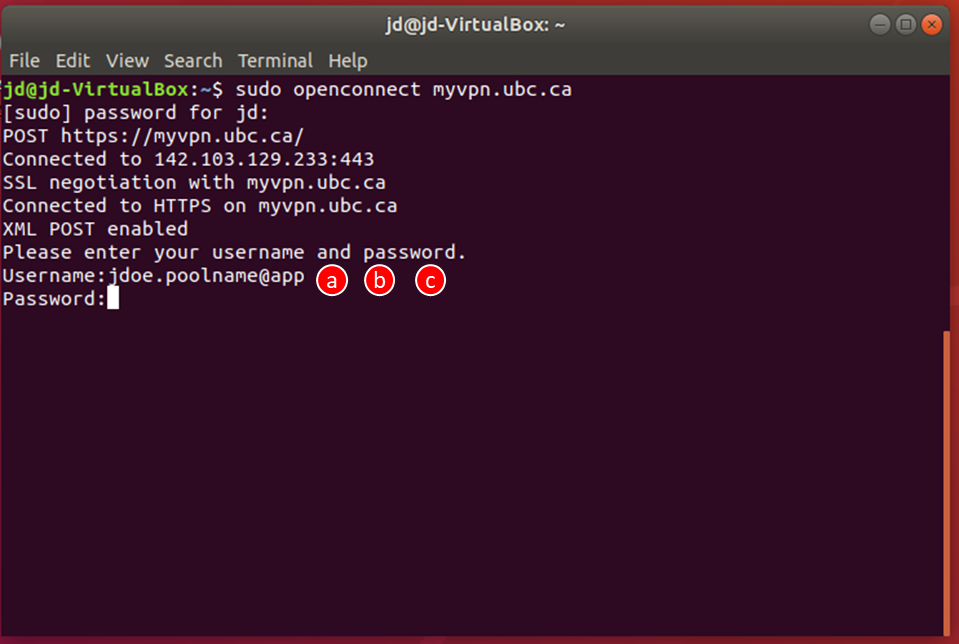
- Enter your CWL username and press enter
- Enter your password and press enter
- myVPN should now be connected
- Remain Connected to myVPN
- The terminal window must remain open after connecting to myVPN. Closing the terminal or using ctrl-c will disconnect the VPN.
- More connection options
- To use a VPN pool add .poolname at the end of your CWL (e.g. jdoe.poolname)
- To use MFA add @app or @phone to the end of your CWL/pool (e.g. jdoe@app or jdoe@phone)
- To use a VPN pool and MFA, add .poolname at the end of your CWL, followed by your preferred method of MFA (e.g. jdoe.poolname@app)
Install a GUI client in GNU/Linux that will connect to UBC’s MYVPN service
- Navigate to the Terminal
- Click on Show Applications in the bottom left hand corner
- Type Terminal in the search bar
- Click on the Terminal application
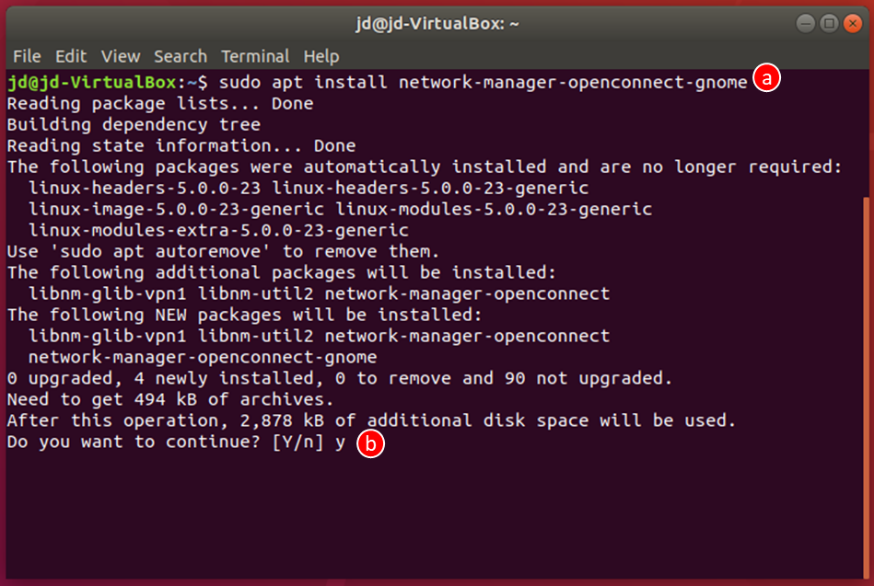
- Install the OpenConnect GUI VPN client using your distributions package manager
- In the Terminal window:
- For Debian/Ubuntu, type: sudo apt install network-manager-openconnect-gnome
- For Redhat CENTOS Fedora, type: sudo yum install network-manager-openconnect-gnome
- Type y and press enter to accept changes
- The OpenConnect GUI VPN client will install
- In the Terminal window:
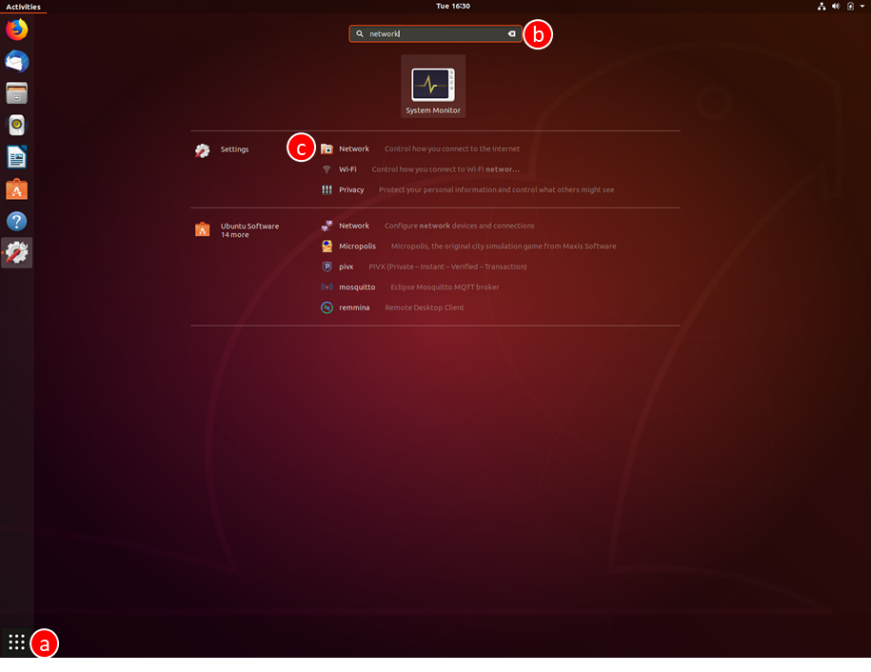
- Open gnome3 settings and add the VPN
- Click on Show Applications in the bottom left hand corner
- Type Network in the search bar
- Click on the Network application under settings
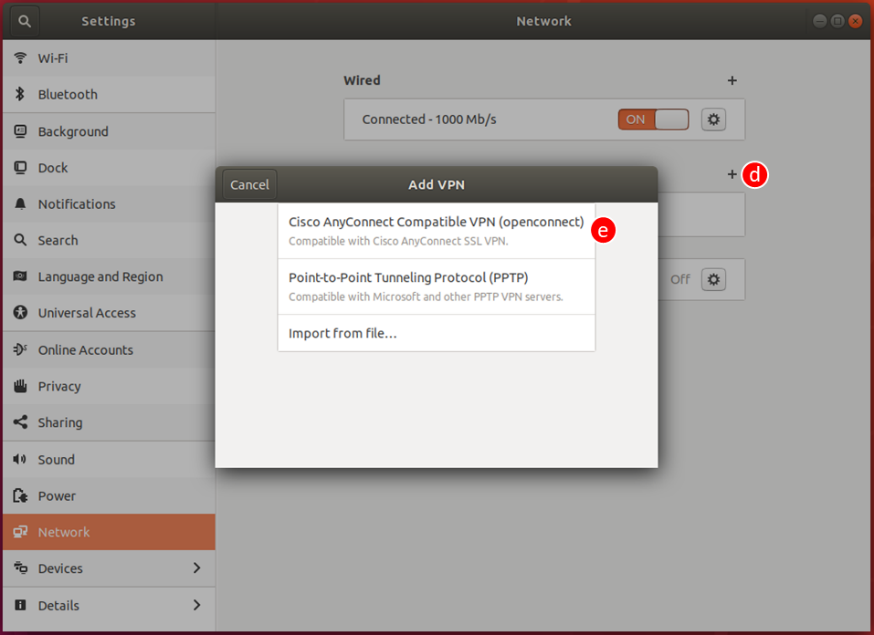
- Click on the + button to the right of VPN in the bottom left hand corner
- Click on Cisco Secure Client
- Rename the VPN to a recognisable name – we chose “UBC myVPN”
- Under Gateway, type: myvpn.ubc.ca
- Click add
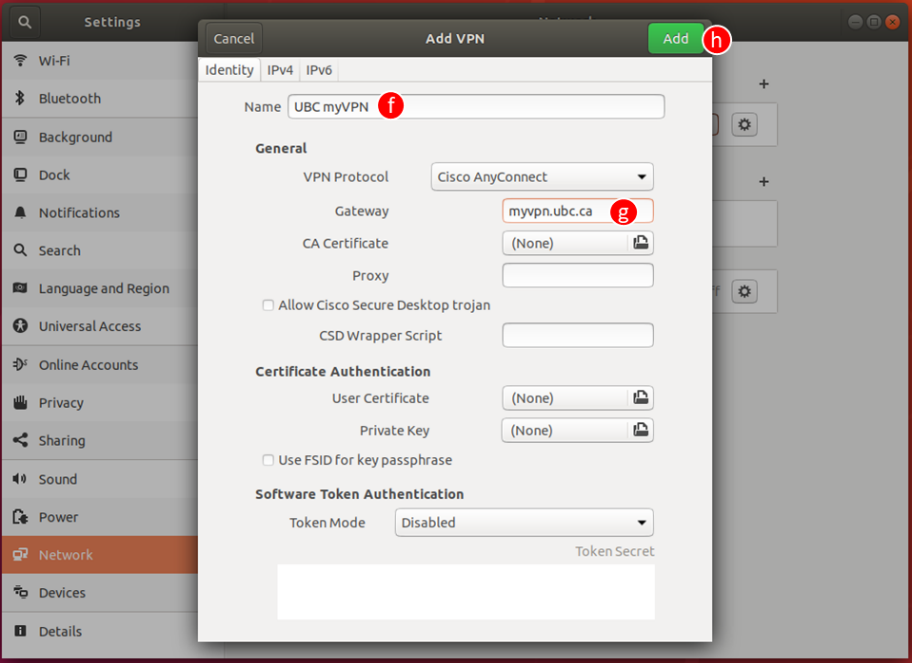
- myVPN has now been added to the gnome3 client (OpenConnect GUI VPN client)
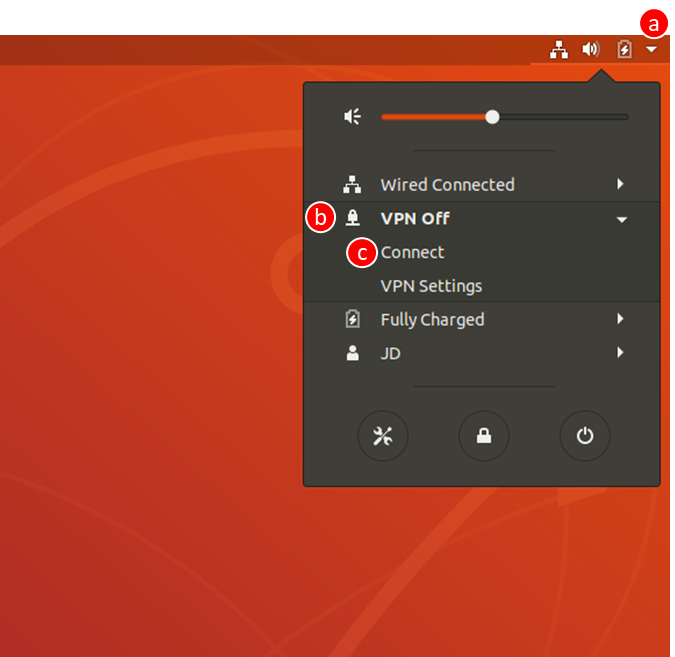
- Connect to myVPN
- Click on the connection logo (
 ) in the top right hand corner of the home screen (system tray)
 - Click on the VPN drop down
- Click Connect
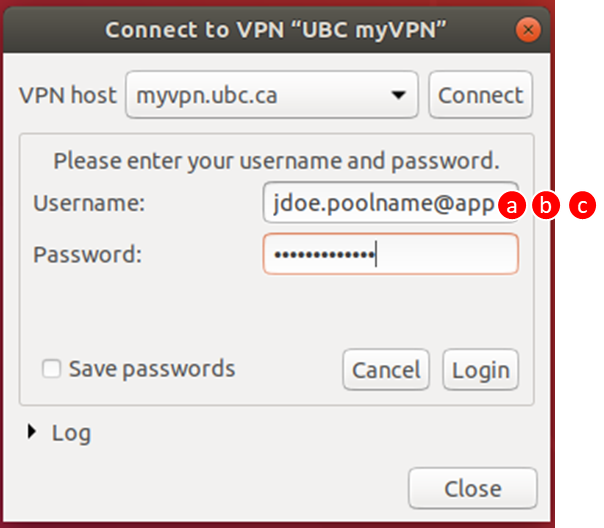
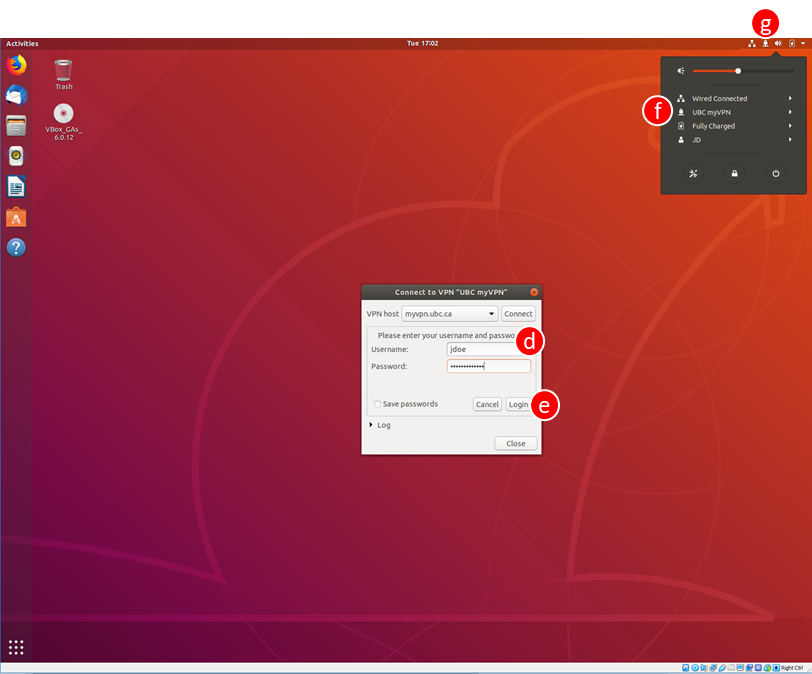
- Enter your CWL username and password
- Click Login
- Click on the connection logo () in the top right hand corner of the home screen (system tray) and you should now see that you are connected to myVPN
- You may also see a new connection icon in your system tray, in the top right hand corner of your screen. The icon can vary depending on your distribution and version.
- Click on the connection logo (
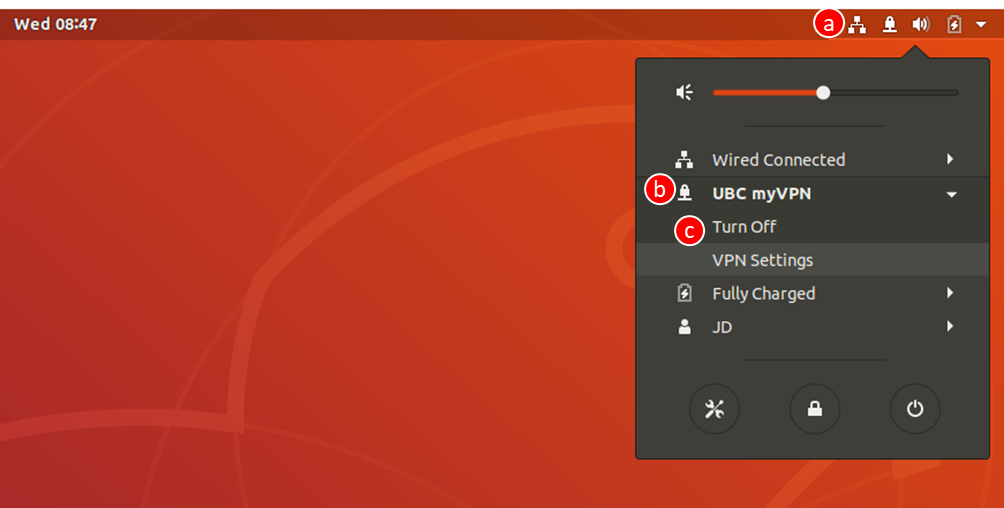
- Disconnect myVPN
- Click on the connection logo () in the top right hand corner of the home screen (system tray)
- Click on the VPN drop down
- Click Turn Off
- Click on the connection logo (
- More connection options
- To use a VPN pool add .poolname at the end of your CWL (e.g. jdoe.poolname) when signing in
- To use MFA add @app or @phone to the end of your CWL/pool (e.g. jdoe@app or jdoe@phone)
- To use a VPN pool and MFA, add .poolname at the end of your CWL, followed by your preferred method of MFA (e.g. jdoe.poolname@app)