This document explains how to set up Mail in Windows 10 for UBC FASmail using Secure IMAP (IMAPS).
Important: For the security of UBC's FASmail service, the legacy Secure IMAP (IMAPS) protocol is no longer enabled by default. Users who require access to FASmail over IMAPS may submit a request to the UBC IT Service Centre (identity verification will be required).
Please note that Windows Mail does not support the full suite of services that Outlook provides, such as Calendaring, Task Lists, Notes, and etc. Only Microsoft Outlook, Entourage and MacMail applications support these features. In addition, if you are currently using Windows Mail to access email from multiple accounts, please contact your Departmental Network Administrator for assistance. The instructions below are for setting up Windows Mail for FASmail only.
- Open Windows Mail: Go to Start Mail.
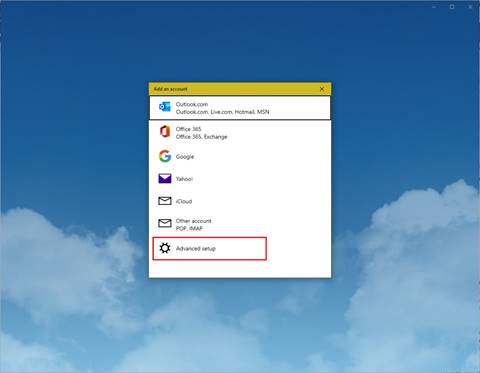
- If this is your first time using Windows Mail, an email account set up wizard should appear. Select Advanced Setup and proceed to step 5
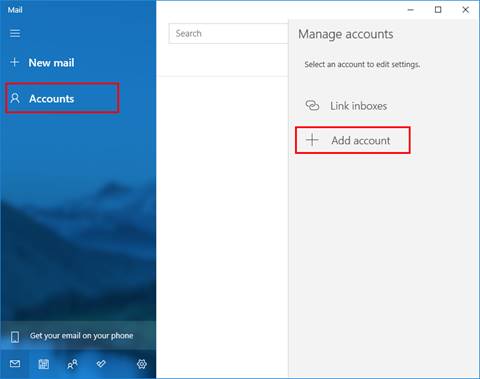
- If you have used Windows Mail before, click on Accounts on the left-hand side, then click Add account on the right-hand side
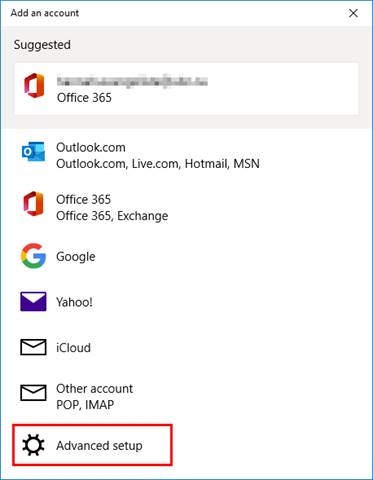
- Click on Advanced setup
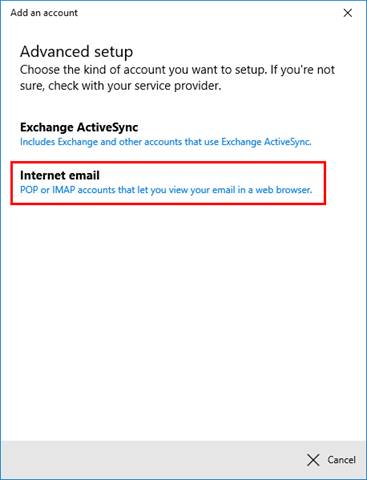
- Select Internet email
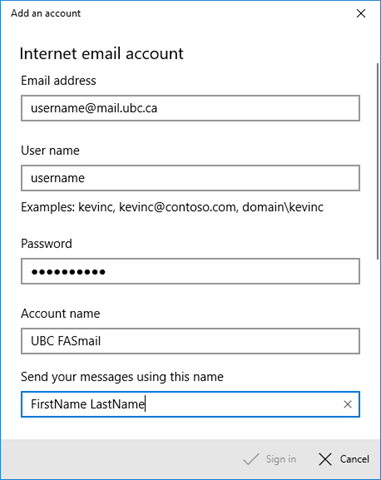
- Fill in the requested information as follows:
- Email address: your FASmail email address
- User name: your CWLusername
- Password: your CWL password
- Account Name: UBC FASmail
- Send your messages using this name: your preferred display name
- Incoming email server: imap.mail.ubc.ca
- Account type: IMAP
- Outgoing (SMTP) email server: smtp.mail.ubc.ca
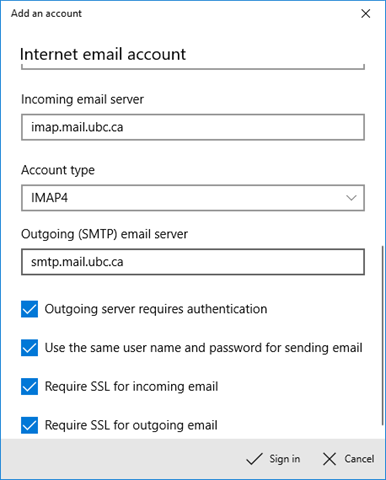
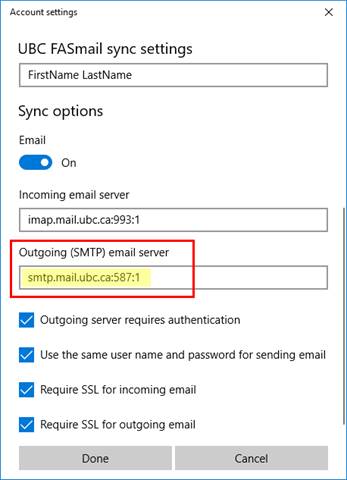
Ensure the following options are checked/enabled:
- Outgoing server requires authentication
- Use the same username and password for sending email
- Require SSL for incoming email
- Require SSL for ougoing email
- Click on Sign In
- Click Done
- Go back to the Manage accounts screen, and click on the UBC FASmail account you just added
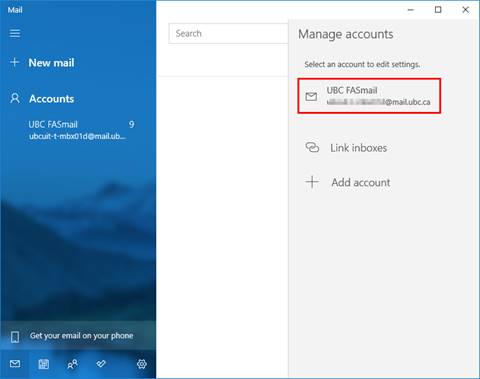
- Click on Change mailbox sync settings

- Scroll down and click on Advanced mailbox settings
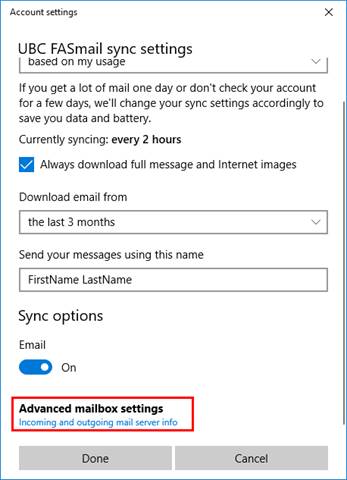
- Go to the Outgoing (SMTP) email server section, and change it to the following:
- smtp.mail.ubc.ca:587:1
- smtp.mail.ubc.ca:587:1
- Click Done, then click Save
Windows Mail is now set up for use with FASmail using Secure IMAP.