Note: In order to access TeamShare from a non-UBC internet connection, you must be connected to the myVPN service first.
Note: What you see on your screen may differ from the illustrations, depending on your version of Microsoft Windows.
If you are using a Microsoft Windows computer that is a member of the EAD domain, your IT administrator may have setup automatic mappings to TeamShare.
Microsoft Windows computers that are not members of the EAD domain will require the Home Drive to be mapped manually.
To map TeamShare, please follow these steps below:
- On Windows 10, open File Explorer. Select This PC from the left pane. Then, on the Computer tab, select Map network drive.

On Windows 7, in your Windows Start menu, right-click Computer and select Map Network Drive

- Select an available drive letter.

- In the Folder field enter \\files.ubc.ca\team\department ID
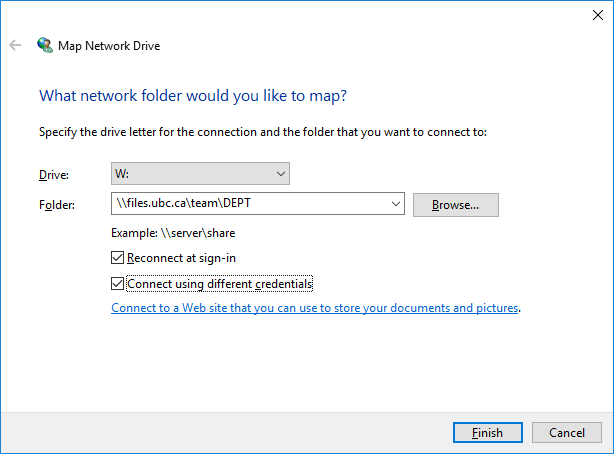
- Reconnect at logon - Select this option if you want this drive to be mapped each time you login to Windows. Note: you will not have off-campus access to this drive until you connect via myVPN.
- Click Connect using different credentials.
- Click Finish.
- On the Connect As or Windows Security window,

- Username: enter EAD\username to save your CWL name in the <username> field
- Password: enter your CWL password
- Click OK and Finish. The mapped network drive will open and show the contents of your department's TeamShare.

- Note: Now you can also access the share if you double-click the Computer icon