- Logging into MyDNS New
- Help and Search
- Important Information
- Creating DNS Records
- Adding a Host record
- Adding an External Host Record
- Adding an Alias record (CNAME)
- Adding a Mail Exchange (MX) record
- Creating DHCP ranges
- Adding a DHCP range
Logging in to myDNS
Important Information: After July 27, 2023 myDNS users will be forced to login via SSO.
To login via SSO:
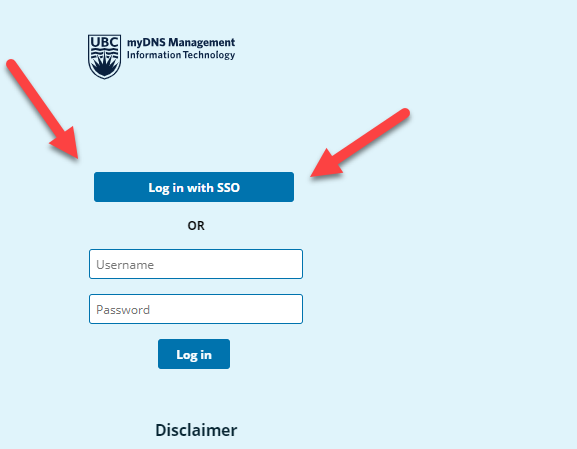
- Navigate to https://mydns.ubc.ca and click on the Log in with SSO button
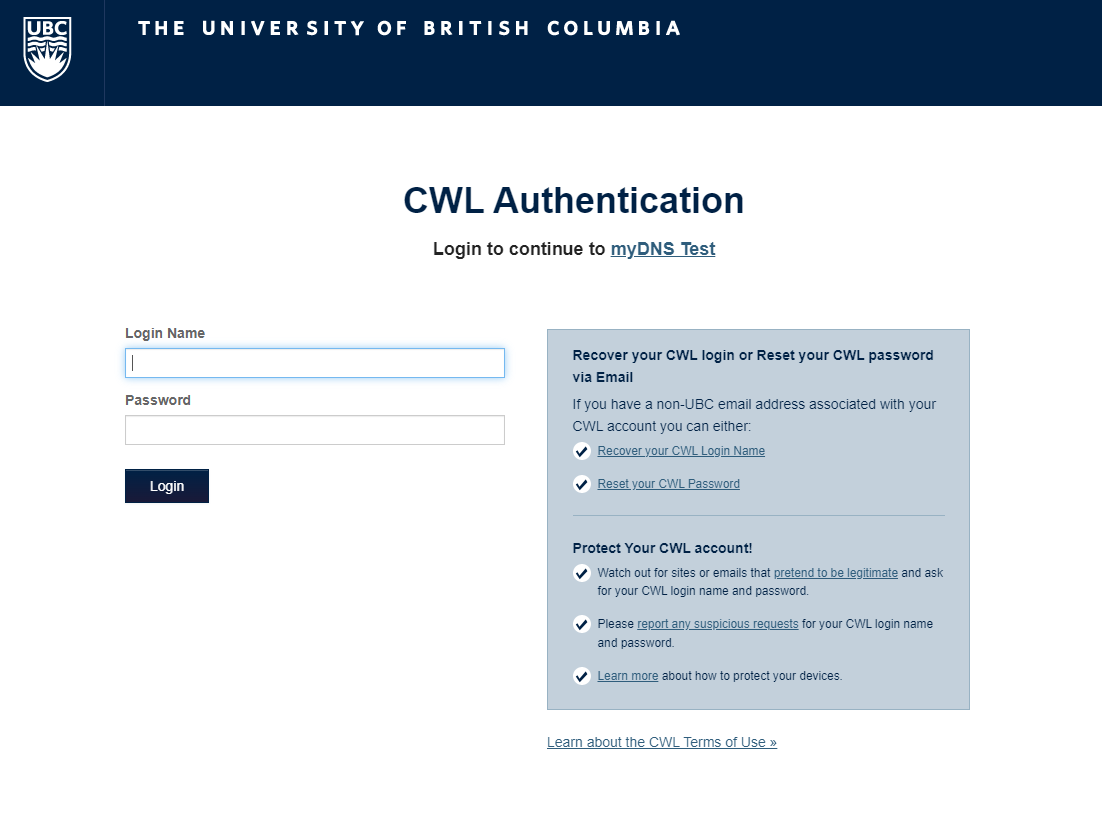
- On the next page, enter your CWL credentials and then click on the Login button.
Help and Search
Help can be located at the top right hand side of the myDNS management interface. Once inside the help area the administration guide and other related documentation can be downloaded for offline reading in PDF format by clicking on the PDF icon near the top right hand side of the help interface.
Important Information
- When creating host records, reverse (PTR) records are automatically created unless the 'Reverse Record' option is unchecked in the Host resource record creation form.
- Records created, modified or deleted are not immediately applied to the DNS servers. Queued changes are applied to the DNS server cluster every 10 minutes.
- DHCP ranges created, modified or deleted are not immediately applied to the DHCP servers. Queued changes are applied to the DNS server cluster every 10 minutes.
Creating DNS Records
Adding a Host record
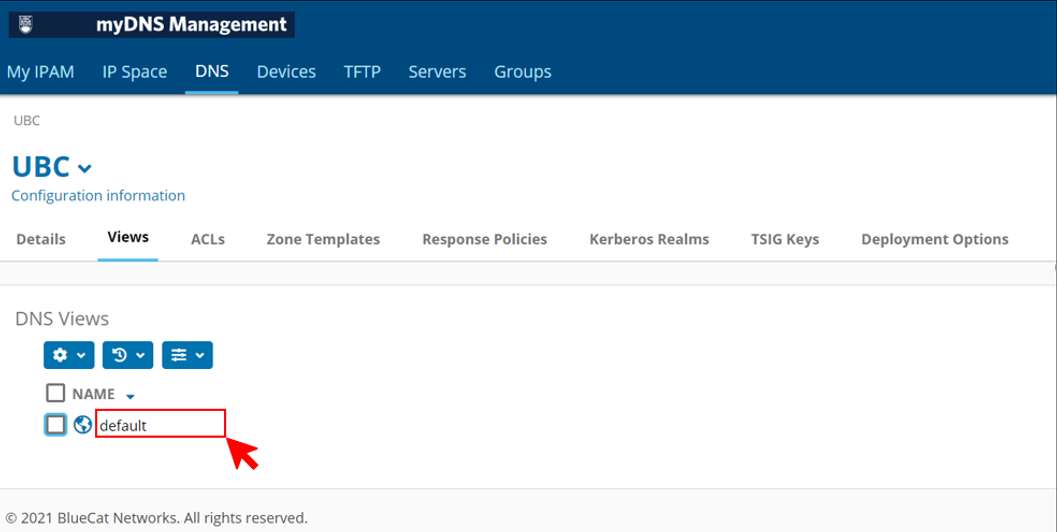
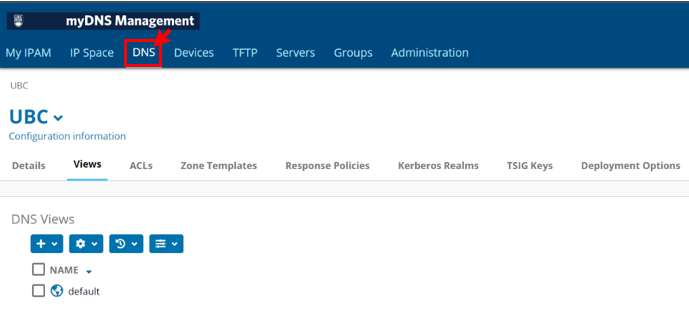
- Click the DNS tab. Tabs remember the page you last worked on, so click the DNS tab again to ensure you are working with the Configuration information page.
- In the DNS Views section, click the name of a DNS view.
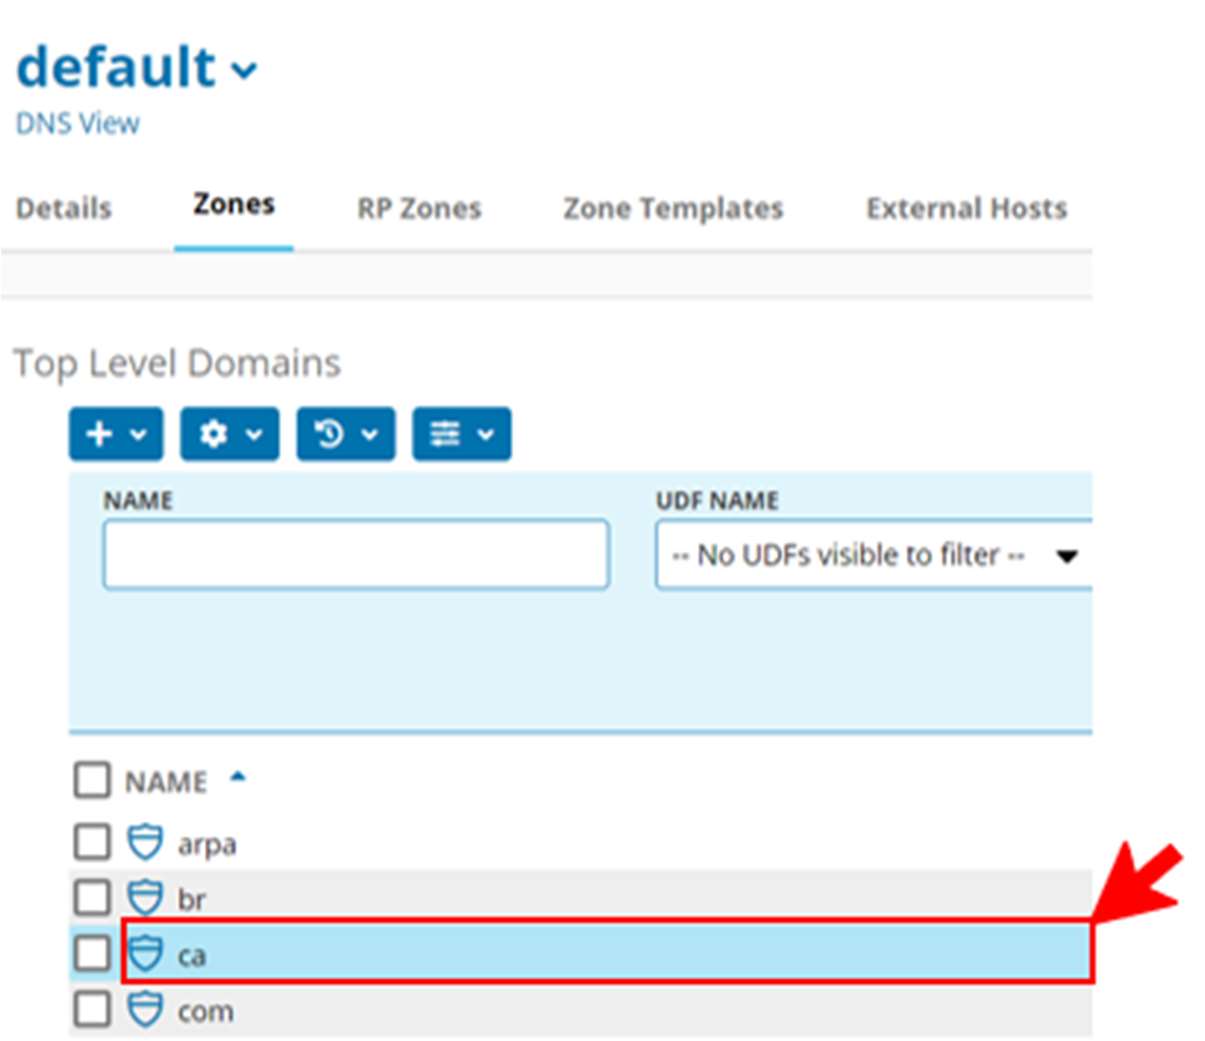
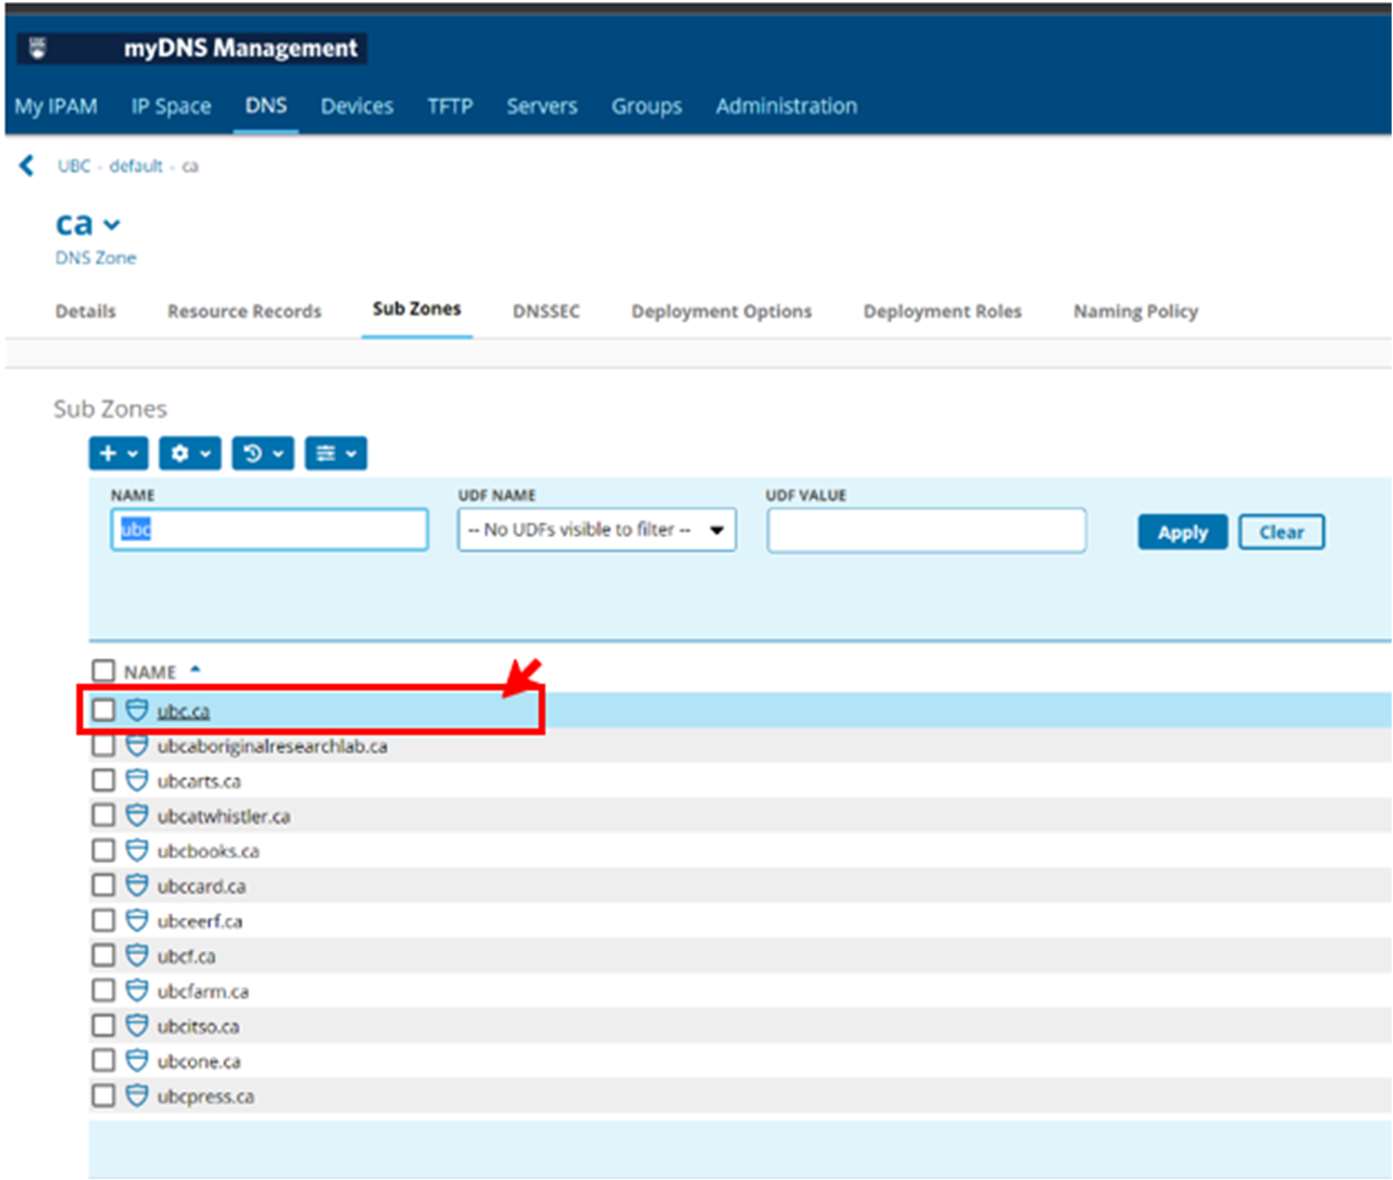
- In the Top Level Domains section, navigate to the top level domain, DNS zone, or DNS subzone where you want to add or edit a resource record. (Example: ca has been chosen)
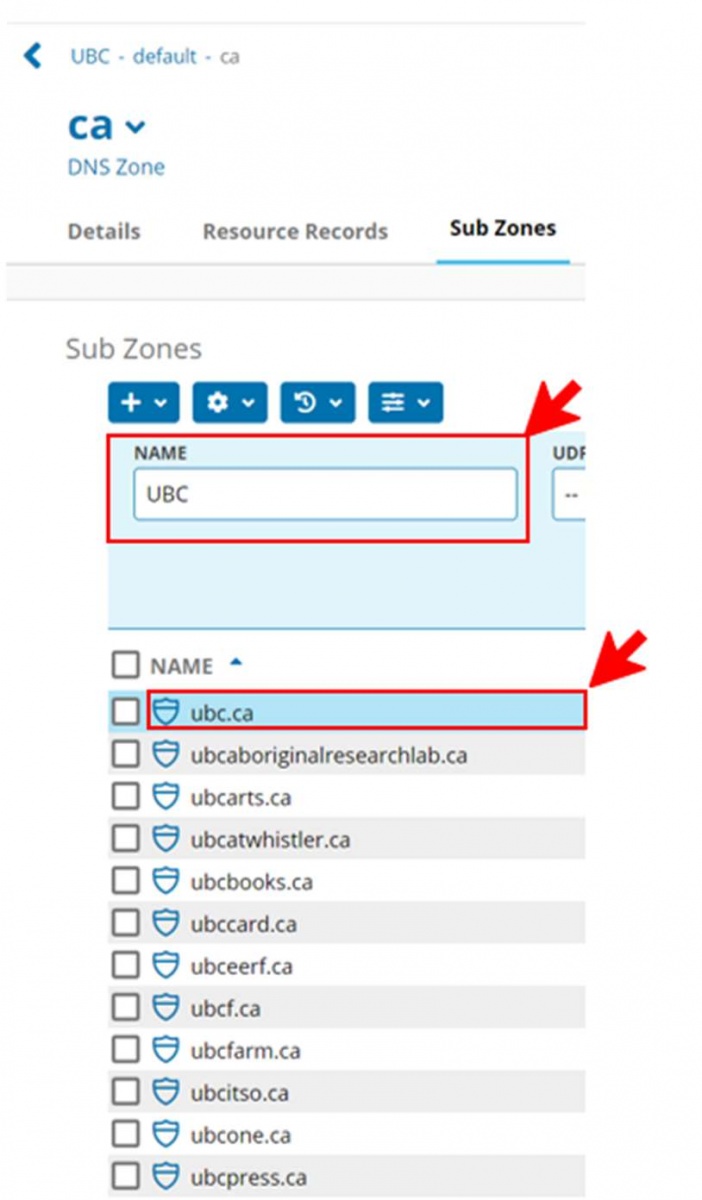
- In the "Sub-zones section" you can either scroll through the sub-zones to find, or do a search to filter -
(Example: "ubc" has been entered in the search box).
Once your sub-zone has been found click on it.
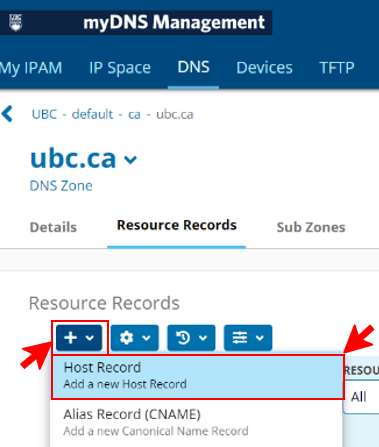
- You will be directed to the Resource Records section, click the drop down and choose Host Record [add a new host record]
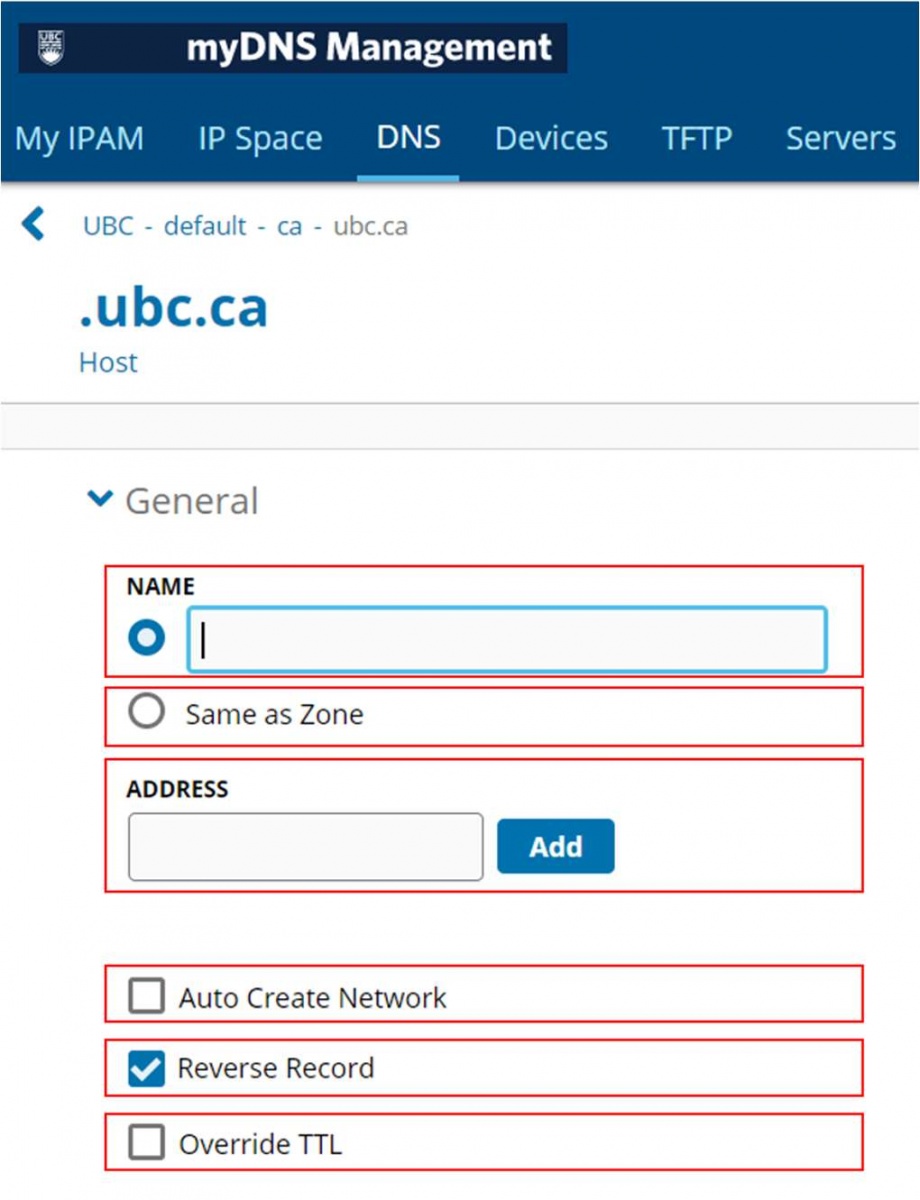
- Set the following parameters:
- Name - to specify a name for the host record, select this option and type a name.
- Same as Zone - to use the zone name for the name of the host record, select this option.
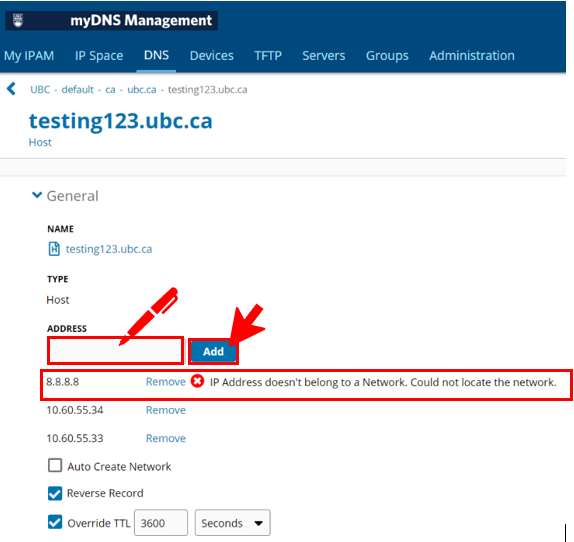
- Address - type an IPv4 or IPv6 address for the host record. To add multiple addresses, click Add after typing each address.
- Auto Create Network - select to automatically create a network if a network containing the IP address or addresses specified in the Address field does not already exist. For IPv6 addresses: if no network or block already exists, Proteus automatically creates a /64 network and a /64 parent block.
- Reverse Record - select to create a PTR record for the host record.
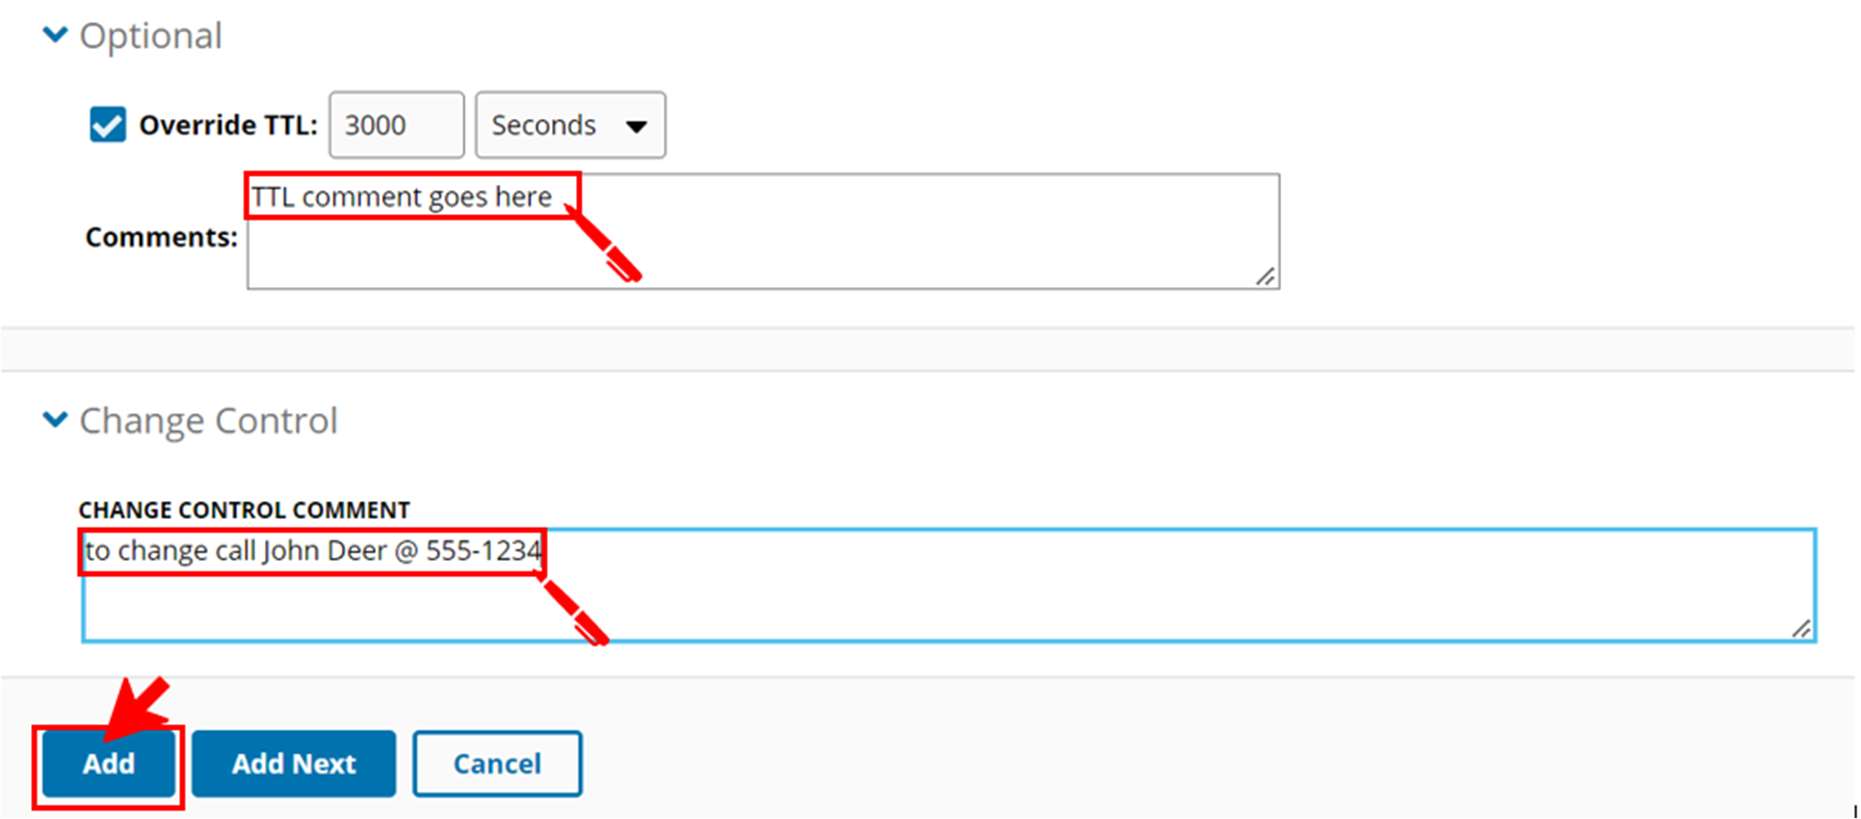
- Override TTL - to change the time-to-live value for the record, select this option and type a value in the field. Select a unit of time from the drop-down list.
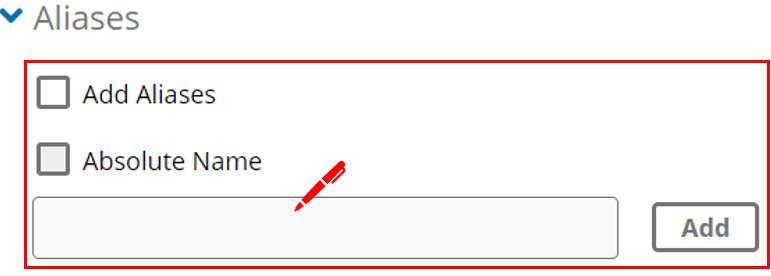
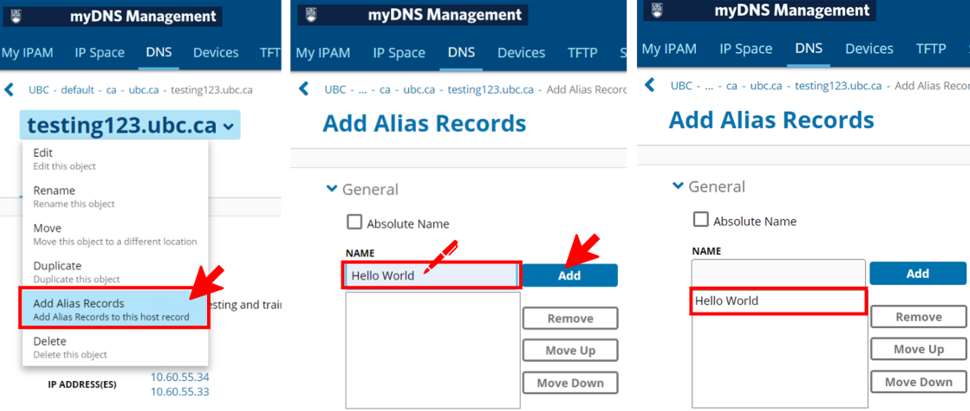
- When adding a host record, an Aliases section appears. To add one or more aliases, select Add Aliases.
- To specify a fully qualified domain name (FQDN) for the alias, select the Absolute Name checkbox, and then type the FQDN in the text field. To add another alias, click Add Another.
- To specify an alias name that includes the zone name, clear the Absolute Name checkbox, and then type the alias name in the text field. To add another alias, click Add Another.
- To remove an alias, click the Remove link beside the alias name.
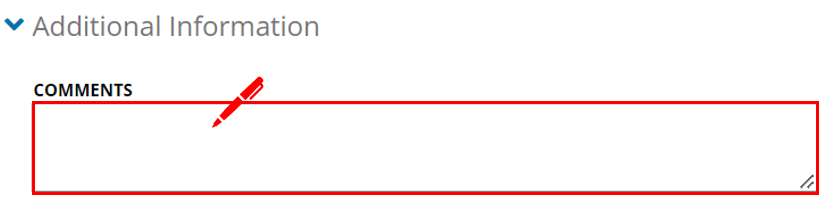
- In the Additional Information section, type notes describing the resource record in the Comments field.
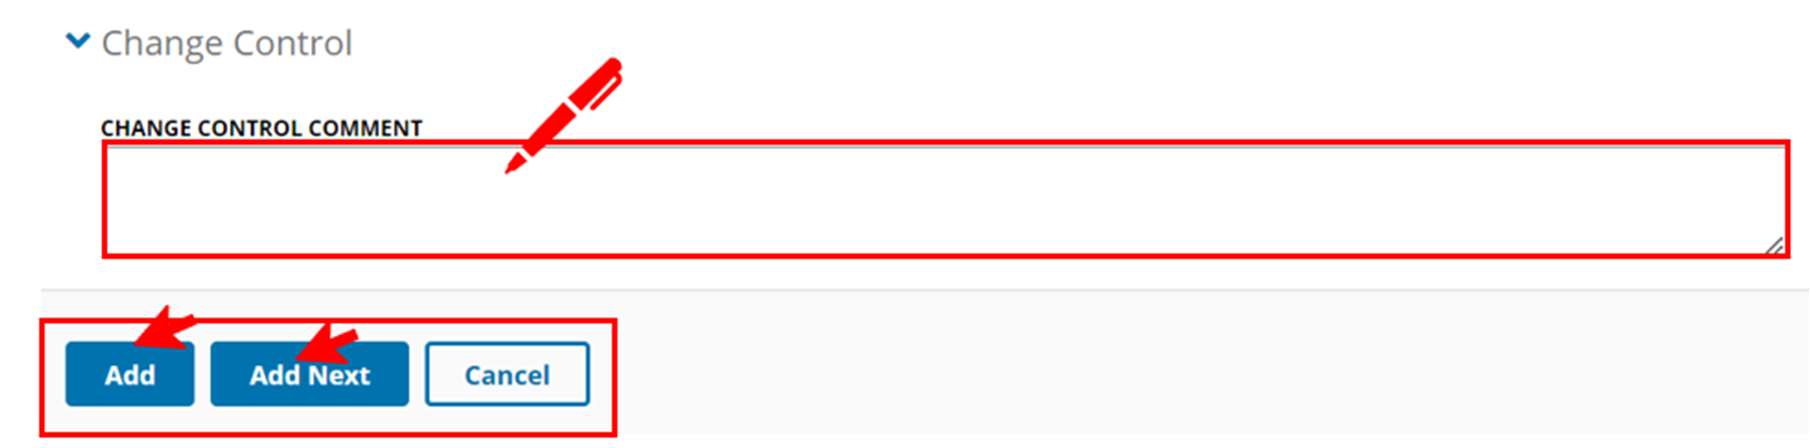
- In the Change Control section, add comments to describe the changes.
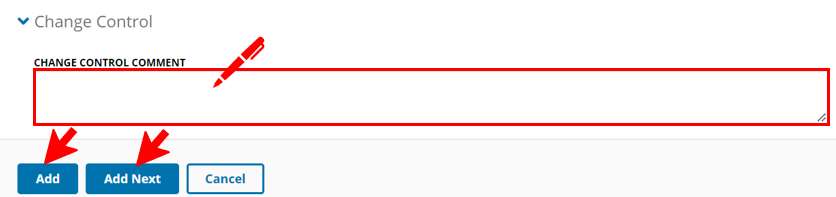
- Click Add or Add Next.
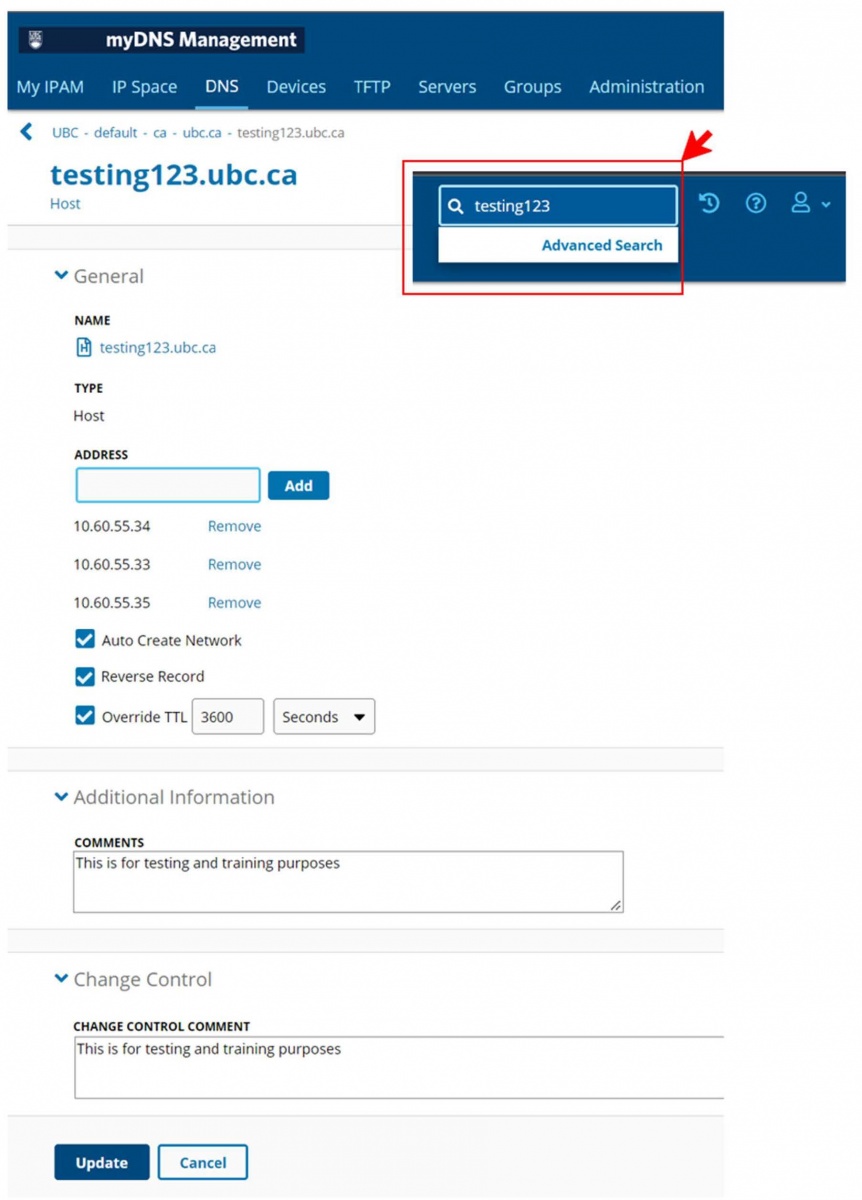
- Here is a sample of a newly created alias with 3 host addresses.
Easiest way to locate is to use the advanced search feature in the top right corner of the page.
Adding an External Host Record
If you need to create a Host Record in your subzone but you do not have permissions to the reverse IP space, then you may have to follow the instruction below to create the entry.
It is important to note that when you follow this procedure the PTR or 'pointer' record for the associated IP address will not be added or modified.
- First, navigate to the subzone which you need to add the entry for, in this example the subzone is "testing123.ubc.ca"
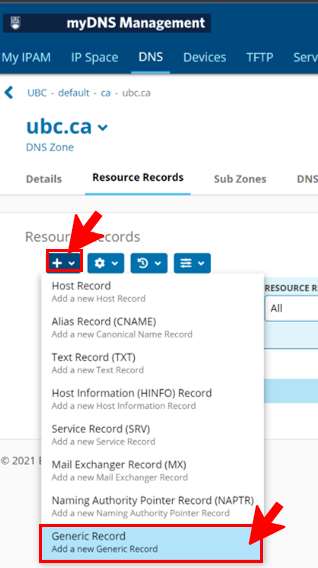
- Once you are in the correct subzone, select New then Generic Record as shown below.
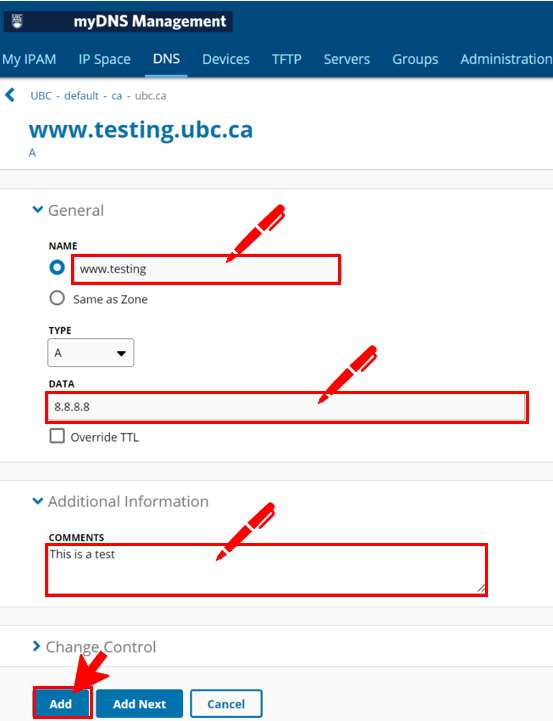
- Now you are at the Add Generic Record page. Enter the required information which is the Name of the record and the Data or IP address which the record should point to.
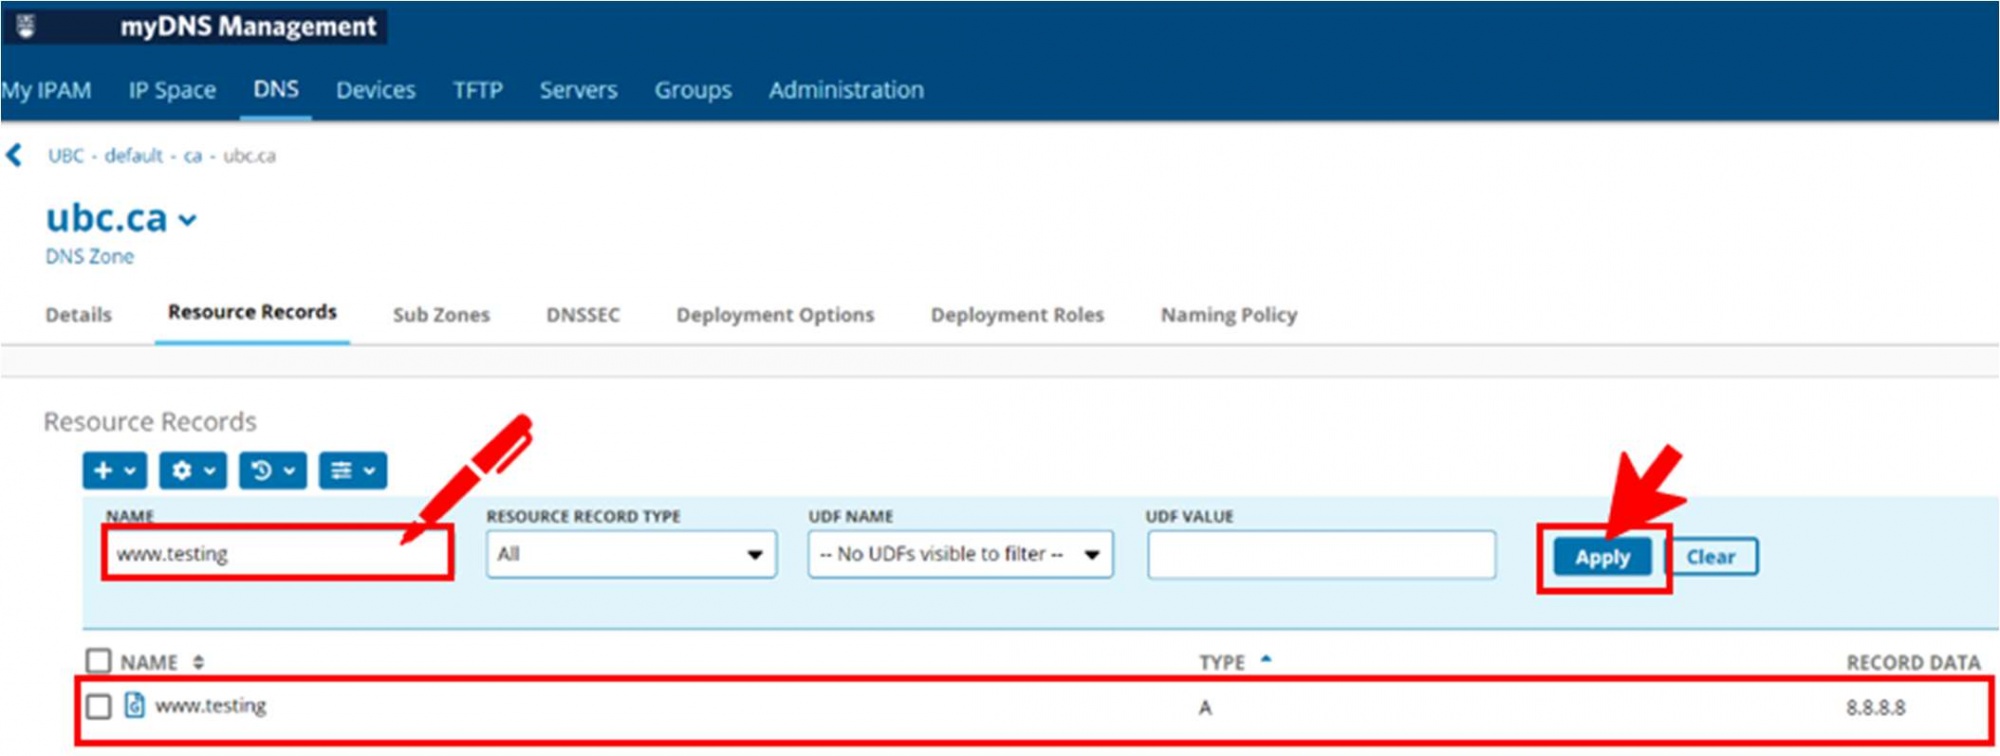
- Once you click Add, you will be returned to the Resource Records page for your subzone, where you can see the newly created A record for www pointing to 137.82.234.137:
You have successfully created an External Record which does not have an associated PTR record.
Adding an Alias record (CNAME)
- Click the DNS tab. Tabs remember the page you last worked on, so click the DNS tab again to ensure you are working with the Configuration information page.
- In the Resource Records section, click New and select Alias – add a CNAME record.
- Set the following parameters:
- Override TTL - to change the time-to-live value for the record, select this option and type a value in the field. Select a unit of time from the drop-down list.
- Change Control - add information about the change control here such as contact info and or rationale
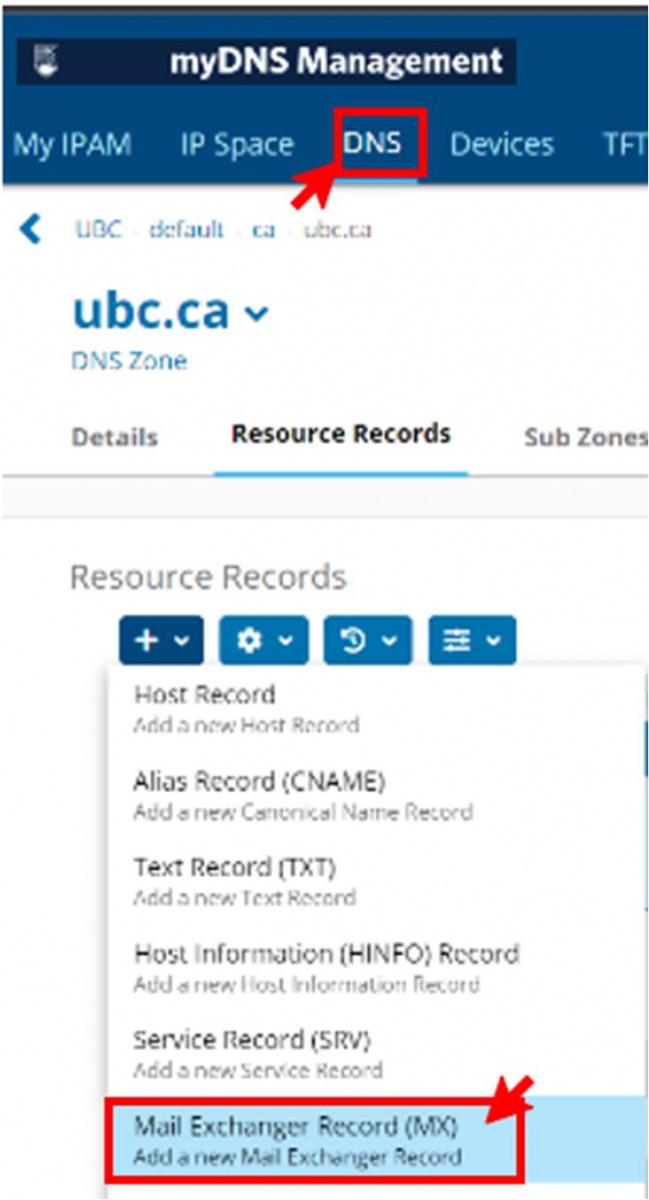
Adding a Mail Exchange (MX) record
- Click the DNS tab. Tabs remember the page you last worked on, so click the DNS tab again to ensure you are working with the Configuration information page.
- In the DNS Views section, click the name of a DNS view.

- In the Resource Records section, click New and select Mail Exchanger – add a MX record.
- Set the following parameters:
- Name - to specify a name for the mail exchanger record, select this option and type a name
- Same as Zone - to use the zone name for the name of the mail exchanger record, select this option.
- Priority - type a value to indicate mail server's priority. If you do not provide a value, 0 (zero) is automatically set as the priority.
- Host - select a host record from the drop-down list.
- External Host - type the name of the host and select
- Override TTL - to change the time-to-live value for the record, select this option and type a value in the field. Select a unit of time from the drop-down list.
- Additional Information-type notes describing the resource record in the Comments field.
- Change Control-add comments to describe the changes.
- Click Add when completed.

Creating DHCP ranges
Adding a DHCP range
- Click the IP Space tab. Tabs remember the page you last worked on, so click the IP Space tab again to ensure you are working with the Configuration information page.
In the IPv4 Blocks section, click an IPv4 block. The Address Space tab for the IPv4 block appears.
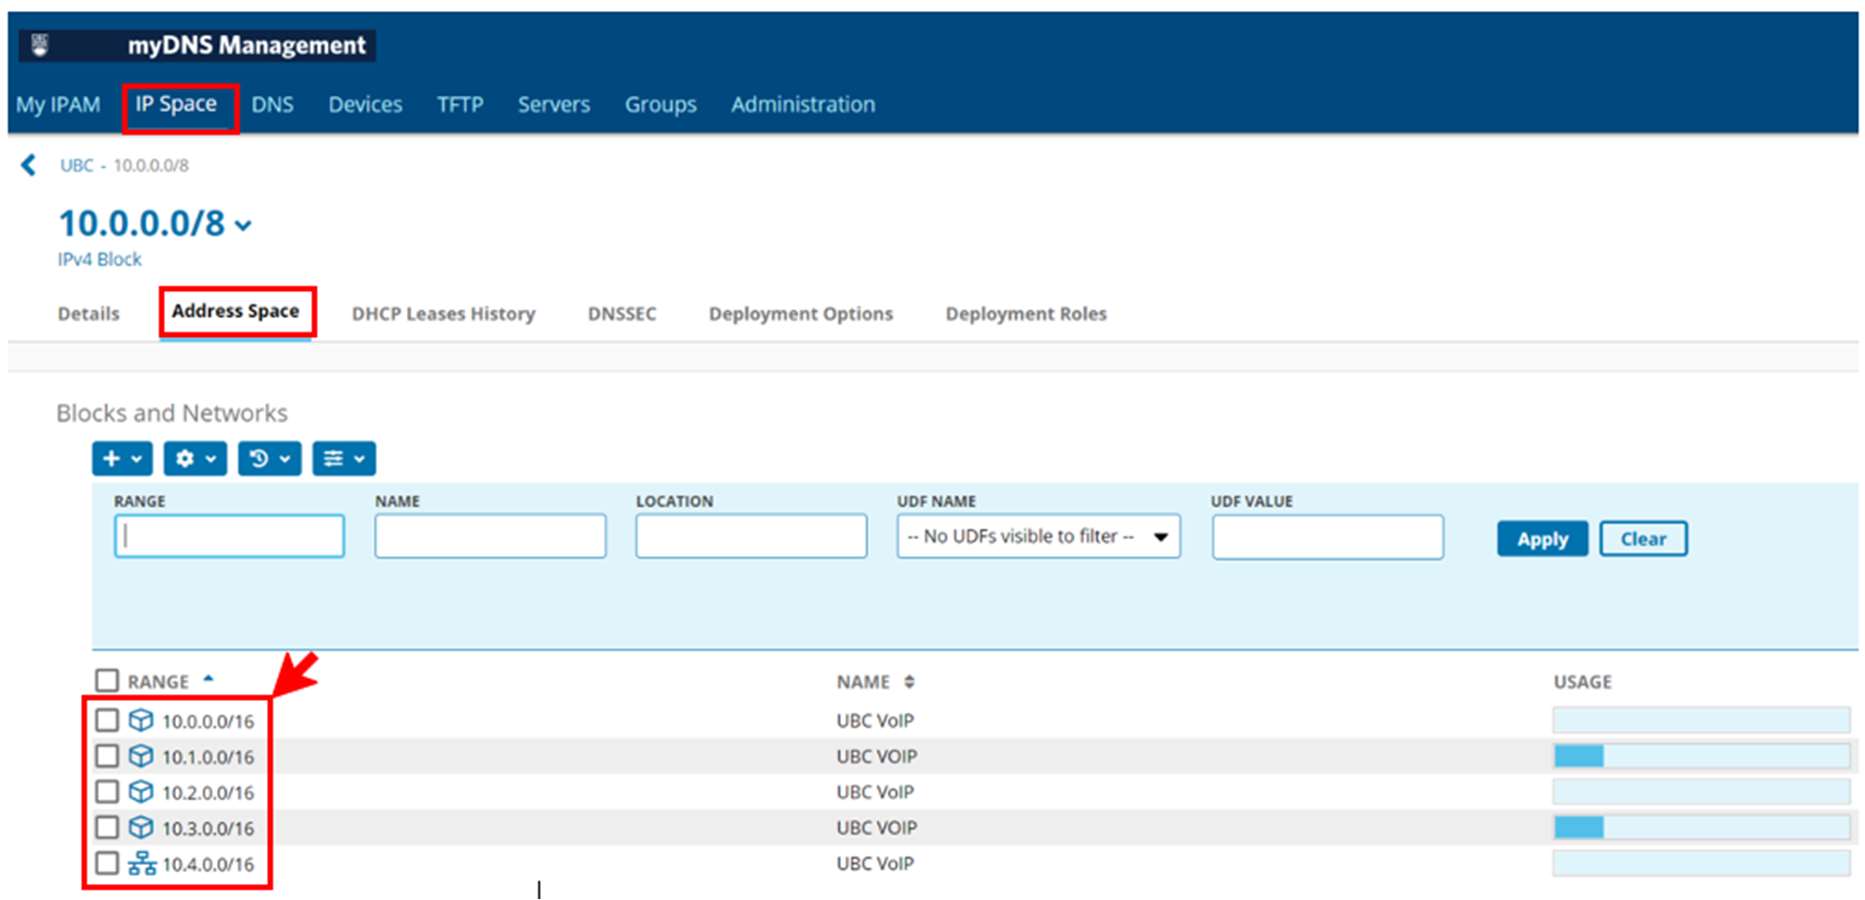
- In the Blocks and Networks section, click an IPv4 network.
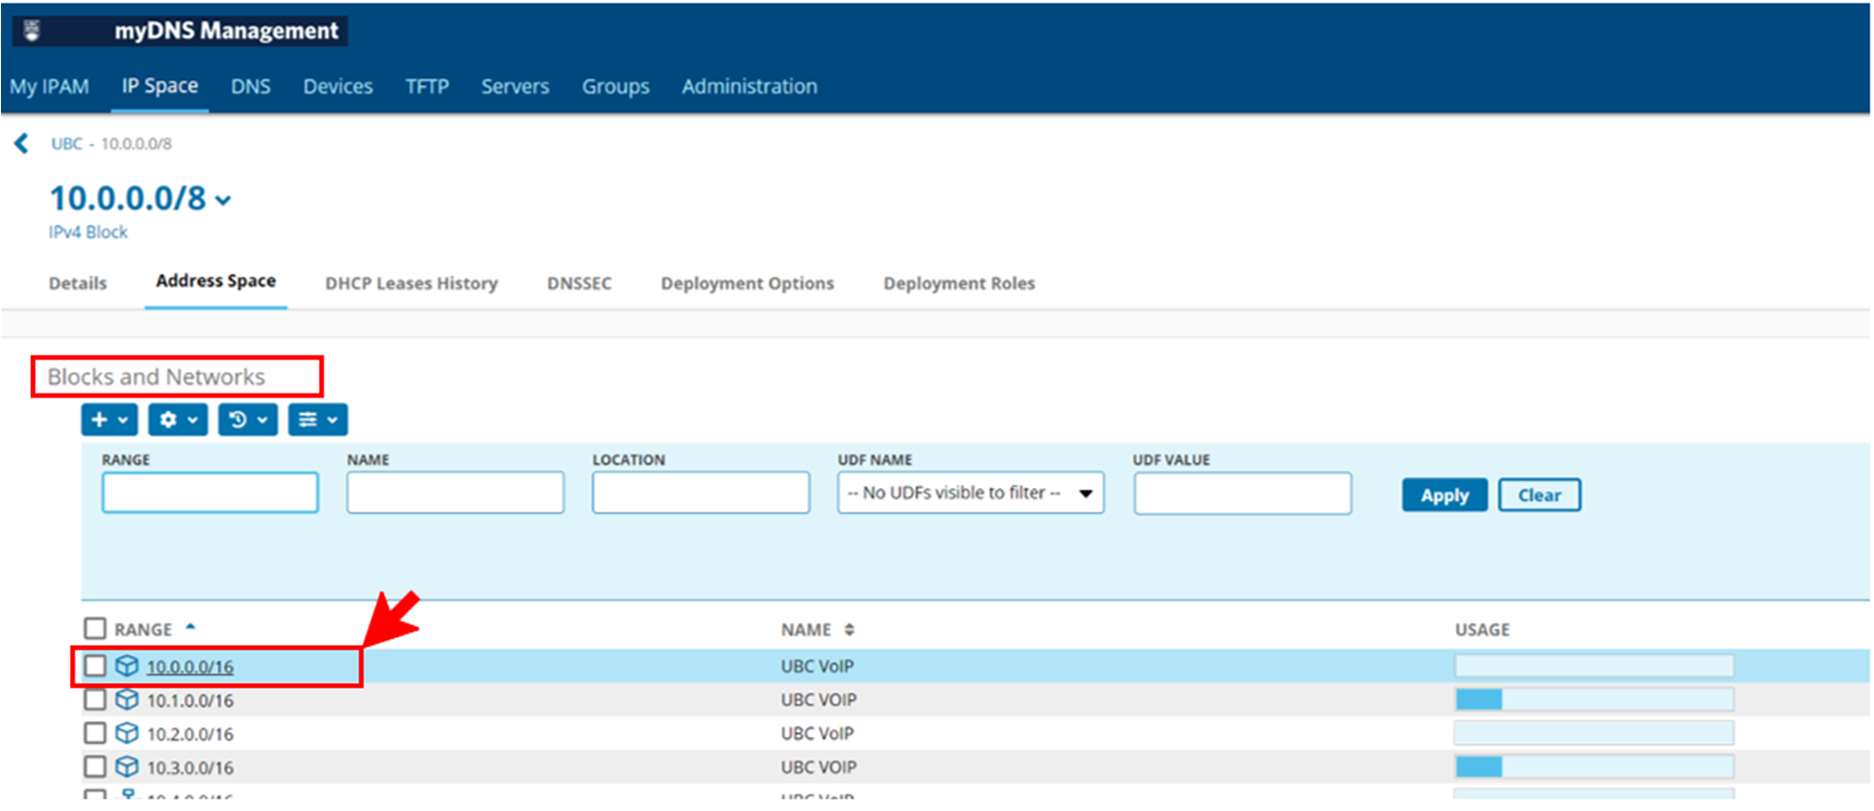
Each network address appears
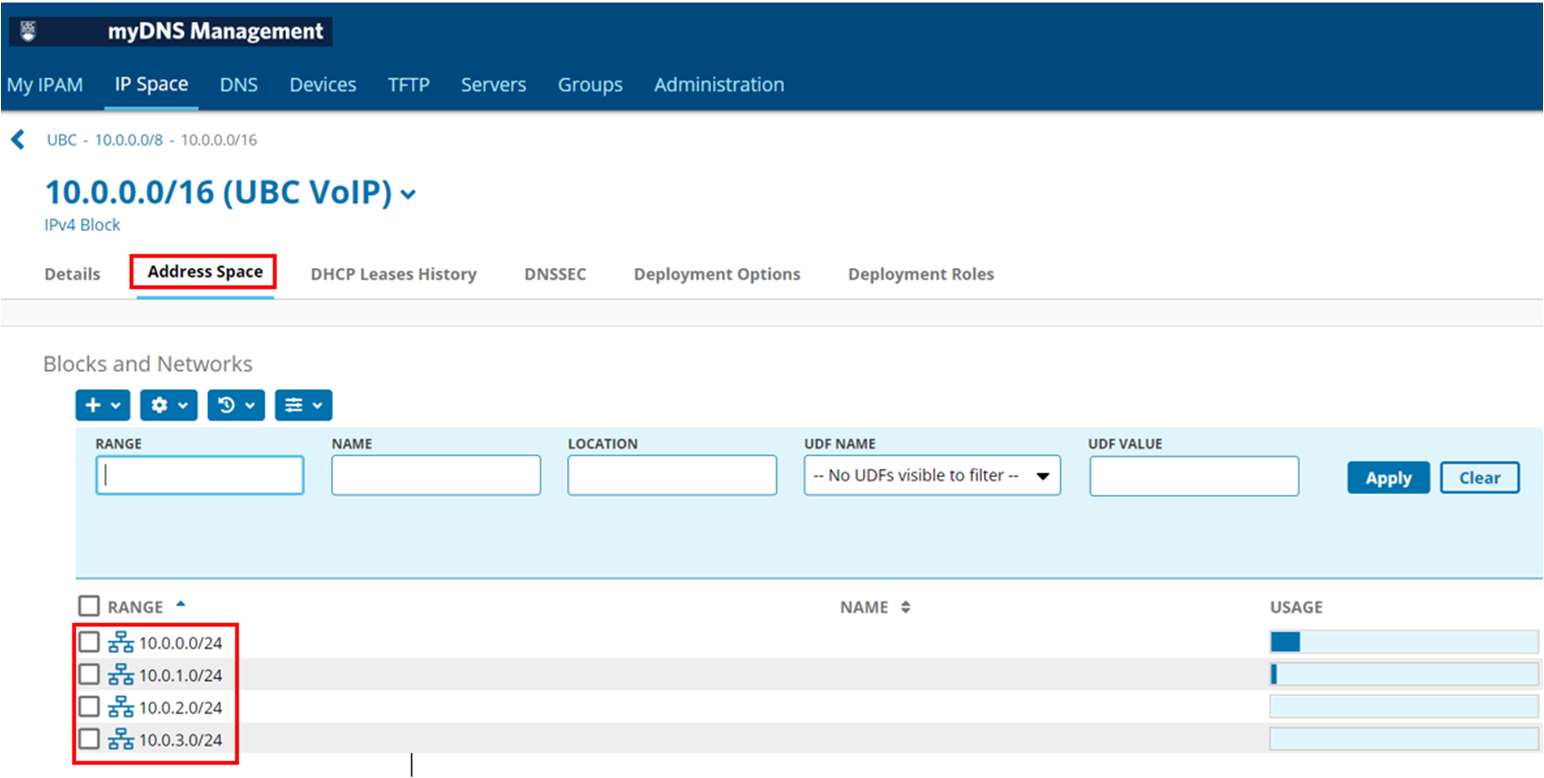
- Click on a network address to view the addresses associated for assignment


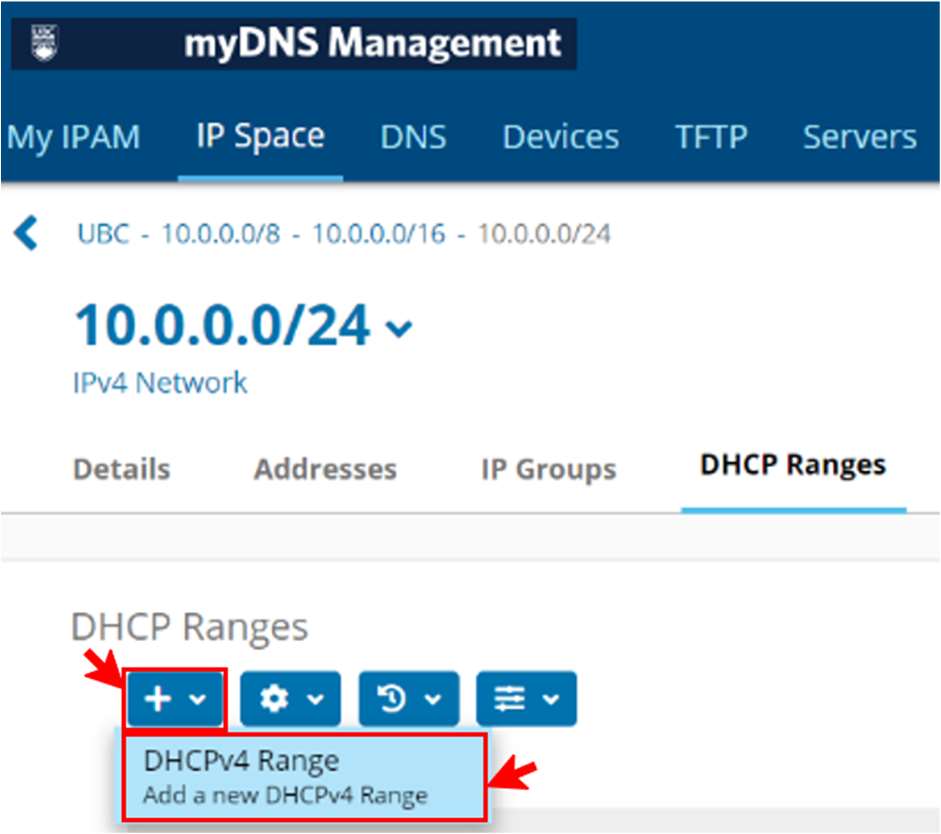
- Click the DHCP Ranges tab.
- In the DHCP Ranges section, click New.
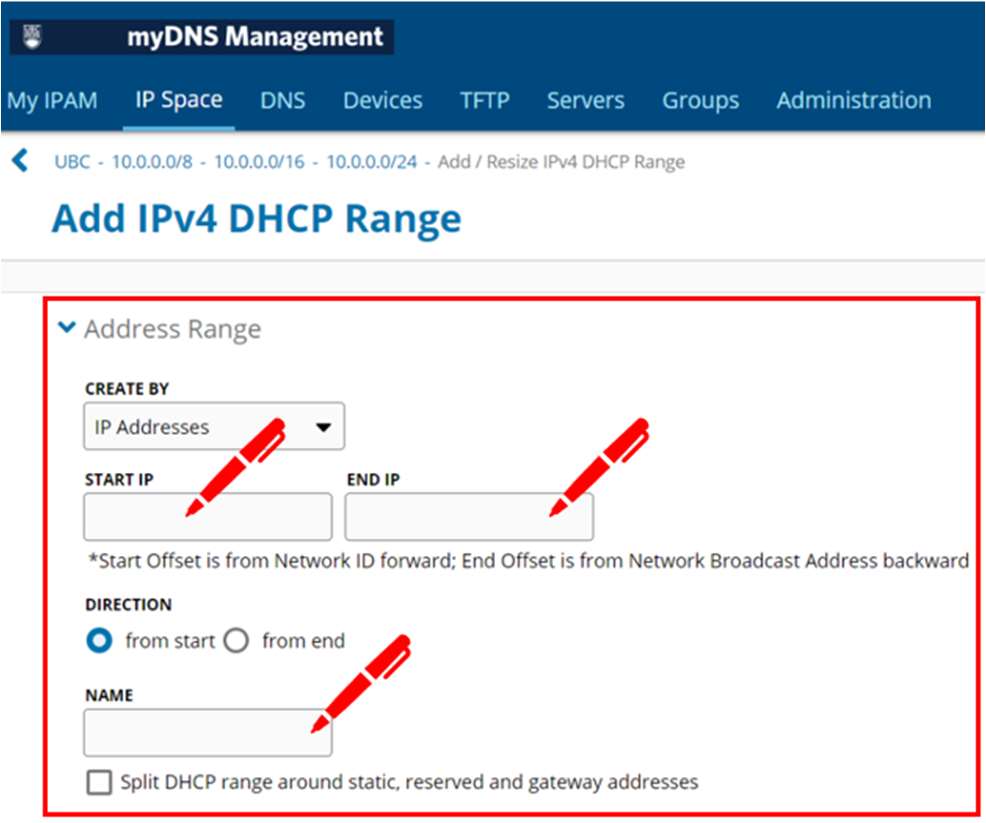
The Add IPv4 Network DHCP Range page appears.
- In the Address Range section, define the address range and set its name:
- Start - type the address for the start of the DHCP range.
- End - type the address for the end of the DHCP range.
- Name - type a descriptive name for the DHCP range.
- Split DHCP range around static addresses - select this checkbox to automatically split the DHCP range at any static addresses that may be in the network and within the DHCP range. Upon deployment, Proteus automatically creates multiple DHCP pools on the managed server, leaving any static addresses outside of the DHCP range you specify. When not selected, any static addresses within the DHCP range become part of the DHCP range.
- The Scope (Range) Split section creates a split scope range for a Windows server. To create a split scope range, select the Scope Split Windows Network checkbox. Define the split scope parameters in the fields that appear:
- Exclude Server 1 - when selected, the entire range is excluded from the first server. The entire range will be hosted on the second server.
- Exclude Server 2 - when selected, the entire range is excluded from the second server. The entire range will be hosted on the first server.
- Split Address - select this option and type the IP address at which the scope is to be split; the range will be split between the two servers at the split address. The first portion of the range, from the start address to the split address, will be active on Server 1 and excluded from Server 2. The second portion of the range, from the first address after the split address to the end address, will be active on Server 2 and excluded from Server 1.
- Preview button - click to display a preview of how the split scope DHCP range will be deployed. The Server 1 and Server 2 fields show the address ranges to be deployed to each server.

- In the DHCP Alert Settings section, set the values for DHCP alerts:
- Inherited Low/High Watermark Value from Parent - when selected, the block inherits the DHCP Alert Settings from its parent object.
- Currently Low Watermark - triggers an alert when DHCP usage is below this value (when too few addresses are being used).
- Currently High Watermark - triggers an alert when a DHCP usage is above this value (when too many addresses are being used).

- In the Change Control section, add comments to describe your changes. This step is optional but may be set to be required. Click Add to add the range and return to the DHCP Ranges tab, or click Add Next to add another range.