CWL - EAD Self Provisioning
Before you can install PGP Whole Disk Encryption, you must have an active EAD account. In order to self provision an EAD account, please follow the steps below:
- Login to your CWL user account at http://www.cwl.ubc.ca/myAccount
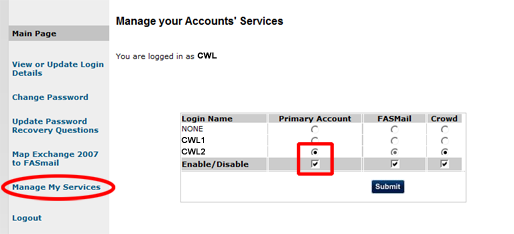
- Select the Manage My Services link from the left side of the page
- Check the box under the Primary Account column, and then click Submit
- Select the radio button on the row with the CWL account that you want to use for Primary Account and click the Submit button
- Enter your CWL password for confirmation
Installing PGP Whole Disk Encryption
- Ensure that your computer meets the PGP Whole Disk Encryption Requirements:
- Your computer is running Windows 7 or Windows XP SP3
- In the event of a drive or encryption failure, data recovery will be impossible. If your data is not also stored on a network shared drive, it is advised to save all critical data to your home drive.
- Your screensaver is configured to lock automatically after 15 minutes of inactivity.
- You have completed a full disk scan.
- From an on-campus location, select your operating system to download the installation file.
Your will need to enter your CWL ID and Password.
- Windows 32-bit operating system
- Windows 64-bit operating system
- Once the file has been saved to your computer, double click on the .msi file to launch the installation wizard.
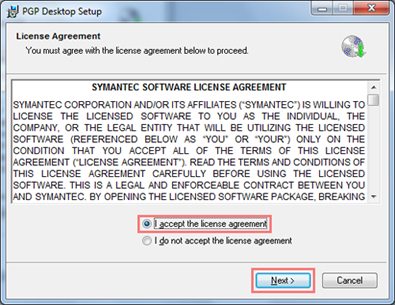
- Accept the license agreement and click Next
- Choose Do not display the Release Notes and click
Next.

- Once the computer restarts, login to the computer's regular user account (this will be the account of the client who owns the machine)
- After login you will be prompted to Allow the PGP certificate. Click Always Allow.
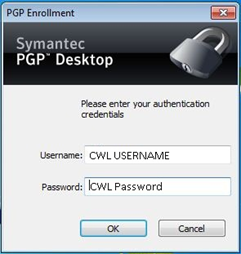
- The PGP Enrollment window will pop up. Enter the account's primary CWL/EAD
username and password.
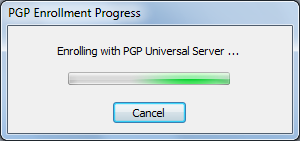
- PGP will contact the server and enroll the credentials.
- Upon completion of the Enrollment you will now be taken through the setup for creating your
PGP Keys. If you are a new user select the I am a new user radio button
and click Next.
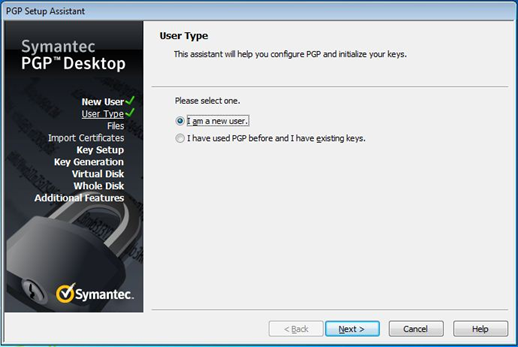
- Next is passphrase creation. Click Next.
- Enter your secret passphrase.
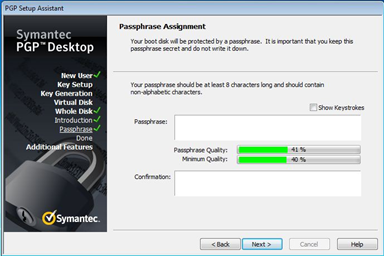
- Note: The passphrase requirement for PGP WDE is a minimum of 8 characters with 40% strength requirement. Setting a passphrase with minimum 40% quality means your passphrase, if only 8 charactors long, will need atleast one number and one capital letter.
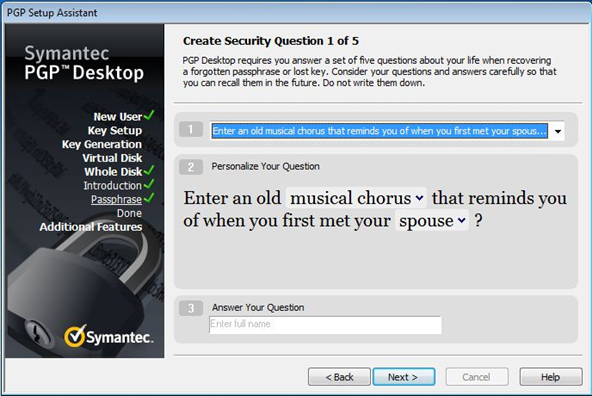
- In this step you will be required to enter 5 secret questions and answers. You have the
option to use pre-supplied questions and answers or you can set your own secret questions and
answers. Be sure that the questions and answers you are using are memorable as these will help
you in the event you forget the Passphrase set in the previous step. Each highlighted field in
section 2 of the screenshot below are interchangeable however if you do not find the best fit
as stated above you may create your own questions and answers. After you have completed all
your questions and answers click Next.
- On the following screen click Next then click Finish.
- The encryption process time depends on the size of the hard drive and can take many hours to complete. During this time, it is safe to shut down your computer. Encryption will resume the next time the system is running, indicated by a lock icon in the menu bar.
- Once the PGP desktop software is installed and the Whole Disk Encryption has started you
will see the following screen when you boot up your system. You will need to enter your
passphrase into this section (note that when the passphrase is typed, the cursor will move but
won't display any characters).

